
We haven't been cooking a whole lot around our house lately- with a new baby and packing up the house for our move down south it's been a lot easier to get take out or throw a pizza in the oven. We do manage to cook a big breakfast about every morning though- bc my husband is what I call "the Breakfast King." He enjoys making breakfast and I'm not going to turn down his offer to make a meal.
We've been having a lot of meals at our friends houses lately since this is the last week that we will be residing in Jefferson City. We have been getting together with many of our friends for dinner and I always offer to make a dessert. The main dessert I've been turning to is Orange Baby Cookies- a recipe that comes from a dear friend and previous manager- Cyndi Young.
I recently wrote an article over my friend Cyndi and her cookie making skills for Missouri Farmer Today. When I went to Cyndi and her husband Jim's farm, they had four different cookies laid out for me to take photos of and taste for the article! I fell in love with the Orange Baby Cookies and I know you will too!
These cookies are delicious and can be whipped up in a snap! I say that these cookies will save your soul bc no matter what mood you are in- after one cookie you will feel like you are in heaven! And I bet you can't eat just one...
Orange Babies
By Cyndi Young
1 C. softened butter
½ C. sugar
½ C. brown sugar (packed)
1 egg
1½ T. grated orange peel
2¼ C. flour
¾ tsp. baking soda
½ tsp. salt
1½ C. vanilla baking chips
Cream the butter and sugars. Beat in egg and orange peel. Gradually add dry ingredients and mix well. Stir in vanilla chips. Form into walnut-sized balls and bake on ungreased cookie sheets at 350 degrees for 10 minutes or until golden brown.
January 11, 2010
Cookies that Will Save Your Soul
May 4, 2009
The True Way to a Pregnant Woman’s Heart
 I have discovered the way to any pregnant woman’s heart - that’s right. And there’s no rhyme or reason to it.
I was making Red Velvet Cupcakes the other night for a co-workers wedding shower when I discovered the way to my heart- Red Velvet Cake! After frosting one of the delicate little bright red cupcakes with loads of homemade cream cheese icing I decided that I needed to taste one of my homemade treats- just to be sure that it was kitchen approved.
As I slowly enjoyed the first bite my taste buds came alive! WOW- Red Velvet cake had never tasted so good. I finished eating the cupcake and began to ice the rest of my cupcakes. My husband was laughing at me- knowing that I would just have to go back for one more cupcake eventually. (And he was right)
I iced a few more cupcakes, then put a glass in the freezer. I iced some more cupcakes and then decided it was time for another cupcake- paired alongside my frozen glass of milk. WOW!
I ended up having three cupcakes that night and two frozen mugs of milk- but it was so worth it!
Here is the recipe for the Red Velvet Cake (which by the way is now officially my favorite cake). This is a wonderful recipe because the cake calls for buttermilk. I also get cake recipes that call for buttermilk because the buttermilk makes the cake crumbs so soft and flaky. Hope your taste buds agree that this cake is a winner.
Preheat oven to 350 degrees F and place rack in center of oven. Butter two - 9 inch round cake pans and line the bottoms of the pans with parchment paper. Set aside.In a mixing bowl sift together the flour, salt, and cocoa powder. Set aside.
In bowl of your electric mixer, or with a hand mixer, beat the butter until soft (about 1-2 minutes). Add the sugar and beat until light and fluffy (about 2-3 minutes). Add the eggs, one at a time, beating well after each addition. Scrape down the sides of the bowl. Add the vanilla extract and beat until combined. In a measuring cup whisk the buttermilk with the red food coloring. With the mixer on low speed, alternately add the flour mixture and buttermilk, in three additions, beginning and ending with the flour.In a small cup combine the vinegar and baking soda. Allow the mixture to fizz and then quickly fold into the cake batter.
Working quickly, divide the batter evenly between the two prepared pans and smooth the tops with an offset spatula or the back of a spoon. Bake in the preheated oven for approximately 25 - 30 minutes, or until a toothpick inserted in the center of the cakes comes out clean. Cool the cakes in their pans on a wire rack for 10 minutes. Place a wire rack on top of the cake pan and invert, lifting off the pan. Once the cakes have completely cooled, wrap in plastic and place the cake layers in the freezer for at least an hour. (This is done to make filling and frosting the cakes easier.)
February 2, 2009
Lady & Sons Resturant Review
 Whew. What a day…I awoke this morning to a beautiful sight- a sunrise over the Savannah River. Yes, I may be here in this beautiful and historic city for a work trip- BUT I’m making the best of it.
This morning the convention participants (all 400 + of them) took a riverboat breakfast cruise up the Savannah River (which btw is the 2nd busiest port in the nation). I enjoyed networking with farmers from around the nation and Canada and seeing so many familiar Missouri faces.
The breakfast- nothing to brag about. Wish it would have been, but it wasn’t. I mean I’m in the “home” of grits, pecans, pralines, sweet tea, seafood galore and the breakfast really wasn’t that great.
But, the day got much better. My co-worker and I then headed over to the Lady & Sons (Paula Deen’s restaurant) to make our in-person reservations. There was already a line forming at 9:30 am of around 30 folks. BUT- we got a reservation for dinner! You can imagine my excitement. Sarah (my co-worker) has had to listen to me for the past two days talk all about Ms. Paula and how wonderful she is. But, Sarah is such a sweetie! She stood in the line with me, we made our reservation, then did some shopping next to the restaurant in Paula Deen’s gift store. (Yes- you can imagine my delight.)
I came out of the store with a nice hefty bag of goodies that I plan on sharing with some of my friends when I return home.
The rest of the day I spent at the hotel for the convention activities and later took a trolley ride around downtown Savannah to explore the historical aspects of this charming city. Sarah and I then enjoyed a wonderful dinner at the Lady & Sons at 5:00 pm. The restaurant was charming, the staff was friendly and so hospitable, and the food was fantastic! Sarah had a grilled tilapia on a bed of wild rice and side of steamed asparagus (which she said was very tasty) and I choose the stuffed flounder (shrimp and crab stuffing) with a lemon-dill sauce and sides of wild rice and steamed asparagus. We also enjoyed a side of hoecakes and cheddar biscuits which is passed around by the wait staff.
Our waitress (Morgan) was a delight and a mighty fine singer. She performed a little jazz number for us and was a terrific singer. All and all I would give the entire experience a 8 out of 10.
I have photos from the day, but unfortunately I forgot to bring my USB cord to download the photos onto my laptop. So, you will have to wait to see my Savannah photos until next week.
December 15, 2008
Holiday Baking 2008 Gets Underway
Nothing beats receiving homemade goodies during the Christmas in my opinion. I would much rather someone give me something they spent time thinking about and making that any store bought gift.
It might be a lot of work for the cook, but making holiday goodies brings smiles to faces and joy to the heart!
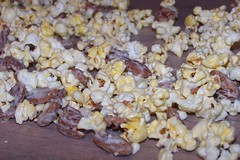
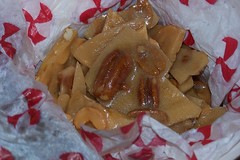
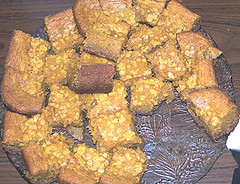
I switch up the menu each year when I bake. This year’s menu: Cashew and Pecan Brittle, Mini-Pound Cakes, Oatmeal Chocolate Chip Cookies, Almond Bark Popcorn (Pictured to the left), Fantasy Fudge and I still have three homemade Pumpkin Pies to make for some neighbors.
The Mini-Pound Cakes are my favorite because they are light and airy. The recipe comes from Martha Stewart, but of coarse!
Classic Pound Cake
Makes one 9-by-5-inch loaf
1 1/2 cups (3 sticks) unsalted butter, softened, plus more for pan
2 cups all-purpose flour
1 teaspoon salt
1 1/2 cups granulated sugar
1 teaspoon pure vanilla extract
6 large eggs
Confectioners' sugar, for dusting
Preheat oven to 350 degrees. Butter a 9-by-5-inch loaf pan; set aside. Whisk flour and salt in a medium bowl; set aside.
Put butter, granulated sugar, and vanilla in the bowl of an electric mixer fitted with the paddle attachment. Mix on medium-low speed until pale and fluffy, 3 to 5 minutes. Add eggs, one at a time, beating until combined after each addition. Reduce speed to low; mix in flour mixture until just combined.
Spoon batter into prepared pan, and smooth with an offset spatula. Bake, rotating pan halfway through, until cake is golden and a cake tester inserted into center comes out clean, 50 to 55 minutes. Let cool on a wire rack 10 to 15 minutes. Turn out onto rack, and let cool completely. Before serving, dust cake with confectioners' sugar, if desired. Cake can be stored at room temperature, wrapped well in plastic, up to 3 days.
November 19, 2008
Skillet Cabbage Anyone
 Ever tried skillet cabbage? Yeah me neither until a co-worker of mine suggested I try it. He had it at deer camp this year and swore I wouldn’t be disappointed.
I’m up to trying new things so I decided to give it a shot. It’s very different, but tasty! It reminds me of something my southern grandma would have made me, because let’s face it – this isn’t the healthiest side dish (the cabbage is cooked in bacon grease!) But if you like rich southern cuisine, you’re gonna be a fan!
Skillet Cabbage
4 C. Shredded Cabbage
1 Green Pepper, Shredded
2 C. Diced Celery
2 Large Red Onions, Sliced Thin
2 Tomatoes, Peeled and Cut Coarse
1/4 C. Bacon Drippings
2 T. Sugar
1/2 t. Salt
1/4 t. Pepper
Prepare vegetables and mix together lightly. Heat bacon grease in large skillet over medium heat. Add vegetables and sprinkle with sugar, salt and pepper. Stir briefly to mix. Cover and cook exactly 5 minutes over medium heat.
October 31, 2008
Pumpkin Whoopie Pies
 My fellow co-worker Sarah brought in these deliciousally little pumpkin cookies today at work, that kind look like ice cream cookies. Even though I started my diet today I had to try one, they looked too good to pass up.
I’m so glad I did because they were wonderful! I asked her for the recipe, which comes from the Martha Stewart website. I’m planning on making these for Thanksgiving dinner this year. I know they will be a hit for my niece and nephews.
Pumpkin Whoopie Pies with Cream-Cheese Filling
Makes 12 whoopie pies
3 cups all-purpose flour
1 teaspoon salt
1 teaspoon baking powder
1 teaspoon baking soda
2 tablespoons ground cinnamon
1 tablespoon ground ginger
1 tablespoon ground cloves
2 cups firmly packed dark-brown sugar
1 cup vegetable oil
3 cups pumpkin puree, chilled
2 large eggs
1 teaspoon pure vanilla extract
FOR THE CREAM-CHEESE FILLING
3 cups confectioners' sugar
1/2 cup (1 stick) unsalted butter, softened
8 ounces cream cheese, softened
1 teaspoon pure vanilla extract
Make the cookies: Preheat oven to 350 degrees. Line two baking sheets with parchment paper or a nonstick baking mat; set aside.
In a large bowl, whisk together flour, salt, baking powder, baking soda, cinnamon, ginger, and cloves; set aside. In another large bowl, whisk together brown sugar and oil until well combined.
Add pumpkin puree and whisk until combined. Add eggs and vanilla and whisk until well combined. Sprinkle flour mixture over pumpkin mixture and whisk until fully incorporated.
Using a small ice cream scoop with a release mechanism, drop heaping tablespoons of dough onto prepared baking sheets, about 1 inch apart. Transfer to oven and bake until cookies are just starting to crack on top and a toothpick inserted into the center of each cookie comes out clean, about 15 minutes. Let cool completely on pan.
Make the filling: Sift confectioner' sugar into a medium bowl; set aside. In the bowl of an electric mixer fitted with the paddle attachment, beat butter until smooth. Add cream cheese and beat until well combined. Add confectioners' sugar and vanilla, beat just until smooth. (Filling can be made up to a day in advance. Cover and refrigerate; let stand at room temperature to soften before using.)
Assemble the whoopie pies: Line a baking sheet with parchment paper and set aside. Transfer filling to a disposable pastry bag and snip the end. When cookies have cooled completely, pipe a large dollop of filling on the flat side of half of the cookies. Sandwich with remaining cookies, pressing down slightly so that the filling spreads to the edge of the cookies. Transfer to prepared baking sheet and cover with plastic wrap. Refrigerate cookies at least 30 minutes before serving and up to 3 days.
March 18, 2008
Stromboli Anyone?
 Today is my co-worker Shelley's birthday and we started the day with breakfast food (almond coffee cake, breakfast casserole, milk, oj, a Double Chocolate Gooey Butter Cake....yes that's right cake for breakfast...so good). Now, we are moving on to lunch and afternoon snacks (stromboil, spinach dip, hot wings, chips, key lime pie, cake, cheesecake dip, fruit and cream and much more!)
My friend Veronica made the Stromboli and I love these yummy sandwiches. Here is the recipe she uses. And if you are interested in the background of the word Stromboli here is what Wikipedia says.
This rolled baked sandwich is perfect for feeding a crowd of hungry sports fans, or a hungry family for a casual supper. You can really use any combination of meats, cheeses and even veggies you choose, so take our suggestions with a grain of salt. One hint however, the more veggies you use, the more liquid they'll release, so too many veggies can make a somewhat soggy stromboli. Use as many different fillings as you like, but it's important to not layer them too thickly, as this will make it difficult to roll the stromboli.
December 12, 2007
Rosemary Pinwheel Time
 Tomorrow at work is a Holiday Snack Day…on the menu for tonight to make is two pumpkin pies, homemade whip cream and my one of my favorite snacks…Rosemary Pinwheels.
These pinwheels make a great snack to serve during the holidays and can be prepared ahead of time…then sliced and baked the day of.
Baked Parmesan Rosemary Pinwheels
1 can (8oz.) of crescent dinner rolls
1/2 cup regular cream cheese, softened
1/2 cup grated Parmesan cheese
4 teaspoons of fresh rosemary
Preheat oven to 375 degrees. Separate dough into rectangles and press all seams together. Place cream cheese, cheese and rosemary in bowl and mix well.
Spread mixture on each rectangle (about 2 tablespoons) and spread over entire dough, leaving 1/4 inch around edges. Roll up the dough and pinch the seam to seal.
* Your dough will be soft, so I've learned to place it in the freezer from about 20 minutes. Take out of freezer and then cut each roll crosswise into slices. Place on baking stone or cooking sheet.
Bake 12-15 minutes or until lightly golden brown.
December 7, 2007
The Gift that Keeps on Giving
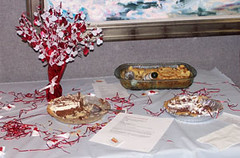
 Happy Holidays to All! (See Larger Image)
Christmas is just around the corner, can’t believe how quickly it’s came this year. I wish there was more of a break between Thanksgiving and Christmas.
My co-worker Sarah Gehring is the Membership Coordinator for AgriMissouri™, a marketing program through the Missouri Dept. of Agriculture that promotes Missouri made products.
She is also a fellow blogger, with her AgriMissouri Showcase Blog. She posted today on finding the right gift to give to those names on our Christmas lists that have everything. One of her favorite gifts to give are AgriMissouri gift baskets, full of great local Missouri food products such as meat sticks, salad dressings, soups, spices, bbq sauce, cheese ball mixes, summer sausages, pasta sauces…plus you'll be supporting Missouri's largest industry-AGRICULTURE and the farmers and farm families.
From Sarah’s post:
Lots of AgriMissouri members offer holiday gift baskets. This makes gift giving so easy. All you have to do is visit their web site or call the company, discuss the baskets they have available and place your order. Several of them will even let you customize the gift basket so that you can include specific products. I've given grandparents, neighbors and out-of-state family AgriMissouri gift baskets and they are always a hit.
To help you find AgriMissouri members offering holidays gifts, the AgriMissouri Holiday Gift Guide is located on the web site. It's the easiest shopping you will do!
*The gift box above is available at Missouri Mercantile.
August 15, 2007
Cold Strawberry Soup
First, I apologize for not updating my blog for awhile…I’ve been working at the Missouri State Fair since last Monday.
The heat has been over 100 degrees the past week in Missouri and we are looking forward to some much needed rain and cooler temps by Friday.
For a cool treat today I’ve got a Strawberry Soup recipe that a friend of my husband’s passed along to me that really hits the spot on hot summer days.
Enjoy!
Cold Strawberry Soup
2lb. Fresh Strawberries
1/2 Cup Sugar
1 Tub Whipped Cream (I used the light, but you can use whatever)
1/3 Cup Sour Cream
1/3 Cup Whipped Cream Cheese
Clean and stem Strawberries. Puree strawberries and sugar in blender. Pour into large mixing bowl. Add everything else and blend. Refrigerate and serve. (It's better cold)
March 22, 2007
Another Great Dip
As I've said before I love experiementing with recipes and trying new ways to make a good recipe GREAT.
I did just that with a shrimp dip recipe from Paula Deen. I turned a good recipe into a GREAT one. I made this recently at my work's St. Pat's Pot Luck. It was a hit adn I've been asked for the recipe....here you go.
Shrimp and Crab Dip
by Lane
1/4 cup (1/2 stick) butter
1 large chopped red bell pepper
1 8oz. cream cheese, room temp.
1 pound medium fresh shrimp, peeled coarsely chopped
3 small cans of crab meat
1/3 cup sliced green onion or 1 small yellow onion, chopped fine
1 1/2 cups sour cream
1 T. lemon juice
¼ tsp. red pepper
½ tsp. basil
1 T. parsley
Salt and pepper
1 cup shredded Parmesan cheese
1 cup shredded mozzarella cheese
1 cup mayonnaise
Assorted Crackers or bread for serving
Preheat oven to 350°F.
In a medium skillet, melt butter over medium heat. Add red bell pepper, and cook 3 minutes. Stir in shrimp, salt, parsley and green onion; cook 3 to 4 minutes, or until shrimp are firm and barley pink. In a large bowl mix cream cheese well add the sour cream, cheeses, seasonings, and mayonnaise and mix well. Add crab meat and mix in. Add shrimp, red bell pepper, and onion mixture to bowl. Spoon mixture into a large baking dish. Bake 50 minutes, or until lightly browned and bubbly. Serve with assorted crackers or bread.
March 2, 2007
Paula Deen Stikes Again
 Yesterday I got an email from a lady at Hoffman Media, a company that handles public relations for Paula Deen. The lady thanked me for my enthusiasm for Paula Deen and asked me if I would be interested in receiving a care package of all of Paula Deen's magazines. “Of coarse,” was my reply back.
I was very surprised to be offered such a nice gift. I will say Paula has some very good people working for her.
I also started planning a trip to Savannah, Georgia for June. I plan on surprising my mother with a vacation for the two of us in Savannah for her birthday. The vacation is more like a “Paula Deen Getaway.”
I’m planning on taking in lunch at the Lady & Sons Restaurant and Uncle Bubba’s, taking a tour of old Savannah (the Paula Deen Tour) and hopefully getting tickets to one of the tapings of Paula’s Party. I sent in my request yesterday for tickets to one of the tapings for the end of June.
If anyone has any other great suggestions for a Savannah trip please let me know. It will be my first visit to Georgia and I’m very exciting. There is nothing that would make the trip better then getting tickets to the television show, I know that would really make the trip a "hoot" for my mother. I’ll keep you posted and let everyone know something when I hear back!
Today’s recipe is one from a fellow co-worker of mine, Myra. This is another great quick and easy meal for us working women and men. I do however make a couple of additions to this recipe. I like to also add thinly sliced red bell pepper and I use fresh garlic instead of the powder. I also add fresh parsley from my herb garden. I love the taste of fresh herbs…they really make any dish “pop.”
Enjoy…until next time.
PASTA SYDNEY
by Myra Verslues
Grill Chicken breast – use salt, pepper and garlic powder for seasoning.
Cook noodles – I usually use Angel hair pasta but any will work.
Cook/Steam either asparagus or broccoli.
In a large skillet, add cut-up chicken breast, cooked noodles and vegetables, 1 tablespoon of butter, one tablespoon of lemon juice, and 1 can of sliced mushrooms or fresh mushrooms.
Sprinkle with parmesan cheese – I usually use quite a bit. Sprinkle with a little more pepper and garlic powder to taste.
Pour approximately 1 cup of olive oil over everything and stir together…. If you need more oil add more because this is the “good” oil. Season to taste. Simmer and serve.
February 14, 2007
Learfield Bake-Off Results
Happy Valentine’s Day to All!

The judging took place at 11 am and the entire company was invited in the taste testing at noon.
I’ve been busy since Monday night getting everything prepared, cooked and garnished. I’m entering my Super Duper Chocolate Crinkle Cookies, Amish Bread, Smooth as Silk Chocolate Pie and a Double Chocolate Cake.
The Double Decadence Chocolate Cake is another rich dessert. The best part of this recipe is the combination of chocolate and coffee. These two ingredients are a match made in heaven!
Smooth as Silk Chocolate Pie
Filling
6 oz. package semi-sweet chocolate chips
¾ cup butter (1 ½ sticks), room temp.
1 cup sifted powdered sugar
1/8 tsp. salt
2 tsp. vanilla
3 eggs
Topping
1 cup heavy whipping cream
2 T. powdered sugar
1 square bitter sweet chocolate (shaved for curls to garnish)
I baked pie shell
Bake pie shell and cool completely.
Place chocolate bits in bowl over hot water to melt, set aside to cool.
In mixing bowl, combine butter, sifted powdered sugar and salt; beat at high for 10-15 minutes. Mixture should be think and fluffy. Add eggs one at a time, beating three minutes after each addition. Add vanilla.
Fold cooled chocolate into creamed mixture to complete the filling. Spoon into a baked pie shell. Beat whipping cream and powdered sugar and place on the top of filling. Place pie in refrigerator.
Serve small portions- very rich pie.
Double Decadence Chocolate Cake
½ cup semi-sweet chocolate chips
1 ½ cups hot coffee or espresso
3 cups sugar
2 ½ cups flour
1 ½ cups unsweetened cocoa powder
2 tsp. baking soda
¾ tsp. baking powder
1 ¼ tsp. salt
3 large eggs
¾ cup oil
1 ½ cups buttermilk
1 tsp. vanilla
Preheat 300 degrees.
Spray 2 (9x2) round cake pans with cooking spray and line bottoms with wax paper and spray again.
Combine chocolate chips and coffee in small bowl. Let mixture stand, whisking occasionally, until mixture is melted and smooth.
In a medium bowl whisk together sugar, flour, cocoa powder, baking soda, baking powder and salt.
In a large bowl beat eggs for 3 minutes, slowly add buttermilk, oil, vanilla and melted chocolate to eggs, beating well. Add dry ingredients to mixture and beat until smooth. Divide batter between pans and bake for about 48 minutes.
Shiny Chocolate Icing
2 cups semi-sweet chocolate chips
1 cup heavy whipping cream
2 T. sugar
2 T. light corn syrup
¼ cup butter flavor Crisco
In saucepan whisk together the cream, sugar and corn syrup. Bring to a boil over medium heat, whisking until sugar is dissolved. Remove pan from heat and add chocolate chips, whisking until mixture is smooth.
Cut Crisco into three pieces and add to mixture, whisking until smooth.
Transfer icing to a bowl and chill until spreadable (30 minutes). Spread icing between cake layers and all over. Keep cake covered and chilled and bring to room temperature to serve.
Sweet Breads and Pastries
1st: Lane McConnell
2nd: Clarice Brown
Candy
1st: Marcia West
2nd: Katie Bellers
3rd: Julie Harker
Cookies
1st: Lane McConnell
2nd: Clarice Brown
3rd: Julie Harker
Pie
1st: Clarice
2nd: Lane McConnell
3rd: Shelly Voss
Cake
1st: Sandy Dulle
2nd: Patti Rackers
3rd: Myra Versules
January 11, 2007
Tortellini Alfredo with Prosciutto and Artichoke Hearts
I love pasta. As a kid my brothers would call me noodle head because all I wanted to eat was pasta. Spaghetti, lasagna, mac n’ cheese, even plain pasta with some sprinkles of parmesan cheese made me happy.
I have acquired quite a few pasta cookbooks through the years. From making homemade pasta (which I still have never tried) to creating the perfect cream sauce, these cookbooks are stacked full of great Italian recipes.
So, when I was putting together our company cookbook this past year and I came across a tortellini recipe that Clarice submitted I was intrigued.
I love pasta. I love prosciutto. And I love artichokes. This was a recipe for me. I was quite surprised to find how easy this recipe was. You know me, I like to add some ingredients to every recipe. On this dish I also added 1 clove of smashed garlic, ½ teaspoon of salt and pepper and 1 dash of basil.
Thanks for another great recipe Clarice!
Tortellini Alfredo with Prosciutto and Artichoke Hearts
by Clarice Brown
Makes up to 4 to 6 servings
Prep: 10 mins., Cook: 35 mins.
2 (9-oz) packages refrigerated cheese-filled tortellini
1 cup whipping cream
½ cup (2 oz.) freshly grated Parmesan cheese
3 strips prosciutto, chopped
3 marinated artichoke hearts, sliced
Cook tortellini according to package directions, drain and set aside.
Heat cream in a large skillet over low heat. Gradually sprinkle in cheese, stirring constantly, until blended. Simmer, stirring occasionally, 15 to 20 minutes.
Add tortellini, prosciutto, and artichoke hearts; simmer, stirring occasionally, 5 to 10 minutes or until sauce is slightly reduced. Serve Immediately.
December 28, 2006
Take Time to Smell the Roses
It’s a beautiful day in Mid-Mo today. The forecast is for 52 degrees and sunshine, which is always a plus in the winter months.
It amazes me that we are almost ready to dive into 2007. I remember when I was young how months and weeks seemed to drag on and on, but now it seems as though time just flies by. It was in 2004 that I graduated Mizzou and married my husband and now we are almost ready to celebrate our third year wedding anniversary.
I was telling my mother and father during the Christmas break that Charlie ( my husband) and I had said we would wait five years before having kids. That seemed so far away when we got married, but now I look at the date and that is really only two short years away.
We sometimes get caught up in our day-to-day lives and forget to “smell the roses.” My father used to say this phrase to me when I was a child and it has really stuck with me as I have grown. It seems hard to find time to sit down on the couch at night and watch a movie and relax or take time out of your weekend to teach your children a new board game or even try a recipe that you have had on your “To Do” list for months. In 2007 I’m planning on taking more time to “smell the roses."
Here is another recipe you can add to your to try recipe box. This recipe is easy and great the next day.
Mexican Chicken
by Cyndi Young - Puyear
(I won second place with this in the 2001 Illinois Products Expo Celebrity Cook-off. The basic recipe came from an old Scott County Illinois Home Extension Cookbook, but I’ve “perfected” it to fit my family’s tastes. It is an easy recipe to double.)
Whole Chicken
Chopped onion (1 or more – depending upon your taste)
1 stick butter
1 can cream of chicken
1 can cream of celery
1 small package Mexican Velveeta
1 bag Doritos
Shredded cheese
2 jalapenos (again, depending upon your taste)
Boil and de-bone chicken. Separate into “bite sized” pieces.
Butter a casserole dish and layer with ½ bag of Doritos. Sauté onion in remaining butter in a large skillet. Add soups and Velveeta. Simmer 5 minutes. Add peppers and chicken.
Pour over chips. Top with shredded cheese.
Bake covered at 350 degrees for about 20 – 30 minutes. Serve with remaining Doritos. This is great re-heated.
December 27, 2006
Iowa Farmer Today Article
I hope everyone had a very Merry Christmas over the weekend.
We got back late last night from southern Missouri after visiting our families and friends. It was a long holiday trip, but a much needed one. Spending time with our families during the holidays is what we look forward to the most. Presents are great, but it’s family time that makes your holiday memories.

I got a call from the paper the beginning of December about my cooking blog and my recipes. McKenzie Keedy Disselhorst, the Director of Communications for the Missouri Cattlemen Association had submitted my name to the paper as a great cook. Thanks McKenzie!
Mindy Ward of IFT Missouri Edition came to visit me at my home on December 5th to take some photos and interview me about Home Cooking is What I Like. The article that Mindy wrote, "Cook archives family recipes" is very good. I thank her for bringing a simple story to life like she did.
Now to some recipes from some of my co-workers. I love quiche and I really enjoyed making Karla’s Quiche Lorraine. It’s a fairly simple recipe that can be prepared in a snap. I’ve also included a great pork chop recipe from Clarice that dresses up your traditional pork chop recipe.
Quiche Lorraine
by Karla Mantle
Pastry for a single-crust pie
Dash ground nutmeg
3 eggs, beaten
6 slices bacon, fried crisp & crumbled
1½ C. milk
1½ C. shredded Swiss cheese
1/4 tsp. salt
1 T. all-purpose flour
1/8 tsp. pepper
2 T. bacon drippings
1 med. onion, sliced
Prepare pastry for single-crust pie. Line the unpricked pastry shell with a double thickness of heavy-duty foil. Bake at 450 degrees for 5 minutes. Remove foil. Bake for 5 to 7 minutes more or until pastry is nearly done. Remove from the oven. Reduce oven temperature to 325 degrees. Cook onion in bacon drippings over medium heat until tender; drain. In a bowl stir together eggs, milk, salt, pepper and nutmeg. Toss together shredded cheese and flour. Add bacon-onion mixture to Swiss cheese-flour mixture to egg mixture; mix well. Pour egg mixture into hot pastry shell.
Bake at 325 degree for 35 to 40 minutes or until a knife inserted near the center comes out clean. If necessary, cover edge of crust with foil to prevent over-browning. Let stand for 10 minutes. Serves 6.
Pork Chops Teriyaki
by Clarice Brown
Makes 4 to 6 servings
1 can (8 oz.) pineapple chunks in juice
1 tablespoon vegetable oil
6 boneless pork chops, ¾ inch thick
½ cup Kikkoman Teriyaki Sauce
¼ cup water
1 clove garlic, minced
1 tablespoon sesame seed, toasted
2 teaspoons grated fresh ginger root
1 tablespoon cornstarch
1 tablespoon water
½ cup finely chopped green onions and tops
Drain pineapple; reserve juice. Heat oil in Dutch oven over medium-high heat. Brown pork chops on both sides in hot oil.
Combine reserved juice, Teriyaki sauce, ¼ cup water, garlic, sesame seed and ginger; pour over chops and simmer, covered 30 minutes. Turn chops over and continue cooking, covered 30 minutes longer, or until chops are tender. Remove.
Dissolve cornstarch in 1 tablespoon water and stir in pan juices. Cook and stir until sauce boils and thickens. Stir in pineapple chunks and green onions, cooking until pineapple is heated through. Return chops to pan and coat both sides with sauce.
December 20, 2006
A Blessed Holiday
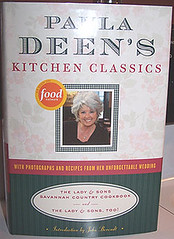
Our Christmas this week was wonderful. I got my husband some fishing items he had wanted, plus hiking boots and a very nice watch. He gave me a very special gift though….A Paula Deen Cookbook to add to my collection. It’s not just a cookbook though, it’s even signed by Paula herself! When I opened the book and saw her signature I was in awe to see my book was signed by my favorite cook.
It was a very special gift and took a lot of thought from my husband. He also gave me a 7-cup KitchenAid Food Processor, which I’ve been wanting for about 6 months now. I’m very excited to get home after the holidays and try making some wonderful pastries with it.

Honey Roasted Pork Loin
by Randy and Emma Williams
2 – 3 lb. boneless pork loin
¼ c. honey
2 T. Dijon mustard
2 T. mixed or black peppercorns, crushed
½ t. dried thyme
½ t. salt
Place roast on a lightly greased rack in a shallow roasting pan. Combine honey and next 4 ingredients; brush half mixture over roast. Bake at 325 for 1 hour; brush with remaining mixture.
Bake 30 additional minutes. Our Christmas favorite!
Corned Beef & Cabbage
by Clarice Brown
Prepare corn beef as directed on package. Place corn beef in roasting pan, fat side up. Add spices supplied. Bake at 300 degrees for 1 hour per pound or until tender.
Trim off excess fat and slice. Place back in roaster. Add 1 head quartered cabbage and one onion, chopped coarsely. Add salt and pepper to taste. Bake until cabbage is tender. (In a top of the counter roaster, 4 hours at 300 degrees.)
Cherry Almond Glazed Pork
by Sue Lear
(Sue doubles the sauce recipe for this.)
When you brown and cook the chops, be sure they do not overlap in the skillet, so each one will be evenly glazed with the cherry sauce. For 2 or 4 servings, you’ll find the pork chops easier to prepare and serve than a tiny roast. But when it comes to a dinner for 6 or more, we recommend the pork loin roast with the same glaze.
2 servings:
¼ cup cherry preserves
1 tablespoon light corn syrup
1 tablespoon red wine vinegar
Dash of cinnamon, nutmeg, cloves
1 tablespoon of slivered almonds, toasted
4 servings:
1/2 cup cherry preserves
2 tablespoon light corn syrup
2 tablespoon red wine vinegar
Dash of cinnamon, nutmeg, cloves
2 tablespoons of slivered almonds, toasted
6 servings (3 pounds):
12 ounce jar, (1 cup) cherry preserves
2 tablespoons light corn syrup
¼ cup red wine vinegar
¼ teaspoon of cinnamon, nutmeg, cloves
2 tablespoons of slivered almonds, toasted
8 servings (4 pounds):
12 ounce jar (1 cup) cup cherry preserves
2 tablespoons light corn syrup
1/4 cup of slivered almonds, toasted
For Pork Chops (2-4 servings):
In skillet, brown chops on both sides. Drain fat. Sprinkle chops with a little salt and pepper. Add 1 tablespoon water. Cover, cook over low heat for 30 minutes. Meanwhile, combine in small saucepan the cherry preserves, corn syrup, vinegar, and seasonings. Heat mixture to boiling, stirring frequently. Remove from heat and stir in almonds. Keep cherry sauce warm ‘til ready to use. When chops have cooked 30 minutes, spoon on just enough sauce to glaze; cover and cook 15 more minutes more, ‘til chops are tender, basting one or twice with the remaining sauce.
Pork Loin Roast (6-8 servings):
Rub roast with a little salt and pepper. Place on rack in shallow baking pan. Roast, uncovered, in slow oven (325 degrees) for about 2 to 2 ½ hours. Meanwhile, combine in small saucepan the cherry preserves, corn syrup, vinegar, and seasonings. Heat mixture to boiling, stirring frequently. Remove from heat and stir in almonds. Keep cherry sauce warm till ready to use. When meat has roasted 2 to 2 ½ hours, spoon enough hot cherry sauce over the roast to glaze; return to oven for about 30 minutes more, ‘til meat thermometer registers 170 degrees. Baste roast with sauce several times during last 30 minutes. Pass remaining sauce with the roast.
December 19, 2006
Food Porn?
Willamette Week Online had a great online article that a fellow co-worker passed along to me regarding an interesting topic: Cooking Porn.
Now, it’s not what you think. The article discusses the beautiful lush food photos inside many of the cookbooks we view today. The article explains the way the photos are intriguing, but how us average folks can make the recipes, but never make the food look as glamorous as the photos inside these cookbooks. Reason why: Simple, because these photos are full of food stylists, photographers and art directors that are trained at making food look its best. In my opinion, all that really matters is that your food tastes wonderful.
The article is still worth a read in my opinion. I am like most cooks. I love for my food to not only taste superb, but also look like those cherished cookbook photos. We see a recipe from a photo and then we have the desire to make the treasured recipe, expecting our own attempts to look just as the cookbook photos. But, the reality is that doesn’t happen because we are not food stylists and food artists. We are just cooks, and that is good enough.
Here’s a quick recipe for enchiladas that has become one of my favorite quick fixes at my home. I do, however make one change to this recipe. I add two cans of green chilis and some garlic powder. This recipe comes from another co-worker, thanks for sharing Paul. If you like this recipe you will also enjoy my own Mexican Lasagna recipe.
*Side Note: Our Learfield Family Cookbook is complete. It's been such a hit around the office, even our Chairman of the Board and Chief Executive Officer, Clyde Lear, talked about the cookbook on the company blog. View his comments at the Grow Learfield Blog.
San Diego Chili Enchiladas
by Paul and Leah Roberts
12 corn tortillas
1 can Rotel
1 can Cream of Chicken soup
1 16 oz carton of sour cream
1 can diced green chilies
3 to 4 chicken breasts, cooked and shredded
2 to 3 cups shredded cheddar cheese
In medium sized pot, blend and warm Rotel, cream of chicken soup and sour cream. Warm the corn tortillas using a skillet or microwave, spraying each tortilla lightly with cooking spray or brush lightly with oil and then warming.
Assemble enchiladas: Place the desired amount of shredded chicken in warmed tortilla, sprinkle cheese, add three to four diced chilies, and spread a spoonful of cream sauce. Roll tortilla and place in oblong pan. Repeat. Spread remaining cream sauce over top of tortillas, sprinkle remaining cheese across top and sprinkle additional chilies to taste. Warm in 350 degree oven for 25 minutes or until bubbly. Best served with Lipton Spanish rice.
December 18, 2006
Stuffing Recipe for Your Holiday Meal
Here is a great stuffing recipe from one of my fellow co-workers. This is an easy way to dress up your holiday turkey this Christmas.
Sourdough Bread Stuffing
by Randy and Emma Williams
1 ¼ lb. sourdough bread, crusts trimmed, cubed
¾ lb. bacon, crisply cooked, crumbled, dripping reserved
2 c. celery
¾ c. onion, diced
1 lb. mushrooms, sliced
1 ½ T. dried sage leaves
2 t. thyme
1 t. salt
¾ t black pepper
1 ½ c. canned chicken broth
2 eggs
1 ½ t. baking powder
Prepare bacon, reserving ¼ c. drippings. Add onion and celery to the drippings and sauté for 10 minutes. Add mushrooms and seasonings. Pour mixture over bread cubes, add bacon and toss to blend. Mix in 2 c. broth. Beat eggs and baking powder together and add to mixture. Moisten stuffing with additional broth, if needed. Bake for one hour or until cooked through and golden brown on top.
December 11, 2006
Another Pumpkin Recipe
Only 15 days until Christmas! It’s amazing how times flies so fast during the holidays.

My husband and I took our annual trip to Branson over the weekend. We did some last minute Christmas shopping on the new Branson Landing and strolled around Silver Dollar City on Saturday night.
I’ve posted before about how wonderful and fun I think SDC is during the holidays before, but this year was even better.
There is a new section of the park open that is just for kids only! Great for the parents. Plus, a living Nativity show, the best lighted Christmas parade ever and the lights are always amazing.
If you have never gone to Branson during the holidays, it’s worth it! The kids will be amazed by the beauty and detail of the lights, as will you.
Last Friday was our company’s annual Snack Day Crawl. We have a little over 100 employees at Learfield. Each department was responsible for bringing in a few dishes and setting up an area in their section of the building to display their food. The “crawl” is a great way for all our employees to go around the building and mingle with one another. I think it’s one of the great team building events that we do within our company. My boss, Cyndi even did a post on the Brownfield Blog about the crawl.
Pumpkin Gooey Butter Cakes
By Paula Deen
Cake:
1 (18 1/4-ounce) package yellow cake mix
1 egg 8 tablespoons butter, melted
Filling:
1 (8-ounce) package cream cheese, softened
1 (15-ounce) can pumpkin
3 eggs
1 teaspoon vanilla
8 tablespoons butter, melted
1 (16-ounce) box powdered sugar
1 teaspoon cinnamon
1 teaspoon nutmeg
Preheat oven to 350 degrees F.
Combine the cake mix, egg, and butter and mix well with an electric mixer. Pat the mixture into the bottom of a lightly greased 13 by 9-inch baking pan.
To make the filling: In a large bowl, beat the cream cheese and pumpkin until smooth. Add the eggs, vanilla, and butter, and beat together. Next, add the powdered sugar, cinnamon, nutmeg, and mix well. Spread pumpkin mixture over cake batter and bake for 40 to 50 minutes. Make sure not to overbake as the center should be a little gooey.
Serve with fresh whipped cream.
Variations:
For a Pineapple Gooey Cake: Instead of the pumpkin, add a drained 20-ounce can of crushed pineapple to the cream cheese filling. Proceed as directed above.
For a Banana Gooey Cake: Prepare cream cheese filling as directed, beating in 2 ripe bananas instead of the pumpkin. Proceed as directed above.
For a Peanut Butter Gooey Cake: Use a chocolate cake mix. Add 1 cup creamy peanut butter to the cream cheese filling instead of the pumpkin. Proceed as directed above.


