December 29, 2006

Healthier Eating for 2007

One of my New Year’s resolutions is to eat healthier in 2007. Now, this doesn’t mean that I’m not going to indulge in my favorite pies, Paula Deen’s Double Chocolate Gooey Butter Cake or baked goods. This resolution just means that I’m going to try to eat more green veggies, salads and cut down on sugar.

It’s fairly easy to makeover your old favorite recipes into new healthier meals. All you have to know is what needs to be changed. It has been discovered by food scientists that the majority of people don’t notice some of the following changes in their meals:

Reduce sugar by one-third (Example: If a recipe says 1 cup, use 2/3 cup.)

This works best in canned and frozen fruits and in making puddings and custards. In cookies and cakes try using 1/2 cup sugar per cup of flour. For quick breads and muffins, use 1 tablespoon sugar per cup of flour. To enhance the flavor when reducing sugar, add vanilla, cinnamon, or nutmeg.

Reduce fat by one-third (Example: If a recipe calls for 1/2 cup use 1/3 cup.)

This works best in gravies, sauces, puddings and some cookies. For cakes and quick breads, use 2 tablespoons fat per cup of flour.

Omit salt or reduce by one-half (Example: If a recipe says 1/2 teaspoon, use 1/4 teaspoon.)

This may be more acceptable if you gradually reduce the amount each time you make the recipe. Herbs, spices, or salt-free seasoning mixes can enhance flavor. Do not eliminate salt from yeast bread or rolls. It is essential for flavor and proper texture. Trust me on this, I've tried it....not very pretty.

Next step is to reduce your fat intake.

All fats and oils are high in calories and provide lots of flavor but you can make a healthier choice by choosing those with less saturated fat. Likewise, when you use lower fat milk products, you reduce fat, calories and cholesterol.

The best oils to use are: canola, safflower, sunflower, corn, peanut, olive and soybean oil, contain the lowest amount of saturated fat (6%-15%). Coconut oil, butter, palm oil, animal fat and lard contain the most (41-54%).

This was one of the best choices I have made: Use reduced fat sour cream, cream cheese, cottage cheese and yogurt in sauces and dips. I tried skim milk, but I couldn’t do it. I like my 2% milk way too much. Just be aware of how much milk you drink a day and don’t over do it.

Here are some other healthy ingredients I’ve tried:

Instead of 2 whole eggs try 1 whole egg plus 4 egg whites
Instead of whole milk try 2% or skim milk
Instead of cream try evaporated or evaporated skim milk
Instead of cream cheese try light cream cheese or Neufchatel (I love this kind of cheese)
Instead of whipped cream try homemade non-fat whipped topping (recipe follows)
Instead of cottage cheese try non-fat ricotta cheese
Instead of 1 ounce baking chocolate try 3 tablespoons powdered cocoa plus 1 tablespoon cooking oil
Instead of mayonnaise try half light mayonnaise and half non-fat yogurt

Here is a great trick when you want a no fat whipped topping.

No Fat Topping Recipe
1 tablespoon unflavored gelatin
2 tablespoons boiling water
1/2 cup nonfat dry milk powder
1/3 cup ice water
2 tablespoons lemon juice
3 tablespoons sugar
1 teaspoon vanilla

Dissolve gelatin in boiling water. In a thoroughly chilled small bowl, beat milk and ice water. Beat in lemon juice. Add sugar and vanilla and beat to soft peaks. Add gelatin mixture and beat. Yield: about 1 1/2 cups.

Calories: 12 per tablespoon

December 28, 2006

Take Time to Smell the Roses

It’s a beautiful day in Mid-Mo today. The forecast is for 52 degrees and sunshine, which is always a plus in the winter months.

It amazes me that we are almost ready to dive into 2007. I remember when I was young how months and weeks seemed to drag on and on, but now it seems as though time just flies by. It was in 2004 that I graduated Mizzou and married my husband and now we are almost ready to celebrate our third year wedding anniversary.

I was telling my mother and father during the Christmas break that Charlie ( my husband) and I had said we would wait five years before having kids. That seemed so far away when we got married, but now I look at the date and that is really only two short years away.

We sometimes get caught up in our day-to-day lives and forget to “smell the roses.” My father used to say this phrase to me when I was a child and it has really stuck with me as I have grown. It seems hard to find time to sit down on the couch at night and watch a movie and relax or take time out of your weekend to teach your children a new board game or even try a recipe that you have had on your “To Do” list for months. In 2007 I’m planning on taking more time to “smell the roses."

Here is another recipe you can add to your to try recipe box. This recipe is easy and great the next day.

Mexican Chicken
by Cyndi Young - Puyear
(I won second place with this in the 2001 Illinois Products Expo Celebrity Cook-off. The basic recipe came from an old Scott County Illinois Home Extension Cookbook, but I’ve “perfected” it to fit my family’s tastes. It is an easy recipe to double.)

Whole Chicken
Chopped onion (1 or more – depending upon your taste)
1 stick butter
1 can cream of chicken
1 can cream of celery
1 small package Mexican Velveeta
1 bag Doritos
Shredded cheese
2 jalapenos (again, depending upon your taste)

Boil and de-bone chicken. Separate into “bite sized” pieces.

Butter a casserole dish and layer with ½ bag of Doritos. Sauté onion in remaining butter in a large skillet. Add soups and Velveeta. Simmer 5 minutes. Add peppers and chicken.

Pour over chips. Top with shredded cheese.

Bake covered at 350 degrees for about 20 – 30 minutes. Serve with remaining Doritos. This is great re-heated.

December 27, 2006

Iowa Farmer Today Article

I hope everyone had a very Merry Christmas over the weekend.

We got back late last night from southern Missouri after visiting our families and friends. It was a long holiday trip, but a much needed one. Spending time with our families during the holidays is what we look forward to the most. Presents are great, but it’s family time that makes your holiday memories.

Iowa Farmer Today Logo

When I arrived at work this morning a saw a copy of Iowa Farmer Today (Missouri Edition) on my desk. I was reading through the most recent edition and came across the interview I recently took part in with the paper for the Farm Cook section.

I got a call from the paper the beginning of December about my cooking blog and my recipes. McKenzie Keedy Disselhorst, the Director of Communications for the Missouri Cattlemen Association had submitted my name to the paper as a great cook. Thanks McKenzie!

Mindy Ward of IFT Missouri Edition came to visit me at my home on December 5th to take some photos and interview me about Home Cooking is What I Like. The article that Mindy wrote, "Cook archives family recipes" is very good. I thank her for bringing a simple story to life like she did.

Now to some recipes from some of my co-workers. I love quiche and I really enjoyed making Karla’s Quiche Lorraine. It’s a fairly simple recipe that can be prepared in a snap. I’ve also included a great pork chop recipe from Clarice that dresses up your traditional pork chop recipe.

Quiche Lorraine
by Karla Mantle

Pastry for a single-crust pie
Dash ground nutmeg
3 eggs, beaten
6 slices bacon, fried crisp & crumbled
1½ C. milk
1½ C. shredded Swiss cheese
1/4 tsp. salt
1 T. all-purpose flour
1/8 tsp. pepper
2 T. bacon drippings
1 med. onion, sliced

Prepare pastry for single-crust pie. Line the unpricked pastry shell with a double thickness of heavy-duty foil. Bake at 450 degrees for 5 minutes. Remove foil. Bake for 5 to 7 minutes more or until pastry is nearly done. Remove from the oven. Reduce oven temperature to 325 degrees. Cook onion in bacon drippings over medium heat until tender; drain. In a bowl stir together eggs, milk, salt, pepper and nutmeg. Toss together shredded cheese and flour. Add bacon-onion mixture to Swiss cheese-flour mixture to egg mixture; mix well. Pour egg mixture into hot pastry shell.

Bake at 325 degree for 35 to 40 minutes or until a knife inserted near the center comes out clean. If necessary, cover edge of crust with foil to prevent over-browning. Let stand for 10 minutes. Serves 6.

Pork Chops Teriyaki
by Clarice Brown
Makes 4 to 6 servings

1 can (8 oz.) pineapple chunks in juice
1 tablespoon vegetable oil
6 boneless pork chops, ¾ inch thick
½ cup Kikkoman Teriyaki Sauce
¼ cup water
1 clove garlic, minced
1 tablespoon sesame seed, toasted
2 teaspoons grated fresh ginger root
1 tablespoon cornstarch
1 tablespoon water
½ cup finely chopped green onions and tops
Drain pineapple; reserve juice. Heat oil in Dutch oven over medium-high heat. Brown pork chops on both sides in hot oil.

Combine reserved juice, Teriyaki sauce, ¼ cup water, garlic, sesame seed and ginger; pour over chops and simmer, covered 30 minutes. Turn chops over and continue cooking, covered 30 minutes longer, or until chops are tender. Remove.

Dissolve cornstarch in 1 tablespoon water and stir in pan juices. Cook and stir until sauce boils and thickens. Stir in pineapple chunks and green onions, cooking until pineapple is heated through. Return chops to pan and coat both sides with sauce.

December 24, 2006

New Year's Chocolate Truffles

Here is a great recipe for a New Year's get together that is very impressive and easy to make. Everyone loves chocolate...I gurantee these truffles will make your party guests go back for more.

Chocolate Truffles
Recipe courtesy Alton Brown, 2004
From the Food Network Show: Good Eats

10 ounces bittersweet chocolate, chopped fine
3 tablespoons unsalted butter
1/2 cup heavy cream
1 tablespoon light corn syrup
1/4 cup brandy
1/2 cup Dutch process cocoa powder
finely chopped nuts, and/or toasted coconut, for coating truffles
8 ounces semisweet or bittersweet chocolate, chopped fine

Place the 10 ounces of chocolate and butter in a medium size glass mixing bowl. Microwave for 30 seconds. Remove and stir, and repeat this process 1 more time. Set aside.

Heat the heavy cream and corn syrup in a small saucepan over medium heat until simmering. Remove from the heat and pour the mixture over the melted chocolate mixture; let stand for 2 minutes. Using a rubber spatula, stir gently, starting in the middle of bowl and working in concentric circles until all chocolate is melted and mixture is smooth and creamy. Gently stir in the brandy. Pour the mixture into an 8 by 8-inch glass baking dish and place in the refrigerator for 1 hour.

Using a melon baller, scoop chocolate onto a sheet pan lined with parchment paper and return to the refrigerator for 30 minutes.

Place the cocoa powder, nuts, and/or toasted coconut each in its own pie pan and set aside.
In the meantime, place the 8 ounces of chocolate into a medium mixing bowl which is sitting on top of a heating pad lined bowl, with the heating pad set to medium. Depending on the heating pad, you may need to adjust the heat up or down. Stirring the chocolate occasionally, test the temperature of the chocolate and continue heating until it reaches 90 to 92 degrees F; do not allow the chocolate to go above 94 degrees F. If you do, the coating will not have a nice snap to it when you bite into the chocolate. Once you have reached the optimal temperature, adjust the heat to maintain it.

Remove the truffles from the refrigerator and shape into balls by rolling between the palms of your hands. Use powder-free vinyl or latex gloves, if desired.

Dip an ice cream scoop into the chocolate and turn upside down to remove excess chocolate. Place truffles 1 at time into the scoop and roll around until coated. Then place the truffle into the dish with either the cocoa powder, nuts or coconut. Move the truffle around to coat; leave truffle in the coating for 10 to 15 seconds before removing. In the meantime, continue placing the chocolate-coated truffles in the cocoa or other secondary coating. After 10 to 15 seconds, remove the truffle to a parchment lined sheet pan. Repeat until all truffles are coated. Allow to set in a cool dry place for at least 1 hour; or store in an airtight container in the refrigerator. Truffles are best when served at room temperature.

December 20, 2006

A Blessed Holiday

Paula Deen Cookbook

On Monday night my husband and I had our Christmas where we open gifts and celebrated this beautiful holiday. As many do, we travel to our parent’s homes every holiday. We have always had “our” Christmas before we leave to drive down south to visit our families.

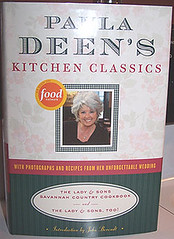
Our Christmas this week was wonderful. I got my husband some fishing items he had wanted, plus hiking boots and a very nice watch. He gave me a very special gift though….A Paula Deen Cookbook to add to my collection. It’s not just a cookbook though, it’s even signed by Paula herself! When I opened the book and saw her signature I was in awe to see my book was signed by my favorite cook.

It was a very special gift and took a lot of thought from my husband. He also gave me a 7-cup KitchenAid Food Processor, which I’ve been wanting for about 6 months now. I’m very excited to get home after the holidays and try making some wonderful pastries with it.

Paula’s signature

If you are still trying to decide on what you will be serving this holiday I’ve got some wonderful ideas for you. Maybe one of these recipes will fit perfectly on your family’s Christmas table. The Cherry Almond Glazed Pork is an absolute show stopper, it’s a favorite by our company’s owner – Clyde.

Honey Roasted Pork Loin
by Randy and Emma Williams

2 – 3 lb. boneless pork loin
¼ c. honey
2 T. Dijon mustard
2 T. mixed or black peppercorns, crushed
½ t. dried thyme
½ t. salt

Place roast on a lightly greased rack in a shallow roasting pan. Combine honey and next 4 ingredients; brush half mixture over roast. Bake at 325 for 1 hour; brush with remaining mixture.

Bake 30 additional minutes. Our Christmas favorite!

Corned Beef & Cabbage
by Clarice Brown

Prepare corn beef as directed on package. Place corn beef in roasting pan, fat side up. Add spices supplied. Bake at 300 degrees for 1 hour per pound or until tender.

Trim off excess fat and slice. Place back in roaster. Add 1 head quartered cabbage and one onion, chopped coarsely. Add salt and pepper to taste. Bake until cabbage is tender. (In a top of the counter roaster, 4 hours at 300 degrees.)

Cherry Almond Glazed Pork
by Sue Lear

(Sue doubles the sauce recipe for this.)

When you brown and cook the chops, be sure they do not overlap in the skillet, so each one will be evenly glazed with the cherry sauce. For 2 or 4 servings, you’ll find the pork chops easier to prepare and serve than a tiny roast. But when it comes to a dinner for 6 or more, we recommend the pork loin roast with the same glaze.

2 servings:
¼ cup cherry preserves
1 tablespoon light corn syrup
1 tablespoon red wine vinegar
Dash of cinnamon, nutmeg, cloves
1 tablespoon of slivered almonds, toasted

4 servings:

1/2 cup cherry preserves
2 tablespoon light corn syrup
2 tablespoon red wine vinegar
Dash of cinnamon, nutmeg, cloves
2 tablespoons of slivered almonds, toasted

6 servings (3 pounds):
12 ounce jar, (1 cup) cherry preserves
2 tablespoons light corn syrup
¼ cup red wine vinegar
¼ teaspoon of cinnamon, nutmeg, cloves
2 tablespoons of slivered almonds, toasted

8 servings (4 pounds):
12 ounce jar (1 cup) cup cherry preserves
2 tablespoons light corn syrup
1/4 cup of slivered almonds, toasted

For Pork Chops (2-4 servings):

In skillet, brown chops on both sides. Drain fat. Sprinkle chops with a little salt and pepper. Add 1 tablespoon water. Cover, cook over low heat for 30 minutes. Meanwhile, combine in small saucepan the cherry preserves, corn syrup, vinegar, and seasonings. Heat mixture to boiling, stirring frequently. Remove from heat and stir in almonds. Keep cherry sauce warm ‘til ready to use. When chops have cooked 30 minutes, spoon on just enough sauce to glaze; cover and cook 15 more minutes more, ‘til chops are tender, basting one or twice with the remaining sauce.

Pork Loin Roast (6-8 servings):

Rub roast with a little salt and pepper. Place on rack in shallow baking pan. Roast, uncovered, in slow oven (325 degrees) for about 2 to 2 ½ hours. Meanwhile, combine in small saucepan the cherry preserves, corn syrup, vinegar, and seasonings. Heat mixture to boiling, stirring frequently. Remove from heat and stir in almonds. Keep cherry sauce warm till ready to use. When meat has roasted 2 to 2 ½ hours, spoon enough hot cherry sauce over the roast to glaze; return to oven for about 30 minutes more, ‘til meat thermometer registers 170 degrees. Baste roast with sauce several times during last 30 minutes. Pass remaining sauce with the roast.

December 19, 2006

Food Porn?

Willamette Week Online had a great online article that a fellow co-worker passed along to me regarding an interesting topic: Cooking Porn.

Now, it’s not what you think. The article discusses the beautiful lush food photos inside many of the cookbooks we view today. The article explains the way the photos are intriguing, but how us average folks can make the recipes, but never make the food look as glamorous as the photos inside these cookbooks. Reason why: Simple, because these photos are full of food stylists, photographers and art directors that are trained at making food look its best. In my opinion, all that really matters is that your food tastes wonderful.

The article is still worth a read in my opinion. I am like most cooks. I love for my food to not only taste superb, but also look like those cherished cookbook photos. We see a recipe from a photo and then we have the desire to make the treasured recipe, expecting our own attempts to look just as the cookbook photos. But, the reality is that doesn’t happen because we are not food stylists and food artists. We are just cooks, and that is good enough.

Here’s a quick recipe for enchiladas that has become one of my favorite quick fixes at my home. I do, however make one change to this recipe. I add two cans of green chilis and some garlic powder. This recipe comes from another co-worker, thanks for sharing Paul. If you like this recipe you will also enjoy my own Mexican Lasagna recipe.

*Side Note: Our Learfield Family Cookbook is complete. It's been such a hit around the office, even our Chairman of the Board and Chief Executive Officer, Clyde Lear, talked about the cookbook on the company blog. View his comments at the Grow Learfield Blog.

San Diego Chili Enchiladas
by Paul and Leah Roberts

12 corn tortillas
1 can Rotel
1 can Cream of Chicken soup
1 16 oz carton of sour cream
1 can diced green chilies
3 to 4 chicken breasts, cooked and shredded
2 to 3 cups shredded cheddar cheese

In medium sized pot, blend and warm Rotel, cream of chicken soup and sour cream. Warm the corn tortillas using a skillet or microwave, spraying each tortilla lightly with cooking spray or brush lightly with oil and then warming.

Assemble enchiladas: Place the desired amount of shredded chicken in warmed tortilla, sprinkle cheese, add three to four diced chilies, and spread a spoonful of cream sauce. Roll tortilla and place in oblong pan. Repeat. Spread remaining cream sauce over top of tortillas, sprinkle remaining cheese across top and sprinkle additional chilies to taste. Warm in 350 degree oven for 25 minutes or until bubbly. Best served with Lipton Spanish rice.

December 18, 2006

Stuffing Recipe for Your Holiday Meal

Here is a great stuffing recipe from one of my fellow co-workers. This is an easy way to dress up your holiday turkey this Christmas.

Sourdough Bread Stuffing
by Randy and Emma Williams

1 ¼ lb. sourdough bread, crusts trimmed, cubed
¾ lb. bacon, crisply cooked, crumbled, dripping reserved
2 c. celery
¾ c. onion, diced
1 lb. mushrooms, sliced
1 ½ T. dried sage leaves
2 t. thyme
1 t. salt
¾ t black pepper
1 ½ c. canned chicken broth
2 eggs
1 ½ t. baking powder

Prepare bacon, reserving ¼ c. drippings. Add onion and celery to the drippings and sauté for 10 minutes. Add mushrooms and seasonings. Pour mixture over bread cubes, add bacon and toss to blend. Mix in 2 c. broth. Beat eggs and baking powder together and add to mixture. Moisten stuffing with additional broth, if needed. Bake for one hour or until cooked through and golden brown on top.

December 15, 2006

Cooking for Our Pets- New

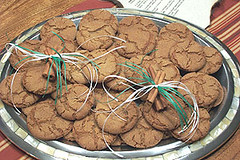
My husband baked my Molasses Spice Crinkle Cookies on Wednesday night. Yes, you read this right, my husband baked the cookies not me.

His company, FCS Financial (used to be Farm Credit Services of America) held a Holiday Cookie Contest on Thursday and Charlie wanted to enter my cookies. I laid out all the ingredients for him on the kitchen counter and he went to town measuring, creaming the butter and sugar, and blending the batter. He hand rolled each ball of dough carefully, to be sure that every cookie was of the exact size and uniformity. He set the timer each batch and carefully watched over the cookies for the last minute or so to be sure he got them out in the nick of time.

I was VERY impressed! Each cookie was pulled out of the oven at the proper time, he didn’t burn a single cookie and all the cookies were uniform.

Molasses cookie

I did help him on the presentation part of his cookie entry. I tied together three bundles of cinnamon sticks with raffia for him to lay around the plate of cookies and I also printed off the recipe on decorative paper which I then tied raffia on the corner of one side of the recipe card.

He took the cookies to work on Thursday and then I got a call Thursday afternoon from my husband.

“You won’t believe this,” he said. “I got 1st place.”

He was right, I thought he was teasing me. “No, seriously. I really got 1st place. I guess all your good cooking has rubbed off on me,” he said.

So, I am VERY proud of my husband. I told him I may have to hang up my baking mitts.

Congrats to all the winners of the FCS Holiday Cookie Contest.

I’ve been receiving a lot of emails from some of you that want to make Christmas presents for your four-legged friends. Maybe some special homemade dog treats?
It’s be awhile since I did a post on “Cooking for Our Pets,” so here is a new recipe your dogs are sure to enjoy. My two friends, Rudy and Lizzy, will agree that this recipe is perfect for the holidays.

Rudy and Lizzy Holiday Photo

Christmas Mint Cookies
from Dog Treats From Your Kitchen

1 1/2 cups whole wheat flour
1 1/2 cups bisquick
1/2 cup mint chopped leaves
1/4 cup milk
4 tablespoons margarine
1 egg
1 1/2 teaspoons corn syrup

1. Combine all ingredients in food processor, process until well mixed
2. Roll out on a floured surface to 1/4 to 1/2 inch thickness.
3. Cut with holiday shaped cookie cutters, place on non-stick cookie pan.
4. Bake at 375 F for 20 minutes or until lightly browned.
5. Cool and store in air-tight container.

December 13, 2006

Holiday Wishes from My Kitchen

2006 Christmas Card

Happy Holidays from my kitchen to yours! I want to send you all a Christmas greeting card – You can view the card in a larger format [PHOTO].

I’ve been meaning to post this wonderful new recipe I tried a couple of weeks ago. I found it on the Food Network site one day while I was searching for a new way to make potatoes. This recipe is from Paula Deen, of course, she is the best cook on the network, in my opinion.

It is a very unique side dish but it could be used for an easy main dish for a weeknight meal. My husband and I enjoy simple meals that we can make together through the weekdays and this recipe is perfect for those nights your just want to kick back and relax together.

Enjoy and Merry Christmas…

Shrimp Stuffed Potatoes
Paula Deen


6 large Idaho potatoes
Vegetable oil, for coating
8 tablespoons butter
2 cups grated cheddar cheese, plus more for sprinkling
2 cups grated Monterey Jack
2 cups sour cream
Salt and pepper
1 pound shrimp, peeled and Sauteed
Paprika

Preheat oven to 350 degrees.

Begin by washing potatoes, drying them, and gently pricking them with a fork on the sides. Coat each potato with vegetable oil, place on foil covered pan, and bake for approximately 1 hour.
Place the butter in a large bowl. Remove the potatoes from the oven and slice each potato in half. Gently scoop out the potato and place in the bowl. Using a mixer on high, mix the potatoes, butter, sour cream, salt, and pepper.

Fold the shrimp and both cheeses into the mixture. Gently stuff the mixture back into the potato shells, making sure not to break them. Pile the mixture as high as you can on top of the potato shells. Sprinkle each potato with cheese and paprika for color. Bake in the oven for approximately 20 to 30 minutes until browned on top.

December 11, 2006

Another Pumpkin Recipe

Only 15 days until Christmas! It’s amazing how times flies so fast during the holidays.

SDC Christmas Lights


My husband and I took our annual trip to Branson over the weekend. We did some last minute Christmas shopping on the new Branson Landing and strolled around Silver Dollar City on Saturday night.

I’ve posted before about how wonderful and fun I think SDC is during the holidays before, but this year was even better.

There is a new section of the park open that is just for kids only! Great for the parents. Plus, a living Nativity show, the best lighted Christmas parade ever and the lights are always amazing.

If you have never gone to Branson during the holidays, it’s worth it! The kids will be amazed by the beauty and detail of the lights, as will you.

Last Friday was our company’s annual Snack Day Crawl. We have a little over 100 employees at Learfield. Each department was responsible for bringing in a few dishes and setting up an area in their section of the building to display their food. The “crawl” is a great way for all our employees to go around the building and mingle with one another. I think it’s one of the great team building events that we do within our company. My boss, Cyndi even did a post on the Brownfield Blog about the crawl.

Pumpkin Gooey Butter Cakes

I brought in some pickled okra, an olive tray, a large batch of Almond Bark Popcorn and a new recipe I tried out for the first time – Paula Deen’s Pumpkin Gooey Butter Cake. Needless to say, there was none of this delicious cake left by the close of the work day on Friday.

Pumpkin Gooey Butter Cakes
By Paula Deen


Cake:
1 (18 1/4-ounce) package yellow cake mix
1 egg 8 tablespoons butter, melted

Filling:
1 (8-ounce) package cream cheese, softened
1 (15-ounce) can pumpkin
3 eggs
1 teaspoon vanilla
8 tablespoons butter, melted
1 (16-ounce) box powdered sugar
1 teaspoon cinnamon
1 teaspoon nutmeg

Preheat oven to 350 degrees F.

Combine the cake mix, egg, and butter and mix well with an electric mixer. Pat the mixture into the bottom of a lightly greased 13 by 9-inch baking pan.

To make the filling: In a large bowl, beat the cream cheese and pumpkin until smooth. Add the eggs, vanilla, and butter, and beat together. Next, add the powdered sugar, cinnamon, nutmeg, and mix well. Spread pumpkin mixture over cake batter and bake for 40 to 50 minutes. Make sure not to overbake as the center should be a little gooey.

Serve with fresh whipped cream.

Variations:
For a Pineapple Gooey Cake: Instead of the pumpkin, add a drained 20-ounce can of crushed pineapple to the cream cheese filling. Proceed as directed above.

For a Banana Gooey Cake: Prepare cream cheese filling as directed, beating in 2 ripe bananas instead of the pumpkin. Proceed as directed above.

For a Peanut Butter Gooey Cake: Use a chocolate cake mix. Add 1 cup creamy peanut butter to the cream cheese filling instead of the pumpkin. Proceed as directed above.

December 7, 2006

Unique Christmas Card Idea

Each year we all mail Christmas cards to our friends and family to let them know they’re in our thoughts and prayers during the holidays. I remember the time my mother would put into the messages she would write within her Christmas cards. She always tried to have every card have a specific message to whom she was writing to.

Today, many just simply write “Merry Christmas, the BLANK Family” or Happy Holidays” within their Christmas cards. I like it when I receive a card that has some type of meaning or saying in it because it makes me feel as though the person took the time to think of me during the holidays. Isn’t that what the holidays are about, taking time out for our loved ones?

This year I did a little something different for my Christmas cards. I usually write a short message and include one a photo cards with a Christmas border (that you can get printed at Target, Wal-Mart or other various stores.)

I decided this year I would write everyone a letter, a generic letter, but it was still a letter. I included information about my husband’s fishing, my cooking blog, thanking those who helped in the celebration of my parent’s 40th anniversary party and a recipe from my kitchen.

I thought how can I make this letter special? By including a recipe, that would be festive in fit into the Christmas spirit. So, at the end of my letter I included my recipe for Molasses cookies.

I think this is a great way to send along something special with your Christmas cards this year. Include one of your family’s recipes within your holiday cards or letters to your friends and family. I’m sure everyone will enjoy your recipe as much as your family does.

You could print it out on decorative paper and maybe even include a photo of you and your family making the special recipe together. By doing this, your Christmas cards will have a special “touch” for the holidays.

Here are some other ideas of recipes to include in your cards. Try and make the recipes you include simple and easy to make.

Fruit Ball
by Susan Phillips


2 (8 oz) cream cheeses, softened
2 (15 oz) cans fruit cocktail, drained and chopped fine
1 (5 oz) instant vanilla pudding
¾ c. chopped almonds

Mix all ingredients except for ½ cup almonds and form into a ball. Roll in remaining almonds and refrigerate 1-2 hours. Serve with crackers.

Easy Fruit Dip
by Susan Phillips

1 (8oz) Cool Whip, thawed
7 oz. jar of marshmallow cream
3 oz. cream cheese, softened

Mix until smooth.

Party Deviled Egg Sandwiches
by Susan Phillips

Loaf of bread, cut into round shapes (use cookie cutter)
12 hard boiled eggs
½ c. mayonnaise
1/3 c. miracle whip
2 tsp. mustard
¼ tsp. chili powder

Separate egg whites and yolks. Mash egg whites with fork and add mayo. Set aside. Mash egg yolks and add other ingredients. On round bread slice spread egg whites to cover ¾ around edge. Put egg yolks mixture in center. Garnish with olive slices and sprinkle with paprika.

Cucumber Sandwiches
by Susan Phillips


Mix 8 oz. pkg cream cheese and one pkg. dry Ranch dressing
Slice cucumber (1/8 inch thick)

Use a round cookie cutter to cut centers our of bread slices. Spread cheese mixture on bread and top with slice of cucumber.

December 6, 2006

My Family in Photographs

Thanksgiving Family Photo

Here is the entire Baldwin family…what a bunch of hams! As I have said my parents, besides running a cattle operation, my parents also owned and operated Baldwin School Portraits. The family business was my grandfather’s and eventually became my father’s business. It was operated in Springfield, Mo and was in business for more than 35 years. My father, brothers and sister-in-law, Kara all worked for the business.

In 2004, my dad sold the business to Lifetouch Studio’s, a large national company. It just goes to show, it is hard for the little guy to survive these days. It was smart for my family to sell the business because it took a lot of stress off my dad and my entire family. (NOTE: It’s never easy working with family, no matter how well you get along.)

My brothers and Kara still work for studio, which is now called Baldwin’s School Portraits by Lifetouch. As for my father, he is perfectly happy because now he is completely retired on the farm and his sons have a new business path to carry on.

To my point about telling about my family’s old business in photography….well we take a lot of photos in my family. I practically grew up with a camera in my face and now it’s the grandkids that are the little models in my mother’s camera lens.

Yes, my brothers and I had no choice when it came to picture time. Everything had to look right, our backs had to be straight, hair in order, smile perfect and eyes open wide and bright…then SNAP! Another family memory was snapped in time by the camera flash.

My dad used to tell us stories about taking photos all over the state of Missouri. He enjoyed his job because he only had three months of hard work and the rest of the time was spent on his own piece of heaven (the farm.) His job allowed him to spend time doing the things he loved (fishing, hunting, traveling, family) and he also was able to make a good living for his family.

Things have changed quite a bit, even since I was a youngster. But to me, if there is one thing that helps us remember our pasts, it’s those treasured photos we all possess. My father helped bring memories to families across Missouri through the school photos he took throughout the years. Now, my brothers do the same.

I can look through many of my family snapshots and remember the past just from a glance of a photo. Photos can tell a lot about a family….happy times, baby’s births, marriages, silliness between siblings. I love taking trips back in time through old family snapshots, each time I open any of my mother’s photo albums. I have started my own family albums since my husband and I were engaged.

Recipes also tell of a time long ago and can bring back old family memories just as photos do. From eating a piece of hot apple pie that reminds you of your grandmother cooling her pies on a window or cutting into a perfectly grilled steak and a memory of your father from a family bbq flashes by your thoughts. Recipes are a way for us all to connect with our past.

Please pass on your family recipes to future generations. If there is no one to snap that family photo or write down a cherished family recipe and teach it to a youngster….how will is be passed on to the next generation? This holiday pass on a recipe to your grandchildren or other family member, teach them the skill and love of cooking.

Here is a family recipe from my own kitchen. Try serving this pie in place of the traditional pumpkin pie this Christmas. It’s sure to be a hit!

Southern Classic Sweet Potato Pie
by Lane

1 1/2 cups sweet potato puree, cooled
2 eggs
4 T. melted butter
2 T. molasses syrup
1/3 cup light brown sugar
¼ tsp. salt
1 tsp. cinnamon
1/8 tsp. nutmeg
¼ tsp. allspice
½ tsp. ginger
1 tsp. vanilla
¾ cup heavy cream

Pecan Topping:
1 cup brown sugar1/2 cup pecans2 T. all purpose flour3 T. melted butter

Preheat oven to 350 degrees.

In a large bowl beat eggs, butter and sugar until combined with electric mixer. Add the rest of ingredients, except cream and beat on medium until smooth. Add cream and beat on low until combined.

Place pie in oven for 30 minutes. While pie is baking, mix up all ingredients for topping in a small bowl. After pie has baked for 30 minutes, sprinkle topping on top of pie and place back into oven for another 10 minutes. Pie is done when an inserted knife comes out clean.

December 5, 2006

College Dining Halls “beef up” their menus

Home recipes are on the menu in many campus dining halls, that’s according to an article my fellow co-worker Steve Mays passed on to me yesterday that CNN had published.

I found the article very funny. Imagine…college students want to eat home cooked meals because those type of meals (made with love from mom and dad ) are comfort foods.

Apparently, colleges across the nation are trying to incorporate more home cooked meals at dining halls because it’s been shown to aid in homesickness.

Students and parents are being asked to share their own family’s home cooked recipes to colleges and universities and then the recipes are placed in dining halls where students vote on their favorite.

I think this is a great idea and it’s about time. I remember eating those horrid college dining hall dinners. It just never tasted like my mother’s did. All I ever wanted was to be at my parent’s dinner table indulging in mom’s perfect roast beef, creamed corn, mashed potatoes and gravy and sweet rolls. YU---UM.

I did however find this part of the article a little strange (Side note: I am one of these so-called Millennials):

Some experts say it is just the kind of idea that would appeal to college-age "Millennials," members of the generation born after 1981.

William Strauss, co-author with Neil Howe of "Millennials Rising" and "Millennials Go to College," said those young adults are more connected with their parents than previous generations.

I do not share that same opinion. My parent’s were both very close to their parent’s. In fact, I believe that today these Millennials are less connected with their families. I can say this because I am of this generation and I know many of my friends that very seldom see the folks or have any type of emotional connection with their families. It’s disheartening to say that, but that is what I have seen from my college days to present day.

I do think that people in my generation realize what they missed out on from the separation of their family, but not until they mature quite a bit. Sometimes our families are taken for granted.
A family’s bond is the strongest of all. Yes, we get upset with our family members, even embarrassed sometimes, but no matter what they are the ones that know us like no other. They will always love and care for us, through all the bad, and they will help us celebrate and rejoice in the good.

Be thankful this holiday for your family. Give thanks to have loved ones and love those that love you.

Happy Holidays from my kitchen to yours…

Cheesecake with Praline Sauce
by Paula Deen
Makes 12 servings

Crust:
1-1/2 cups graham cracker crumbs
4 tablespoons sugar
1/4 cup (1/2 stick) butter, melted

Filling:
3 (8-ounce) packages cream cheese, at room temperature
1 cup sugar
5 large eggs
1 tablespoon vanilla extract

Topping:
1-1/2 cups sour cream
4 tablespoons sugar
1 teaspoon vanilla extract

Preheat oven to 350°F.For crust, stir together graham cracker crumbs, sugar, and butter. Pat this mixture into the bottom and sides of a 9-inch springform pan.

Make the filling:
In a large bowl, beat together cream cheese and sugar. Beat in eggs, one at a time, then beat in vanilla. Pour filling into crust and bake 1 hour. Remove cake from oven and cool for 10 minutes.

Meanwhile, make topping: in a bowl, mix sour cream, sugar, and vanilla until well blended. Spread this mixture over warm cake and return to oven for 5 minutes. Let cake cool to room temperature in the pan, then cover with plastic wrap and refrigerate for at least 4 hours, or overnight.At serving time, use a table knife to loosen cake from the pan. Remove the sides of the pan and place cake on a platter, leaving it on pan bottom.Serve cheesecake, passing Praline Sauce in bowl with a small ladle. Store any leftovers in the refrigerator.

Praline Sauce:
2 tablespoons light brown sugar
2 tablespoons cornstarch
1 cup dark corn syrup
1/2 cup chopped pecans
1 teaspoon vanilla extract

In a small heavy saucepan, stir together brown sugar and cornstarch. Stir in corn syrup and cook over medium heat, stirring constantly, until thick. Remove the pan from the heat and stir in nuts and vanilla. Cool slightly.

December 4, 2006

What a Winter Storm

Well winter is upon us here in the Midwest. Last week on Thursday my company’s offices closed early and on Friday one of the worst winter storms came through and dropped 4 inches of sleet and 17 inches of snow at my house and in many other areas across the Mid-Missouri. The last time we had this type of accumulation was in 1995, and I think the total was only 8-10 inches.

Needless to say, I was unable to make it out our driveway on Friday morning and a phone call from my boss telling me to “stay home,” was music to my ears. I don’t think I would have been going anywhere in my Explorer.

The problem my husband and I had was we were completely out of groceries! Which never happens at my house, but I had planned on going grocery shopping on Friday. I did manage to make some homemade pancakes for breakfast though, which we both enjoyed.

My husband spent most of the day shoveling our driveway and I spent my time inside cleaning the entire house! I got quite a bit accomplished over the “snowed in” weekend. I cleaned the entire house including: all cabinets and refrigerator, the basement and I even organized every closet and cabinet and in our house!

But, by Saturday my husband and I both were had “cabin fever” and were ready to get out of the house! So, we drove into town on the still ice covered roads and made it to the Wal-Mart (yes Wal-Mart). I don’t like to go to Wal-Mart very much, I try to support my local grocery stores when I can, but most all of the local stores were closed or had ran out of certain types of foods.

Charlie and I did our shopping and then had to stand in line for 40 minutes to check out! It was not a fun experience, but we needed food if we were going to spend all weekend trapped inside.

We also went too Blockbuster and rented three movies to help make the time go by faster. It was actually a much needed break that Charlie and I needed. It’s so beautiful outside and I will admit, it was very nice being snowed in with my husband all weekend!

Here is a much needed recipe to help us all warm up on these blustery cold days. Enjoy!

Navy Bean Soup
From
Food Network Kitchens

1 pound navy beans, picked over, rinsed and drained
10 sprigs parsley
2 sprigs fresh thyme or rosemary
1 bay leaf
2 large smoked ham hocks, about 1 1/2 pounds
1 medium onion, coarsely chopped
1 clove garlic, coarsely chopped
8 cups of cold water
1 medium carrot, coarsely chopped
Kosher salt and freshly ground black pepper
Butter for garnish

Place the beans in a large saucepan and cover with cold water by about 2 inches. Bring to a boil and lower the heat to a simmer. Cook for 5 minutes; remove from the heat, cover, and let sit for one hour. Drain and reserve. Tie the parsley, thyme, and bay leaf together with kitchen twine.
In a large soup pot or Dutch oven combine the beans, herb bundle, hocks, onions, and garlic with the water. Bring to a boil, cover, and adjust the heat so the soup cooks at a gentle simmer. Cook until the beans and hock are completely tender, about 1-1/2 hours.

Turn off the heat and remove the hocks. Cool slightly. Remove the meat from the hocks, discarding the bones, fat, and skin. Cut the meat into small cubes. Remove the herb bundle and discard.

Puree about 3 cups of the beans with a some of the liquid in a blender. (For a smoother soup puree all the beans.) Stir the puree and diced meat into the soup. Heat the soup and adjust the seasoning as needed with salt and pepper.

Pour into heated bowls, place a small pat of butter on top of each soup, and serve.