 My fellow co-worker Sarah brought in these deliciousally little pumpkin cookies today at work, that kind look like ice cream cookies. Even though I started my diet today I had to try one, they looked too good to pass up.
I’m so glad I did because they were wonderful! I asked her for the recipe, which comes from the Martha Stewart website. I’m planning on making these for Thanksgiving dinner this year. I know they will be a hit for my niece and nephews.
Pumpkin Whoopie Pies with Cream-Cheese Filling
Makes 12 whoopie pies
3 cups all-purpose flour
1 teaspoon salt
1 teaspoon baking powder
1 teaspoon baking soda
2 tablespoons ground cinnamon
1 tablespoon ground ginger
1 tablespoon ground cloves
2 cups firmly packed dark-brown sugar
1 cup vegetable oil
3 cups pumpkin puree, chilled
2 large eggs
1 teaspoon pure vanilla extract
FOR THE CREAM-CHEESE FILLING
3 cups confectioners' sugar
1/2 cup (1 stick) unsalted butter, softened
8 ounces cream cheese, softened
1 teaspoon pure vanilla extract
Make the cookies: Preheat oven to 350 degrees. Line two baking sheets with parchment paper or a nonstick baking mat; set aside.
In a large bowl, whisk together flour, salt, baking powder, baking soda, cinnamon, ginger, and cloves; set aside. In another large bowl, whisk together brown sugar and oil until well combined.
Add pumpkin puree and whisk until combined. Add eggs and vanilla and whisk until well combined. Sprinkle flour mixture over pumpkin mixture and whisk until fully incorporated.
Using a small ice cream scoop with a release mechanism, drop heaping tablespoons of dough onto prepared baking sheets, about 1 inch apart. Transfer to oven and bake until cookies are just starting to crack on top and a toothpick inserted into the center of each cookie comes out clean, about 15 minutes. Let cool completely on pan.
Make the filling: Sift confectioner' sugar into a medium bowl; set aside. In the bowl of an electric mixer fitted with the paddle attachment, beat butter until smooth. Add cream cheese and beat until well combined. Add confectioners' sugar and vanilla, beat just until smooth. (Filling can be made up to a day in advance. Cover and refrigerate; let stand at room temperature to soften before using.)
Assemble the whoopie pies: Line a baking sheet with parchment paper and set aside. Transfer filling to a disposable pastry bag and snip the end. When cookies have cooled completely, pipe a large dollop of filling on the flat side of half of the cookies. Sandwich with remaining cookies, pressing down slightly so that the filling spreads to the edge of the cookies. Transfer to prepared baking sheet and cover with plastic wrap. Refrigerate cookies at least 30 minutes before serving and up to 3 days.
October 31, 2008
Pumpkin Whoopie Pies
October 21, 2008
Thinking About Going Green...Stand in Line
 It seems that it’s become the “in thing” to say “I’m going Green” and purchase only organic, cage-free, natural, certified humane, free range, grass-fed, blah, blah, blah and blah type foods. Now, I’m a foodie just like the next person, but I also realize where and how my food is processed and makes it from the field to my plate and I can say that many folks today are very disconnected from their food.
Coming from a farm I have the up most respect for the farmers that supply my table with food. So, when all these terms start showing up on food labels across the nation, it makes what should be a simple everyday choice very complicated.
I have to wonder if most of us really understand what the term “organic” means when it comes to the food we consume or what exactly is free-range poultry…
I work with organic producers around the state in my job with the Dept. of Agriculture and I help producers become certified organic through the USDA. I thought when I took this job a little over a year ago I knew exactly what it meant to be organic, but I’ve learned a lot since then.
I was very impressed that the Food Network has an entire section on its website that helps consumers understand what the term organic means and the differences in the growing and harvesting of organic foods, compared to conventionally grown food. If a product bears a "USDA organic" label, you are guaranteed that's it's at least 95 free of pesticides, synthetic fertilizers and sewage sludge and that it hasn't been genetically modified or irradiated. No hormones or antibiotics are allowed; animals must be fed organically-grown feed and have access to the outdoors. While some experts have suggested that organic foods are healthier than conventionally-grown, the USDA doesn't support these claims.
The site also has a list of ways to become eco-friendly which I really enjoyed reading. Here is the list from the site so you can make steps to "Go Green" in your home.
10 Eco-Friendly Tips
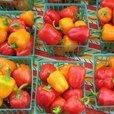
Shop Locally. Look for locally grown produce at farmers' markets, farm stands and food co-ops. You get fresher fare, support your community and help reduce fuel waste and emissions from long-distance shipping.
October 16, 2008
Fettuccine Piccata
 Ever since I was a child, there is one food that I couldn’t get enough of. You are probably guessing steak because I grew up on a beef farm, right? Wrong – it was pasta!
My brothers used to call me “noodle-head” when I was little because all I would ever eat is noodles – any kind – didn’t matter what it was.
I’m still a fan of pasta today. Bring on the fettuccine, mac ‘n’ cheese, lasagna, and don’t forget the pasta salad and the ravioli.
Here is a very easy recipe that’s become one of my go-to recipes at home. Sometimes a throw in some chicken or shrimp to jazz it up. Hope you enjoy!
Fettuccine Piccata
From WhatsCookingAmerica.net
1 (16-ounce) package uncooked fettuccine pasta
October 14, 2008
New Fishing Blog
 Well I guess the blogging jeans have been passed on in the McConnell household – that’s right my husband is now an official blogger!
He started his own fishing blog a couple weeks ago and has become addictive to the blog-o-sphere since he first began. We even had a Blogging 101 class last night at home. Which was loads of fun for me! So, please be sure and check out his own blog: Real Fishing “Midwest Style.”
Also in the news at our house is my husband’s weekend Top 10 win in the FLW Stren Fishing Tournament at Lake Ozark. He fished for three days last week and made it to the championship day to place in the Top 10 of the highly prestigious tournament circuit. We are all very proud of his accomplishment.
To celebrate my husband’s new blog and last tournament win, I’ve got a fishy recipe today!
Grandma's Hush Puppies
October 8, 2008
Cooking Spaghetti Squash
 It’s fall and that means you have the opportunity to enjoy all the wonderful fall squash varieties that are available at your local grocery store or farmers’ markets. I laugh when I see spaghetti squash in the grocery store because I know most people have no idea how to even cook spaghetti squash. Same goes for acorn squash, butternut, ambercup, banana, buttercup, delicate…the list goes on and on.
Try something new tonight and don’t be shy – pick up one of those funny looking squash at your local market and experience the freshness!