
 Yet again Clarice has provided me with an outstanding snack recipe. I made this over the weekend with my mother during Christmas. If you love pecans and want a new way to dress up the plain nuts, this recipe accomplishes just that.
Ensure that the water is very cold and the egg white is room temperature to ensure the mixture becomes frothy.
This is a great sampler for any upcoming New Year's Eve parties you might be throwing this weekend too.
Sugared Pecans
1 egg white
1 teaspoon cold water
4 C. (1 lb.) pecans
½ C. sugar
¼ teaspoon salt
½ teaspoon cinnamon
Beat egg white and cold water until frothy. Mix with pecans until coated well. Mix sugar, salt, cinnamon in a paper in a paper bag. Shake pecans until all the sugar is used.
Bake at 225 degrees on a baking sheet for 1 hour. Turn pecans every 15 minutes. Cool and store.
December 30, 2005
A New Year's Treat That Make Taste Buds Wild
December 29, 2005
I've Been a Little Under the Weather
I apologize for not posting since Saturday, but with the Christmas holiday things have been very hectic. During Christmas I caught, or more like the stomach flu caught me, and I had to take a break.
I will have a great recipe for a New Year's Eve party tomorrow though....Be watching!
December 23, 2005
World Class Pumpkin Pie
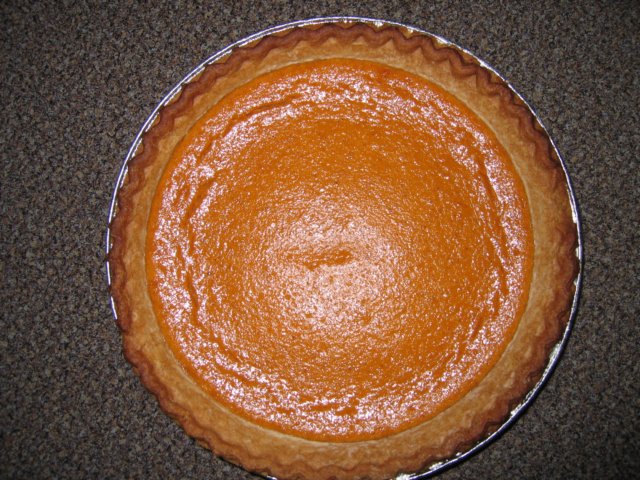 Of all the pies around I will say that pumpkin is my all-time favorite. Now, I'm not talking about a pumpkin pie from the can either, it must be fresh pumpkin. I've had good out-of-the-can pumpkin pie before, but nothing beats a fresh pumpkin pie.
This recipe is my mother's that she came up with years ago when my parents first married. My mother only used fresh pumpkin when she cooked. I have provided the recipe along with the steps of "How to Process a Pumpkin." It may seem like a lot of work to process your own fresh pumpkin, but it's really not. Give it a try, I know you will be suprized how simple it really is. Plus, you will have your own fresh pumpkin to cook with.
Pumpkin Pie
Mix Together:
2 Eggs
1/2 teaspoon Salt
1 teaspoon Cinnamon
1/2 teaspoon Ginger
1/4 teaspoon Nutmeg
1 1/2 C. Sugar
1 1/2 C. Fresh Pumpkin (key to making this pie the best it can be)
2 C. milk (1 5 oz can of evaporated milk fill rest with milk)
Mix well. Bake at 425 degrees for 15 minutes, then turn oven down to 350 degrees. It will be done when you can insert a knife into the pie and the knife comes out clean.
Again, I can't stess how important it is to use only fresh pumpkin for this recipe. My father and I grow our own pumpkins and then process them. We have enough pumpkin left for the whole year. If you use pumpkins to decorate with in the Fall, process the pumpkin.
How to Process Pumpkins
Split the pumpkin in half, remove all seeds and strings. Preheat oven to 350 degrees. Take half of the split pumpkin and place in a large cake pan. Place pumpkin pulp-side down into the pan. Add 2 cups of water to pan. Bake the pumpkin for about 1 hour in the oven. You will know when the pumpkin is ready by pushing on the skin and it feels soft to the touch. If the pumpkin is still hard, let it remain in the oven for another 20 minutes.
After you have your pumpkin cooked, remove all the pulp and place in large bowl. With a blender add 1 cup at a time, along with 1/4 cup of water. Blend together. Be sure to try to keep some of the stringy part of the pumpkin (therefore do not blend the pumpkin to well).
Let pumpkin cool, add to freezer bags and freeze flat. I like to place 2 cups or 1 1/2 cups of pumpkin in each bag, becuase the pie recipe calls for 2 cups of pumpkin and my pumpkin bread recipe calls for 1 1/2 cups.
December 22, 2005
Ready for a Delicious Healthy Meal?
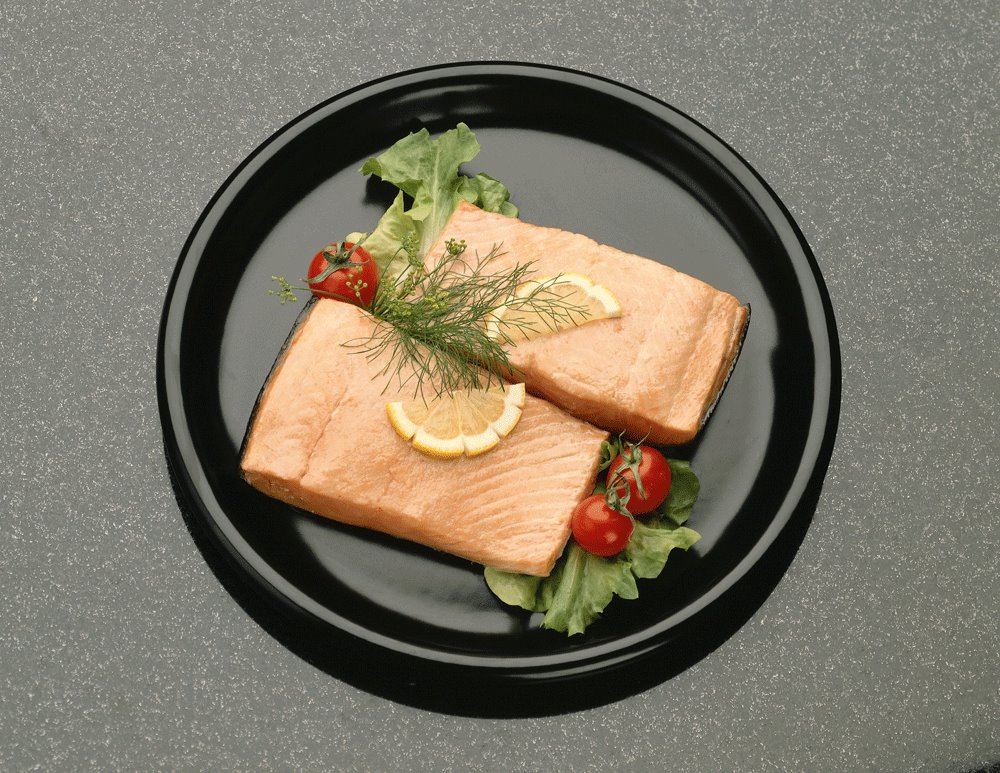
Salmon is a great and healthy way to get off to the New Year. With all this great home cooking, we could all use a little trim around our waistlines. I make a salmon meal at least once a week at my home. There are a ton of ways you can take a nice salmon steak/filet and make a great meal. I got this recipe from another fellow cooking blogger- Cooking for Engineers.
Pan-Grilled Salmon Fillets with Tomato & Tarragon
1-1 1/4 pounds salmon fillet, skin on (scaling is not necessary), pin bones removed, cut into 4 pieces Salt & freshly ground black pepper to taste 1/2 cup dry white wine 1/3 cup very finely chopped fresh chives 3 sprigs fresh tarragon 1 teaspoon butter 2 ripe plum tomatoes, seeded and finely choppedFresh chives for garnish
1. Preheat a 12-inch ovenproof skillet (cast iron is fine) for 3 or 4 minutes over medium-high heat. Preheat the broiler, positioning the top rack about 4 inches from the heat.
2. Place salmon fillets in the skillet, skin-side down, leaving the heat on medium-high. Sprinkle with pepper and cook, undisturbed, for about 6 minutes, or until the salmon flesh turns opaque about halfway up the fish.
3. Transfer the skillet to the broiler and leave it there for 2 or 3 minutes, just until the salmon browns on top. The salmon should still be moist in the middle.
4. Meanwhile, in a small saucepan, heat wine over medium heat. Let it simmer for about 1 minute. Add chives, tarragon and butter and stir. When the butter has melted, add tomatoes and cook another 30 seconds. Adjust seasonings with salt and pepper. Remove and discard the tarragon. Spoon the sauce over the salmon. Garnish with chives.
December 21, 2005
Brittle The Way It Should Be

Clarice Brown works with me and I think she is a great cook. She has brought in some wonderful recipes to work for some office "pot lucks" and "pie contests." She shared this easy recipe for Peanut Brittle with me today. I was looking for a good recipe that was easy-to-do and this brittle is just what I needed to finished my holiday goodie baking...
Easy Peanut Brittle
1 C. Sugar
½ C. corn syrup
1 C. Peanuts
1 teaspoon butter
1 teaspoon vanilla
1 teaspoon baking soda
1 greased cookie sheet
In a microwave safe bowl, add sugar and corn syrup, stir. Microwave on high for 3 minutes. Add peanuts, stir and microwave on high for 3 minutes. Add butter and vanilla, stir and microwave on high for 1 minute. Add baking soda, stir and pour immediately on greased cookie sheet. Let cool and break into pieces. Store in an air tight container.
Peanut Butter Cup Cheesecake

This cheesecake is absolutely wonderful. Joyce that I work with got this recipe from a magazine and made it this week for everyone in the office to try. It's very rich, so be sure to cut into thin pieces.
Peanut Butter Cup Cheesecake
1 ¼ C. graham cracker crumbs
¼ C. Crushed cream-filled chocolate sandwich cookies
¼ C. Sugar
6 tablespoons butter, melted
¾ C. Creamy peanut butter
Filling:
3 packages (8 ounces each) cream cheese softened
1 C. Sugar
1 C. (8 ounces) sour cream
3 eggs, lightly beaten
1 ½ teaspoons vanilla extract
1 C. hot fudge ice cream topping, divided
6 peanut butter cups, cut into small wedges
In a bowl, combine cracker crumbs, cookie crumbs, sugar and butter. Press onto the bottom and 1 inch up the sides of a greased 9 inch springform pan. Place on a baking sheet. Bake at 350 degrees for 7-9 minutes or until set. Cool on wire rack. In a microwave-safe bowl, heat peanut butter on high for 30 seconds or until softened. Spread over crust to within 1 inch of edges.
In a large mixing bowl, beat cream cheese, sugar and sour cream until smooth. Add eggs; beat on low speed just until combined. Stir in vanilla. Pour 1 cup into a bowl; set aside. Pour remaining filling over peanut butter layer.
In a bowl microwave ¼ cup fudge topping on high for 30 seconds or until thin; fold into reserved cream cheese mixture. Carefully spoon over filling cut through filling with a knife to swirl.
Place pan on a baking sheet. Bake at 350 degrees for 55-65 minutes or until center is almost set. Cool on wire rack for 10 minutes. Carefully run a knife around edge of pan to loosen; cool 1 hour longer.
Microwave remaining fudge topping for 30 seconds or until warned; spread over cheesecake. Garnish with peanut butter cups. Refrigerate overnight. Remove sides of pan.
*Note: Reduced-fat or generic brands of peanut butter are not recommended for this recipe.
December 20, 2005
Cooking for Our Pets
 I know this is a little strange that I usually post recipes for human consumption, but we can't forget our little friends... I bought my little Rudy from some great breeders and they have posted these great dog treat recipes on their site: Pocket Puppy. If you like to spoil your pup, these will do it.
Moosie's Mom's Liver Brownies
3 cups Oatmeal
1 cup Flour
1 lb Liver
2 eggs
Process oatmeal in a food processor (or blender) until it is a "medium" consistency. Add the flour to the oatmeal and set aside. In food processor, place liver in small amounts and process until it is "liquid" consistency (it will resemble thick fudge). Add the two eggs to the liver and mix well. Then add the dry ingredients to the liver...stir very well. Spread on a non-stick cookie sheet (or jelly roll pan) and bake at 350 degrees for 10-12 minutes. When cool, cut (or break) into small "bars".
Tips
When all mixed together this is a very sticky goo. To help spread it in the pan, I place a plastic bag on my hand and spray it with cooking spray to minimize sticking.
Shutting off the oven and leaving the pan sit in there until the oven cools helps dry out the bars.
We use a pizza wheel to cut the bars into squares.
Store treats in the refrigerator.
We double the recipe and freeze some of the treats until we need them.
It's Holiday Baking Time
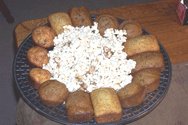 This is my favorite time because everyone is baking and cooking wonderfully delicious goodies. This photo is a tray I made of Almond Bark Popcorn, Pumpkin Bread and Muffins, Cranberry Muffins, and Lemon Poppyseed Bread for neighbors and work. I'm going to share my grandmother's recipe for Pumpkin Bread (or what us southerns call Punkin Bread). This recipe goes way back in the family and comes out perfect everytime.
Baldwin Pumpkin Bread
3 C. Sugar
3 1/2 C. Flour
1 C. Oil (1/2 vegetable, 1/2 sunflower oil)
2/3 C. Water
2 cups Pumpkin
4 eggs well beaten
1 1/2 teaspoons salt
2 teaspoons soda
1 teaspoon nutmeg (1/2 teaspoon grated nutmeg)
1 1/2 teaspoons cinnamon (1 teaspoon grated cinnamon)
Mix well about 50 strokes. Stir in nuts (I like walnuts). Fill in bread pan half full and bake at 350 degrees for about 1 hour.
A Twist on Popcorn

This popcorn is so addicting....This recipe came from my cousin Lana. She makes it every Thanksgiving and Christmas and it's always a hit.
Almond Bark Popcorn
1 bag of popcorn popped (butter flavored)
4 squares of Almond Bark
1 teaspoon of vegetable/canola oil
1/2 C. mixed nuts
Pop the popcorn, melt the squares in the microwave, and pick out the kernels after the popcorn is popped. In the bowl with the almond bark, fold in lightly the oil. Place popcorn and nuts in paper bag and pour over the melted mixture. Shake the popcorn and mixture well. Lay out the popcorn on waxed paper and let dry. Then break popcorn apart and enjoy.
December 19, 2005
Dinner Bread Made Easy
Okay, this isn't my own recipe, but it's great if you're in a hurry. I found this recipe off the FoodNetwork when I was looking for an easy side dish.
Roasted Garlic Bread
1/3 cup extra-virgin olive oil
3 sprigs thyme, plus 1 tablespoon finely chopped
5 heads of garlic
salt and freshly ground black pepper
8 tablespoons unsalted butter (1 stick), at room temperature
1 loaf of good, crusty bread, cut into slices
Preheat oven to 350 degrees F.
Cut top from each head of garlic, exposing the cloves. Place heads of garlic (cut side up), on a piece of heavy duty aluminum foil. Pour olive oil over them, and top with thyme springs. Season with salt and pepper. Wrap the foil tightly. Place in a small ovenproof pan, and bake until the cloves begin to pop out, about 1 hour. Remove from the oven and cool.
To remove the cloves, open the foil and squeeze the lower part of the head of garlic. In a small bowl, mash the cloves to form a paste. (At this point the paste can be used or stored in the refrigerator or freezer.)
Add butter and chopped thyme to the bowl, stirring to combine. Season with salt and pepper, to taste. Toast both sides of the bread, using a hot grill, grill pan, or broiler. Spread the roasted garlic butter paste onto the toasted bread. Serve immediately.
Texas Pecan Pie
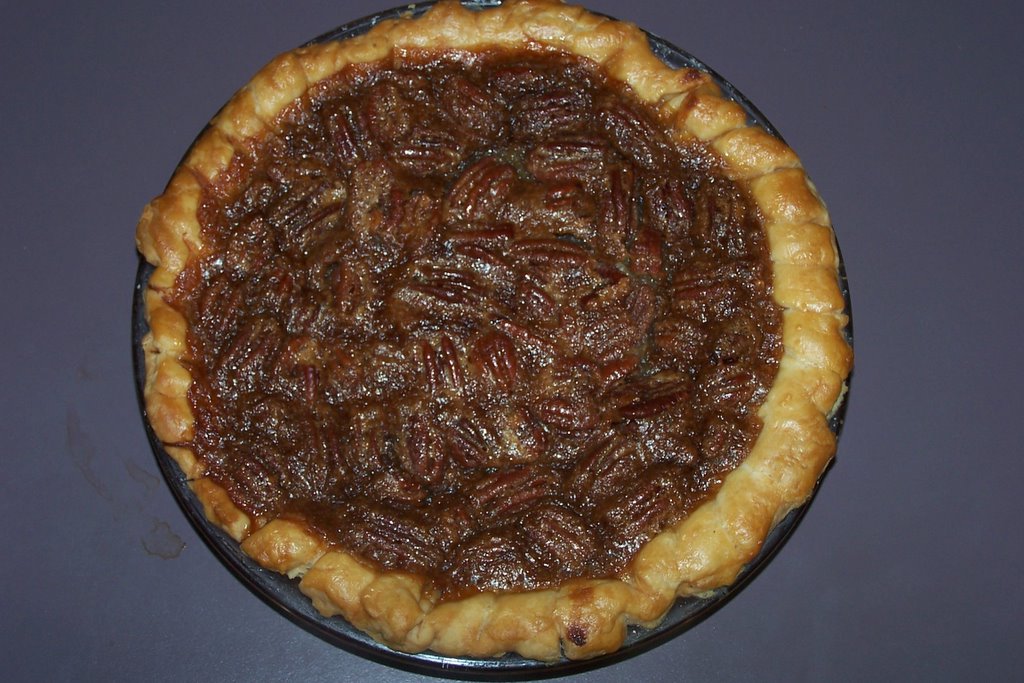
As promised here is the recipe for my grandmother's Texas Pecan Pie. This recipe goes all the way back to my great grandmother who was from Dallas, TX.
Texas Pecan
3 eggs
2/3 cups sugar
1/3 teaspoon salt
1/3 C butter
1 C. Syrup (1/2 dark and 1/2 white Karo syrup)
1 teaspoon vanilla
Beat the eggs well, add sugar gradually, 1/3 tsp. Salt, melted butter, add syrup and vanilla. Do not mix hard for a long time or mixture will become foamy. Pour onto unbaked pie crust. Sprinkle with whole pecans (about 1 C.) Bake at 375 degrees until nicely set and browned. The pie will be a little jiggly in the middle when you take it out.
December 16, 2005
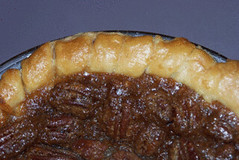
Kasie eating the Pecan Pie

Recipe from Kasie

Kasie's Celebrated Cheeseball
2 packages of Light Cream Cheese
2 Packages of Budding Dried Beef
1 Bunch of Green Onions
Garlic Powder
Soy Sauce
Any type of Triscuit crackers
Set the 2 packages of light cream cheese out while you cut your dried beef and green onions. First cut your dried beef into 1/2 in squares or smaller. Then dice your green onions as small as possible. By now your cream cheese should be somewhat soft. Place the cream cheese, cut dried beef, and cut green onions into a bowl and combine using a fork. Mix as best as possible meanwhile sprinkle approxiamately a teaspoon of garlic powder into the mix and a couple of squirts of soy sauce. Keep mixing and add garlic powder and soy sauce as needed for taste. Now, top off whichever type of Triscuit cracker your heart desires and get ready for the most amazing cheese taste ever.
Finished Pie Crust
I will be posting the recipe for this wonderfully perfect pie later on...
The Perfect Pie Dough
I'm convinced everyone can make a homemade pie crust. In April we had a Pie-Making Contest at my work and one of the rules was that the pie crust had to be homemade. I was surprised how many people were upset with this rule, because they didn't know how to make a homemade pie crust.
I'm 24 years old and I've learned everything about cooking from my mother and grandmother. I have gone through many pie crust recipes, trying to find the perfect one that is fool-proof. I've found it finally.
My mother-in-law passed this recipe along to me this Thanksgiving. It's from Julia Child (which I will say I do believe is the best cook ever). She taught Martha Stewart everything Martha knows about cooking and entertaining. Julia is the best chef ever...here are some of her pie crust tips that I live by.
Perfect Pie Crust
(makes 4 single crusts)
5 1/4 C. of flour
1 tablespoon of kosher salt
1 1/2 sticks cold unsalted butter
1 3/4 C. Shortening, chilled (Crisco)
1 C. ice water
Place flour and salt in large deep bowl and stir. Cut cold butter up and then with your fingers or a pastry cutter crumble the butter and flour together. There should be no lumps in the mixture and it should resemble coarse crumbs. Next, cut up the cold shortening and cut it into the mixture as your did with the butter. The dough will come together and you'll be able to form a ball. Take the ice water and pour into the mixture. You will be worried that it's too much water, but keep mixing with a spoon or your hands, and eventually the water will absorb into the dough. Roll dough into a ball and wrap in plastic wrap and place in refrigerator. Keep in the frig for at least 2 hours.
Rolling The Dough Out
The dough can be stored in the refrigerator for up to 6 days. When you are ready to roll out a pie, cut dough ball into four quarters. Take one quarter out at a time and place the rest back into to he frig. This dough needs to stay cold. Roll out dough on a well floured surface and when dough is the correct size for the pie plate, roll it up around your rolling pin (see link for images of this). The link I've included gives great images on how to roll out dough and putting it into your pie plate.
How to Give Your Crust the Perfect Final Touch
Ever wonder why some people's pie crust is perfectly golden and shiny? Well listen closely, I'm going to let out the secret: 1 egg and 1 teaspoon of water or heavy cream. Whisk together and you have a perfect baste for a pie crust. Baste just the tops of the pie crust with the mixture before placing your filling into the pie and place in the oven. I guarantee you'll have a beautifully golden crust when it comes out.
Until next time....Keep you hands floured and you oven hot!
What does seeing a Christmas Tree Make You Think Of?

Here's the Pinwheels, don't they look great!

Want an Easy Appetizer for the Holidays
Parmesan Rosemary Pinwheels
1 can (8oz.) of crescent dinner rolls
1/2 cup regular cream cheese
1/2 cup grated Parmesan cheese
4 teaspoons of fresh rosemary
Preheat oven to 375 degrees. Separate dough into rectangles and press all seams together. Place cream cheese, cheese and rosemary in bowl and mix well. Spread mixture on each rectangle (about 2 tablespoons) and spread over entire dough, leaving 1/4 inch around edges. Roll up the dough and pinch the seam to seal. Your dough will be soft, so I've learned to place it in the freezer from about 20 minutes. Take out of freezer and then cut each roll crosswise into slices. Place on baking stone or cooking sheet. Bake 12-15 minutes or until lightly golden brown.
December 15, 2005
No-Crust Quiche to Save Some Cooking Time
If you like quiche and hating making the crust to correspond with the quiche, here's the recipe for you. I got this from the Iowa Farmer Today newspaper. (Trust me these farm magazines and newspapers that include recipes are always good, good country cooking.....)
No-Crust Quiche
3/4 C. Bisquick
3/4 C. Milk
4 Eggs
6 oz. grated cheese (I use cheddar)
1/2 C. of each chopped onions, ham, bacon, green peppers or other favorite fillings
Combine all ingredients and fold together lightly. (To fold lightly mix together by folding mixture over under and over). Pour into a 9-inch pie pan and sprinkle with nutmeg (just enough to give it some color). Bake 35 minutes at 350 degrees or until set up in the center and lighlty browned.
Great Blog
Here's a great blog that I try to look at daily. An employee passed this along to me about a month ago. Farmgirl Fare has farm photos, recipes, and daily tidbits from the farm life.

The Beginning to Something Special...
Well...this is the start of something that I thought I would never have time to do - BLOG. But, things have changed. I work daily with all types of media: print, radio, blogs, podcasting, everything you could mention. I'm surrounded by employees that blog, the compnay I work for is beginning to blog, it's like a new found craze. So, I thought I would throw my hat in and try it out.
I'm not gonna blog about how much I love American Idol or how much I hate some movie star like some blogs though. My purpose is simple- To give today's 20 somethings reasons why to enjoy cooking and recipes that anyone can make. I love to cook- for my friends and family. Nothing is better than homemade food- soul food is what my grandmother called it. Good food can make you feel a million different feelings, and everyone has the skills to be a good cook. I'm going to prove this by giving great recipes and steps that are easy to follow.
I grew up on a farm and I didn't have the opportunity to drive to Pizza Hut or Burger King to pick up dinner, my mother and I cooked togther everyday. Now, I see people my age eating out all the time and never cooking at home. I want to show people how great homecooked food really is and how simple recipes are to make.
So, I'm going to post recipes that I have made and tell what I thought about them. I welcome any comments from viewers and would love to get recipes from others. From time to time I will probably also post news and photos about another love of mine besides cooking- Rudy. He is my beloved best buddy, besides my husband. He weighs 8 pounds and has the cutest brown eyes ever- my toy Rat Terrier pup. You'll also see farm and country photos every once in awhile, since that is where my roots are from. So, hang-on and enjoy....