January 30, 2007

Sixty Uses of Baking Soda

I thought that everyone could use some of these tips I came across. I never imagined there would be this many uses of baking soda.

From: http://www.make-stuff.com/cooking/baking_soda.html

Bicarbonate of soda or baking soda has many different uses in the household. Although much more expensive products have been developed over the years to do the same jobs, baking soda can work for you just as well, if not better. Use it in the following ways:

  • To make your own baking powder, stir and sift together 2 parts of Cream of Tartar to 1 part baking soda and 1 part cornstarch.
  • Be sure to keep an extra box of baking soda by your stove in case of grease or electrical fire. Scatter the powder by the handful to safely put it out.
  • Keep a container of baking soda in your garage as well as in your car to put out a fire. It won't damage anything it touches.
  • Baking soda will also put out fires in clothing, fuel, wood, upholstery and rugs.
  • Clean vegetables and fruit with baking soda. Sprinkle in water, soak and rise the produce.
  • Wash garbage cans with baking soda.
  • Soak and wash diapers with baking soda.
  • Oil and grease - stained clothing washes out better with soda added to the washing water.
  • Clean your fridge and freezer with dry soda sprinkled on a damp cloth. rinse with clear water.
  • Deodorize your fridge and freezer by putting in an open container of baking soda to absorb odors. Stir and turn over the soda from time to time. Replace every 2 months.
    Soda absorbs kitty litter odors. Cover the bottom of the kitty box with 1 part soda; then add a layer of 3 parts kitty litter on top.
  • Always add 1/2 cup soda to your washing machine load.
  • Clean combs and brushes in a soda solution.
  • Wash food and drink containers with soda and water.
  • Wash marble-topped furniture with a solution of 3 tablespoons of soda in 1 quart of warm water. Let stand awhile, then rinse.
  • Clean Formica counter tops with baking soda on a damp sponge.
  • Wash out thermos bottles and cooling containers with soda and water to get rid of stale smells.
  • To remove stubborn stains from marble, plastic surfaces, scour with a paste of soda and water.
  • Wash glass or stainless steel coffee pots (but not aluminum) in a soda solution ( 3 tbsp. soda to 1 quart water).
  • Run you coffee maker through its cycle with a soda solution. Rinse.
  • Give baby bottles a good cleaning with soda and hot water.
  • Sprinkle soda on barbecue grills, let soak, then rinse off.
  • Sprinkle soda on greasy garage floor. Let stand, scrub and rinse.
  • Polish silverware with dry soda on a damp cloth. Rub, rinse and dry.
  • For silver pieces without raised patterns or cemented-on handles: place the silver on aluminum foil in an enamel pot. Add boiling water and 4 tbsp. baking soda. Let stand, rinse and dry.
  • Reduce odor build-up in your dishwasher by sprinkling some soda on the bottom.
  • Run your dishwasher through its cycle with soda in it instead of soap to give it a good cleaning.
  • To remove burned-on food from a pan: let the pan soak in soda and water for 10 minutes before washing. Or scrub the pot with dry soda and a moist scouring pad.
  • For a badly-burned pan with a thick layer of burned-on food: pour a thick layer of soda directly onto the bottom of the pan, then sprinkle on just enough water so as to moisten the soda. Leave the pot overnight, then scrub it clean next day.
  • Rub stainless steel and chrome with a moist cloth and dry baking soda to shine it up. Rinse and dry. On stainless steel, scrub in the direction of the grain.
  • Clean plastic, porcelain and glass with dry soda on a damp cloth. Rinse and dry.
  • Remove that bad smell from ashtrays with soda and water.
  • Sprinkle a bit of dry soda in your ashtrays to prevent smoldering and reduce odor.
  • Clean your bathroom with dry soda on a moist sponge - sink, tub, tiles, shower stall, etc.
  • Keep your drains clean and free-flowing by putting 4 tablespoons of soda in them each week. Flush the soda down with hot water.
  • Soak your shower curtains in water and soda to clean them.
  • To remove strong odors from your hands, wet your hands and rub them hard with soda, then rinse.
  • Sprinkle baking soda on your wet toothbrush and brush your teeth and dentures with it.
  • Sprinkle soda in tennis shoes, socks, boots and slippers to eliminate odor.
  • Add 1/2 cups or more of baking soda to your bath water to soften your skin.
  • Putting 2 tbsp. of baking soda in your baby's bath water will help relieve diaper rash irritations.
  • Apply soda directly to insect bites, rashes and poison ivy to relieve discomfort. Make a paste with water.
  • Take a soda bath to relieve general skin irritations such as measles and chicken pox.
  • Take 1/2 teaspoon of baking soda in 1/2 glass of water to relieve acid indigestion or heartburn.
  • Gargle with 1/2 tsp. baking soda in 1/2 glass of water. Freshens and cleans your mouth.
  • Used as a mouthwash, baking soda will also relieve canker sore pain.
  • To relieve sunburn: use a paste of baking soda and water.
  • Bug bites: use a poultice of baking soda and vinegar.
  • Bee sting: use a poultice of baking soda and water.
  • Windburns: moisten some baking soda and apply directly.
  • Making Play Clay with baking soda: combine 1 1/4 cups water, 2 cups soda, 1 cup cornstarch.
  • Use soda as an underarm deodorant.
  • If your baby spits up on his shirt after feeding, moisten a cloth, dip it in baking soda and dab at the dribbled shirt. The odor will go away.
  • When scalding a chicken, add 1 tsp. of soda to the boiling water. The feathers will come off easier and flesh will be clean and white.
  • Repel rain from windshield. Put gobs of baking soda on a dampened cloth and wipe windows inside and out.
  • Add to water to soak dried beans to make them more digestible.
  • Add to water to remove the "gamey" taste from wild game.
  • Use to sweeten sour dishcloths.
  • Use dry with a small brush to rub canvas handbags clean.
  • Use to remove melted plastic bread wrapper from toaster. Dampen cloth and make a mild abrasive with baking soda.

January 29, 2007

Making the Kitchen Fun for Your Kids

When I was a youngster from time to time things seemed so boring on the farm. My parent’s farm is about 20 minutes from ANY town and there were not many children my age to play with.

Now, don’t get me wrong there was plenty to do when the weather was nice outside. I would ride horses, go swimming in the creek, ride the four wheeler all around the back roads through-out the farm, catch bugs and craw daddies, help my mother plant flowers or help dad in the garden, take walks through the woods and I had my daily chores every morning and night as well. So, as you can see there was always plenty to do, but when the weather was rainy, cold, snowy….You couldn’t really do all the fun things outside you wanted to.

It was days like these that my mother would pull me into the kitchen (this is when I was a youngster, remember) and she and I would make crafts together like play dough and homemade bubbles.
It’s funny how it’s these small things that have really stuck in my mind. In fact, if I really think back this is how my mother really introduced to me the kitchen. She made the kitchen not a place where eating was done, but made the kitchen a place of fun for me at an early age. I truly believe this is one reason I enjoy being in the kitchen so much today as a grown woman.

So, today I want to share not traditional “cooking” recipes, but fun “craft” recipes that can help you teach the joys of the kitchen to your children. I know you and your kids will have as much fun making these crafts as I did with my mother, plus you’re making memories and traditions together.

I don’t have children, but I do have a niece, three nephews and another nephew on the way, so I do have quite a bit experience with youngsters. Here are some of my suggestions for making crafts in the kitchen with your kids a bit easier on you:

· Embrace the mess. Children are messy. Children in the kitchen are even messier. If it makes you feel better, cover the table or counter with newspaper or plastic bags. After that, let it go and enjoy the activity.

· Keep the projects appropriate for the child's age and skill and the time you have.

· Make maracas: Fill clean screw-top plastic bottles with different quantities of dry foods (such as beans, rice or peanuts) to create a variety of maracas. Children also can decorate paper labels to tape around the outside of the bottles.

· Fashion jewelry out of pasta and cereal: String cereal O's and different shapes of pasta tubes on yarn or kitchen twine to make necklaces and bracelets. Use markers to color the pasta. (This was one of my favorites!)

· Paint with pudding: Make several different batches of instant pudding, then let children paint on paper with it using large brushes or their fingers. And the best part: it’s ok if they lick their fingers.

· Plant a forest: Of sugar cone trees, that is. Hopkins says that overturned ice cream cones can be decorated like trees (or spaceships or towers or...) using candy sprinkles, peanut butter, prepared frosting, or anything else that sticks.

All the following recipes are from: — Exploratorium, www.exploratorium.eduPlay

Play-Dough
(Start to finish: 10 minutes)

1/2 c. kosher salt
1 c. all-purpose flour
1 T. cream of tartar
1 T. vegetable oil
1 c. water
Liquid food coloring

In a small saucepan, combine all ingredients except the food coloring. Stir until well-mixed, then add food coloring a few drops at a time until desired color is reached. The mixture will start out soupy.

Set the saucepan over medium heat and stir until the mixture begins to clump, dry and gets difficult to move the spoon through, about 3 to 4 minutes. Remove from the heat and transfer the dough to a dry work surface.

When the dough has cooled to the touch, knead until smooth and cool. To store, refrigerate the dough in plastic bags. Makes about 2 cups of dough.

Colored Salt
(Start to finish: 10 minutes)
Zip-close plastic bag
3 T. coarse salt (such as kosher)
Food coloring
White glue
Construction paper

In the plastic bag, combine the salt and 2 or more drops of food coloring. Seal the bag and shake until the salt is colored. Use the glue to create patterns or designs on the paper, then sprinkle the salt over it. Let the glue and salt set for a few minutes, then tip the paper to remove excess salt. Repeat the process with different colors.

Bubbles
2/3 c. Joy dish soap
1 gallon water
2 to 3 T. glycerin (available at pharmacies)

In a large bowl, gently stir together all ingredients. Let sit uncovered overnight. To blow bubbles, fashion hoops from pipe cleaners or tubes from toilet paper and paper towels.

January 26, 2007

15 Foods You Shouldn’t Live Without

A friend passed this on website on to me the other day that includes a list of the foods your body needs. I thought it was very interesting and found that I am following some of the health guidelines, but I need to work on eating more plums and yams though. I think the only time I really eat yams is during the holidays.

From ProtectYourIncome.com

Apples – The old saying really is true. An apple a day keeps the doctor away, and maybe even some damaging diseases. Apples are beneficial on so many different levels. They pack more Vitamin C than an orange and they are full of antioxidants that will help your body stay healthy. With so many different varieties, it’s easy to pick and choose the flavor that’s perfect for you. Try eating a few slices of apple as an after-dinner snack, or add it to your salad for a bright kick.

Flaxseed – This ancient grain is extremely beneficial, particularly to women who suffer hormone imbalances. As little as two tablespoons a day can help maintain bone health and cut your risk of breast cancer. Make sure you grind it properly before eating, so that you can properly digest it. Flaxseed is great on salads, or even sprinkled into a healthy shake. Some people even find that it adds a delightfully nutty flavor to their morning coffee.

Carrots – These little roots are chock full of beta carotene, which your body turns into Vitamin A. They are essential for eye health and there are a variety of different ways to add them to your diet. Cooking carrots does tend to lessen their benefits, so try to eat them raw when possible. Beta carotene can even help ward off cancer, especially skin cancer. If you have trouble eating them raw, try a few in a healthy soup, or dehydrate them for an afternoon snack.

Tomatoes – Tomatoes are extremely rich in lutein, an incredible nutrient that can keep your eyes healthy. They also contain lycopene, which is an antioxidant. Recent studies have shown that eating a few slices of tomato a day can halve your risk of developing cancer, including bladder, stomach and colon cancer. It’s easy to add a few slices to your dinner, or for a special treat, brush your favorite dressing on them a few minutes before eating.

Onions – Onions have been shown to help lower blood pressure and they contain flavonoids, which are believed to protect your body against cancer. In some cultures, raw onions are applied to the soles of the feet during an illness to help draw out the disease. While chopping onions helps release their beneficial nutrients, you can also try grilling them with a steak, adding a few slices to a hamburger or you can add a few slices to your salad. Onions are also easy to add to soups, stews and stir-fry dishes.

Garlic is extremely beneficial. It can help lower blood pressure, and may even reduce the levels of bad cholesterol in your blood stream. It may even help prevent cancer of the stomach. Add a clove to your next batch of mashed potatoes, or a few slices to your next meal. In addition to making your dish more tender, you’ll be reaping the fantastic benefits. To remove garlic’s odor from your hands, rub them on stainless steel. For garlic breath, try a sprig of fresh parsley.

Cauliflower – This member of the cruciferous family is believed to help prevent cancer and promote a healthy liver. In fact, it may even be beneficial to those suffering from rheumatoid arthritis. Try a few fresh pieces of cauliflower in your salad for maximum benefits, or add it to a soup or stir-fry. If the strong flavor bothers you, its close relative broccoli is also just as beneficial.

Plums – If you suffer from anemia, adding plums to your diet may actually help your body absorb more available iron from your blood stream. Plums are also rich in Vitamin C and it may even help reduce the threat of macular degeneration. Try adding a fresh plum as a desert snack, or if you prefer them cooked, a plum tart is fantastic. Cooking plums does tend to lessen their benefits, but you’ll still get some nutrients. Dried plums, or prunes as they are commonly called, are also beneficial.

Green Tea – This tea is rich in antioxidants and it’s extremely easy to find. Make sure to look for green tea that is made in countries that do not allow certain toxic pesticides to be used during the growth process for a healthier cup of tea. Green tea has been found to reduce the risk of stroke and promote a healthy immune system. You can drink it hot or cold and still benefit from its incredible properties. Green tea can also be used as a poultice on wounds.

Cranberries – These little berries are very important to urinary tract health and they are also rich in antioxidants and vitamins. In fact, the latest research has shown that cranberries can even be used as a very effective antibiotic. Cranberry juice is a great way to get your daily dose of health, but make sure you’re drinking natural juice and not a 10% juice cocktail. You can also try canned cranberries for a delicious side dish at your next meal.

Yams – Candied or not, yams are very good for you. They are an excellent source of Vitamin B6, which is essential for heart health. They also contain a high amount of potassium, which is very important in controlling blood pressure. Wild yams are commonly used to help women suffering from hormonal imbalances and they can even help balance your body’s blood sugar. Try adding yams to replace potatoes as a side dish.

Celery – Celery is a great source of Vitamin C and it Celery contains active compounds called Pthalides which help maintain good blood vessel health. Pthalides can relax the muscles of the arteries that regulate blood pressure allowing these vessels to dilate. Celery can also be a diuretic. . Don’t slather your celery in artery clogging cheese or peanut butter though. Slice up a stalk and add it to your salad or your next pot of soup instead.

Olives – Whether you like them green or black, olives are an excellent source of Vitamin E and it can even act as an anti-inflammatory. They are also a good source of iron, copper and dietary fiber. Olives are easy to add to most dishes. Slice them up and add them to your next salad or just eat them plain. You can also experiment and try olive bread, or just stick with olive oil in your cooking to enjoy its benefits.

Strawberries – This favorite berry is rich in phenols which are good for your heart, can protect against cancer and they can even act as an anti-inflammatory, making them a wonderful addition for arthritis or chronic pain sufferers. Recent studies have shown that strawberries can also protect you from macular degeneration. They are rich in folate, Vitamin B5 and many other nutrients.

Honey – If you’re looking for a natural sweetener that’s actually good for you, honey is an excellent choice. It has anti-bacterial, anti-fungal and anti-viral properties and can protect your body from free-radicals and promote quick healing of wounds. Try to find a apiary near your area for fresh honey. Processed honey loses some of its benefits, but it’s a great alternative in a pinch. Try it on toast as an alternative to butter, or add it your oatmeal for a great sweet taste.

January 25, 2007

Paula in the News

Brush up your baking skills with Paula Deen herself! Here you’ll find five cooking tips by Paula Dean on the following lessons: Whipping Egg Whites, Caramel Tips, Old Fashioned Pie Crusts, Whipped Cream and Toasting Nuts.

Also, Paula Deen is the new spokesperson for Smithfield Foods. One of our farm broadcasters at Brownfield, Tom Steever, recently talked to Dennis Treacy of Smithfield about Ms. Paula becoming a new member of the Smithfield team. Treacy says that Paula is a real lady and the company is proud to have a spokesperson like her that supports the company values: families sitting down at the table and eating some ham and beef and enjoy each other’s company. Listen to the interview here.

I caught a recent Paula’s Home Cooking that I really enjoyed. It was for newlyweds, which I still consider myself (My husband and I have been married almost three years).

On this episode Paula and Jamie made: Chicken Divan, Shrimp and Scallop Fraiche and Paula's Lemon Cheesecake with 7-minute frosting.

Here is the recipe for the Chicken Divan. For the other recipes go here.

Chicken Divan
From
Paula’s Home Cooking

2 (10-ounce) packages frozen broccoli, chopped
6 cups shredded chicken, cooked
2 (10 3/4-ounce) cans condensed cream of mushroom soup
1 cup mayonnaise
1 cup sour cream
1 cup grated sharp cheddar
1 tablespoon fresh lemon juice
1 teaspoon curry powder
Salt and pepper
1/2 cup dry white wine
1/2 cup freshly grated Parmesan
1/2 cup soft bread crumbs
2 tablespoons butter, melted

Preheat oven to 350 degrees F.

Remove the outer wrappers from the boxes of broccoli. Open 1 end of each box. Microwave on full power for 2 minutes, until thawed. Drain the broccoli and put into a casserole dish. Add the shredded chicken.

In a medium bowl, combine the soup, mayonnaise, sour cream, Cheddar, lemon juice, curry powder, salt and pepper, to taste, and wine. Whisk together to make a sauce. Pour the sauce over the broccoli and chicken. Mix well with a spatula.

Place the mixture into an 11 by 7-inch casserole dish or 2 (9-inch) square disposable aluminum foil pans that have been sprayed with vegetable oil cooking spray. Pat down evenly and smooth with a spatula. Combine the Parmesan, bread crumbs and butter and sprinkle over the top.
Bake for about 30 to 45 minutes.

Cook's Note: Try topping with Cheddar or Gruyere cheese.

January 24, 2007

Growing Up in the FFA

National Western Stock Show

I grew up on a registered Charolais cattle operation in southwest Missouri, “God’s Country”, as I like to call it. I showed cattle at many state and national cattle shows across the country throughout my high school and college years. My family and I raised the number two show heifer of the year in the Charolais breed and in 2000 we bred and raised the Reserve Grand Champion Heifer at the Charolais Junior Nationals. [Larger Photo Here]

I was also active in many ag youth organizations, but the organization that made the biggest difference in my life was the National FFA Organization.

I joined the FFA when I was a freshman in high school at Mountain Grove. My first Ag Science 1 class opened my eyes to the ag industry and to the world of leadership opportunities that the FFA made possible.

Missouri State FFA Officer Team 00-01

I was highly involved in the FFA throughout high school and college. It was through the organization that I traveled overseas to Australia for two months, attended the Washington Leadership Conference in Washington D.C., won state and national FFA Proficiencies awards, became a 2000 – 2001 Missouri State FFA Officer, was awarded college scholarships to further my education in agriculture and learned what it meant to be a leader and how to motivate and lead others. [Missouri State FFA Officer Team: Larger Photo Here]

Looking back throughout my FFA career though, it wasn’t the awards or the travel experiences that made the biggest impact on my life. It was the people. The friends I made and the professional contacts I gained are what have made me the person I am today.

Being a state FFA officer I had the opportunity to meet some incredible people across Missouri. The students that I met, the FFA instructors that I helped out with leadership programs and the other state officers on my team that year were the huge influences on the person I am today. My teammates became like a family. Although that was about seven years ago that I was a state FFA officer, many of those teammates are still very close friends.

One such friend and past office teammate is Molly (Kaimann) Schneider. Molly is now married and has some lovely daughters with her husband Josh. She loves to cook as we all do and sent me a very hearty recipe that her mother always makes. I know you will enjoy it.

Thanks Molly!

Rice Soup
By Molly Schneider

In a large pot boil beef soup bones and a few healthy shakes from the salt shaker (we prefer short ribs because they are full of flavor and meat) for several hours on the stove.

Boil until meat is cooked. Remove bones and remove meat from the bones. While removing meat from bones add 2-3 hand-fulls of rice (not the minute kind) to the pot to begin cooking.

Add meat back to soup, not the bones.

When rice has cooked and is finished, add tomato juice. We use home canned juice, but store bought will work. (1-2 quarts for a large pot.) You can always add more if you want more of a tomato flavor.

Let the soup simmer for 30 minutes to 1 hour or longer.

Best served with cheese and saltine crackers or homemade rolls.

It is even better the days after because it gets a little thicker. It the soup gets too thick just add more tomato juice.

I know this recipe is full of approx., but you really can't mess it up. Add as little or much as you like of the meat, rice and tomato juice.

Molly’s Note: My mom usually puts the bones on to begin cooking around noon to 1:00 and we eat around 6:30. The soup is never turned off, adjust the heat from high when boiling to low when simmering. This is my favorite. It can feed lots of people and fill them up because of the rice. My grandma made it a lot when her 11 children were home. It went far with little cost.

January 23, 2007

Snow means Baking Time

This past weekend was another one filled with about 5 inches of snow in Mid-MO. (I am really beginning to get “cabin fever”.)

I miss being on my parent’s farm. Even when the weather is cold, snowy and wet there are chores that need tendin’ to. I never remember being bored on the farm. Water gaps had to be fixed, ice covered ponds had to be busted up for the livestock, birthing cattle had to be brought up to the barn and newborn calves needed extra special care in the winter time.

Yes, living on the farm you seldom get a day off just because of a snow and ice storm. Oh, how I miss those days on the farm…

The other memories I have on my parent’s farm during the winter time is winter baking with my mother. After chores were done mom and I would try out new recipes for cookies, pies, cakes and breads at the house. We would thumb through old Farm Journal and the local Douglas County Fire station cookbooks for new recipes. (The Douglas County cookbooks are complied of recipes from the farm cooks all around the area and are put out each year, my mother has some that are over 30 years old. They are the “best” cookbooks for good Ozark cooking.)

It was times like these with my mother that I miss the most. We shared many laughs and happy memories in the kitchen. We still have times like that, but now that I live about 3 hours away from my parents, it’s just a little harder to get together as often as I would like to.

I was recalling the past winter memories with my mother in her kitchen this past weekend, and I decided I would do some baking. By the time Sunday came I had baked: 30 Ginger cookies, 6 dozen chocolate cookies, 2 loaves of Amish Friendship Bread and a few other goodies.

It was a great weekend in all and I was reminded of my wonderful mother the entire time. Here are the recipes from this past weekend.


Chocolate Cookies

Super Duper Chocolate Crinkles
By Lane
Makes 6 dozen cookies

½ c shortening
4 squares unsweetened chocolate
2 c. sugar
2 tsp. vanilla
4 eggs, unbeaten
2 c. flour
2 tsp. baking powder
1/8 tsp. salt
½ c. chopped nuts
Confectioners Sugar

Melt shortening and chocolate; add sugar and vanilla; mix well. Add egg, one at a time, beating well after each.

Sift together all dry ingredients; add to chocolate mixture, fold in nuts.

Chill dough for a couple of hours.

Roll dough into small balls and then roll in confectioners sugar, coating well.

Bake in a 350 degree oven for 12-13 minutes.


Ginger Crinkles

Crackle Top Ginger Cookies
From Farm Journal, 1958
Makes 25-30 cookies


1 c. shortening
2 c. brown sugar
1 egg, beaten
1 c. molasses
4 c. sifted flour
½ tsp. salt
2 tsp. baking soda
2 tsp. ginger
1 tsp. vanilla
1 tsp. lemon extract
Sugar for rolling

Cream shortening; add brown sugar gradually. Blend in egg and molasses – beat until light and fluffy.

Sift together all dry ingredients; add gradually to creamed mixture. (Dough should be soft, but not sticky or tops of the cookies will not crackle.)

Add vanilla and lemon extract. Chill for about 4 hours. Shape into ball and roll in sugar.

Bake in a 350 degree oven for 13 minutes.

January 22, 2007

How to use up those very ripe bananas

I want to thank the Amish Cook for adding ‘Home Cooking is What I Like’ as the Editor’s Choice. Kevin Williams, the editor of the Amish Cook Blog tells of his aunt keeping a starter mix of the Amish Friendship Bread for over twenty years. Wow, that’s a record for the books.

I posted about this wonderful bread a couple of posts ago and since then have received great responses from many. If you have never had the opportunity to try the bread, please do so. The recipe I provided will make four starter bags and leave you with enough batter to make two large loafs.

Banana Bread

Speaking of breads today…

Bananas are one of my favorite fruits. But, call me “picky,” I do not like overly ripe bananas. When the peeling starts turning black and brown I just can’t eat them.

So, what do I do with overly ripe bananas? I let them get WAY overly ripe, peel them and place them in freezer bags. I always have about four bags of frozen ripe bananas in my deep freeze at home. That way when I’m in the mood for banana bread or I need to make some type of banana dessert, I have plenty of ripe bananas ready to use.

(Hint: this really comes in handy around the holiday baking season.)

I’m including a banana nut bread recipe today. I’ve come up with this recipe through a lot of experimental bread recipes that I‘ve tried creating before. This one is a winner though. I suggest letting it cool completely then placing it in a plastic bag overnight and then serving it the next day. The trick to moist quick breads are letting the breads rest after cooking them and letting all the ingredients settle in.

Banana Nut Bread
By Lane

About 16 servings

6 tablespoons butter, soften
½ cup sugar
½ packed brown sugar
1 large egg
2 egg whites
1 teaspoon vanilla
2 cups mashed, very ripe bananas
1 ¾ cups all-purpose flour
1 teaspoon baking soda
½ teaspoon salt
¼ teaspoon baking powder
½ cup heavy cream
1/3 to ½ cup chopped walnuts or pecans

Preheat oven to 350 degrees.

Spray a loaf pan with nonstick spray. Beat butter in a large bowl until fluffy – 2 minutes. Add sugars, beat well. Add egg, egg whites, vanilla and beat. Add bananas and beat for about 30 seconds.

Combine flour, salt, baking powder and baking soda in a small bowl. Add the flour alternately with the cream to the banana mixture, ending with the flour mixture. Fold in nuts.

Bake about 1 hour and 12 minutes. Cool on wire rack.

January 19, 2007

Meals that Last

I've talked about how my soup lasts for a couple of days, which I really appreciate because it gives me the night off from cooking. Let’s face it – even if you love to cook – there are nights when all you want to do is relax and do nothing.

I’ll admit it! Me, the one that loves to cook. Some nights when I’m drained from work by the end of the day, I’ll call my husband and ask him to pick up take-out. That only happens about twice a month though.

Meals that last a couple of nights are great family meals and are much more affordable. The Winter Beef Veggie Soup from yesterday is a perfect example. Between my husband and me, we could eat on that soup for three lunches and dinners, changing up the sides of coarse.

Other great “meals that last”:
Corn Beef and Cabbage
McConnell Holiday Meal
BBQ Beef
Chili
Stews and Soups
Homemade Pizzas Pies
Large Pot Pies

So, I came across this recipe for a Shepherd’s Pie. I had heard of this type of pie before, but never actually made it, so I took a shot at it.

Very tasty. I did however add a few things: 1 Tablespoon of garlic powder on the meat mixture, plus some cumin and parsley. In the potato mixture I added chives and a few shakes of garlic powder also.

Shepherds Pie

Shepherd's Pie from Leftover Beef Roast and Mashed Potatoes
By Paula Deen


1 small onion, peeled and chopped
14 tablespoons butter, divided (1 stick plus 3/4 stick)
1 1/2 pounds ground beef
Salt and black pepper
8 to 10 medium red new potatoes
2 cups milk
1/2 cup sour cream
2 cups instant biscuit mix
1 1/2 cups niblet corn or mixed vegetables, prepared according to package directions

Preheat oven to 350 degrees F.

Beef Layer:
In a large skillet over medium-high heat, sauté onion in 2 tablespoons butter. Add ground beef and cook until browned. Season with salt and pepper, to taste. Set aside.

Potato Layer:
Peel and slice potatoes 1/4-inch thick. Place in a saucepan, cover with cold water, and bring to a boil. Cook for approximately 15 minutes or until fork tender. Drain potatoes and transfer to a mixing bowl. Whip potatoes with an electric mixer, mixing until moderately smooth. Don't over beat them; a few lumps are nice. Add 1/2 cup heated milk, 1 stick butter, and sour cream. Season with salt and pepper, to taste. Whip again until mixed. Adjust thickness by adding more milk, if desired.

Biscuit Layer:
Combine biscuit mix and 1 1/2 cups of milk. The mix should be thinner than that of normal biscuit mix but not runny.

Spray a 9 by 9 by 2-inch pan (or any similar casserole dish) with cooking spray. Layer mashed potatoes halfway up the sides of the dish. Next, spread a layer of corn or mixed vegetables on top of the potatoes. Then add the layer of meat. Pour the biscuit mix over the meat. Melt 4 tablespoons of butter and drizzle over top. Bake for approximately 35 to 45 minutes or until top is golden brown. Let stand for a few minutes before serving.

January 17, 2007

My Soup is On

Last week I made a huge pot of soup that my husband and I ate on for three days. I love meals that allow me to take a couple nights off from cooking. The soup also fed some of my fellow co-workers. I brought Cyndi and Julie in a bowl for their lunches one day because I wanted them to try the soup out….they both returned their bowls to me empty.

I took a recipe from Paula Deen’s Country Cookbook to originally start this recipe and each time I’ve made it I’ve changed techniques and seasonings and I finally have it exactly how I like it.

Note: To those who are already intimidated by the very long list of ingredients, don’t be. All these seasonings and ingredients go into one pot. I’ve given recipes before to some of my friends that have very long lists of ingredients and they say, “I can’t make this.” Anyone can make this soup, I guarantee it!

And if you’re in the mood for something to warm up your belly tonight and you’re just not feeling soup….there is always my White Lightening Chili.

Winter Soup

Winter Beef Veggie Soup
By Lane


Stew beef (found in grocery store by all packaged beef)
4 quarts cold water
1 can diced tomatoes
2 cans of stewed tomatoes
1 large chopped onion
3 tablespoons dried parsley
3 beef bouillon cubes
1 teaspoon vinegar
1 tablespoon dried Italian seasoning
2 tablespoons garlic powder
1 teaspoon basil
2 small cans tomato sauce
1 tablespoon seasoned salt
2 tablespoons Worcestershire sauce
1 teaspoon celery salt
1/2 teaspoon ground black pepper or peppercorns if you have them
2 teaspoons salt
2 bay leaves
2 cans cut green beans
1 can white beans
1 can corn
1 cup uncooked elbow macaroni

In a large pot add water, tomatoes, onions, stew beef and all seasonings. The only things you will not add are the veggies and pasta. Bring to a boil and cover pot, reduce heat to medium and cook for 2 hours. Stir occasionally.

Add the remaining vegetables and the macaroni and stir to distribute the ingredients. Simmer for 45 minutes. Stir occasionally. Check your seasonings here…you may need more salt or pepper, depending on your taste.

January 16, 2007

Winter Weather Pizza

This was a winter weather nightmare for many across Missouri this past weekend. On Friday, the news was calling this storm system a 15-25 year storm and they were correct.

For three days the storm system dumped freezing rain, sleet and snow across the Midwest. Springfield and St. Louis areas were those that were hit the hardest. More than 3 inches of freezing rain and sleet have knocked down trees, transformers and lines in the areas.

Being from the Springfield area my heart goes out to the many residents that are without heat during this bitterly cold weather. My husband and I have many family members and friends that have been without electricity since Friday night. You can check out photos of the Springfield area from the News Leader site.

There is hope in sight for Missouri. Governor Blunt today announced President George W. Bush granted his request for a major disaster declaration following the deadly ice storms that swept across the state over the past weekend. In addition to helping share the cost of recovery, the approval of Blunt's request opens the door for new federal resources for Missouri such as generators.

After declaring a state of emergency early Saturday, Blunt sent approximately 550 Missouri National Guard Troops to the Springfield and St. Louis areas in response to the storms. In addition, the governor provided extensive state resources to communities hit with the severe ice storms including access to dozens of large power generators and Meals-Ready-to-Eat.

Blunt noted the severe winter storms caused eight deaths and knocked out power to over 330,000 Missourians.


JC Ice Storm 2007

In Mid-Mo we received quite a bit of ice. Here is a photo of our back porch. Doesn’t look as though the ice will be melting anytime soon – the temperatures are staying in the 20’s most of the week.

Since my husband and I were trapped inside most of the weekend we did a lot of cooking. On Saturday we made some homemade pizzas with a new recipe for pizza dough that I found on Simply Recipes, which is a great cooking site. Here is the recipe instructions for the dough.


Making the pizza dough

Making the Pizza Dough
This
pizza recipe from Simply Recipes

Makes enough dough for two 10-12 inch pizzas
1 1/2 cups warm water
1 package (2 1/4 teaspoons) of active dry yeast (check the expiration date on the package)
3 1/2 cups bread flour (can use all-purpose but bread flour will give you a crisper crust)
2 Tbsp olive oil
2 teaspoons salt
1 teaspoon sugar

In the large bowl of a heavy duty electric mixer add the warm water. Sprinkle on the yeast and let sit for 5 minutes until the yeast is dissolved. Stir to dissolve completely if needed at the end of 5 minutes.

Attach a mixing paddle to the mixer. Mix in the olive oil, flour, salt and sugar on low speed for about a minute. Remove the mixing paddle and replace with a dough hook. Knead using the mixer and dough hook, on low to medium speed, until the dough is smooth and elastic, about 10 minutes. If you don't have a mixer, you can mix and knead by hand.

Dough Rising 
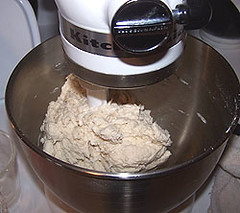
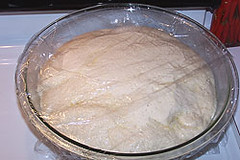
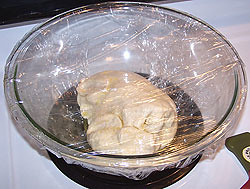
Place ball of dough in a bowl that has been coated lightly with olive oil. Turn the dough around in the bowl so that it gets coated with the oil. Cover with plastic wrap. Let sit in a warm place (75-85°F) until it doubles in size, about 1 to 1 1/2 hours. If you don't have a warm spot in the house you can heat the oven to 150 degrees, and then turn off the oven. Place the bowl of dough in this warmed oven to rise.

Dough Doubling

Preheat the oven to 450°F for at least 30 minutes, preferably an hour.

Remove the plastic cover from the dough and punch the dough down so it deflates a bit. Divide the dough in half. Form two round balls of dough. Place each in its own bowl, cover with plastic and let sit for 10 minutes.

Prepare your desired toppings. Note that you are not going to want to load up each pizza with a lot of toppings as the crust will end up not crisp that way. About a third a cup each of tomato sauce and cheese would be sufficient for one pizza. One to two mushrooms thinly sliced will cover a pizza.


Rolling Out Dough

Working one ball of dough at a time, take one ball of dough and flatten it with your hands on a slightly floured work surface. Starting at the center and working outwards, use your fingertips to press the dough to 1/2-inch thick. Turn and stretch the dough until it will not stretch further. Let the dough relax 5 minutes and then continue to stretch it until it reaches the desired diameter - 10 to 12 inches. Use your palm to flatten the edge of the dough where it is thicker. ou can pinch the very edges if you want to form a lip.

Brush the top of the dough with olive oil (to prevent it from getting soggy from the toppings). Use your finger tips to press down and make dents along the surface of the dough to prevent bubbling. Let rest another 5 minutes.

Repeat with the second ball of dough.

Tomato Sauce Recipe
by Lane


Easy way: Cheat and buy a good quality tomato sauce and add to it chopped shallots (or onions), crushed garlic, basil and whatever else seasonings you wish.


Pizza 1

Or make your own homemade
1 can crushed tomatoes
1 tsp of salt and pepper
1 (6 oz.) can tomato paste
2 cloves crushed garlic
1 tsp. basil or oregano
½ cup chopped shallots or onion

Cook over medium heat for about 10 minutes or until desired thickness.

Spread about 1/3 to ½ cups over pizza dough. Then apply your toppings.


Pizza 2

Topping time (these are some of my favorite toppings):
Shrimp
Feta Cheese
Artichokes
Peppers
Hamburger
Sausage
Bacon (Pancetta is my favorite to use)
Chicken
Zucchini
Sun Dried tomatoes
Parmesan Cheese

The best part about making your own homemade pizza is you can be adventurous with the toppings. Whatever mood you are in you can create your own personal pizza. I love making homemade pizzas also because it gives my husband and I a chance to cook together and have fun.

January 12, 2007

Amish Friendship Bread

My husband came home the other night with Amish Friendship Bread some friends of ours had made. I had never heard of Amish Friendship Bread before, nor eaten it before then. It was wonderful! And after some research on the internet, I discovered the bread has a long standing history that I want to share with you all.

From Wikipedia: Amish Friendship Bread (along with Amish Cinnamon Bread) is the chain letter of the baking world. The idea is very simple: a friend gives you a cup of yeast culture (also known as "starter") and a copy of instructions. Following the instructions, you add sugar, flour and milk and it rises. Eventually, you end up with 4 cups of the starter. You use one cup to make bread (the instructions provide you with the recipe), keep one cup to start a new cycle and give two cups to your friends. Each of your friends also gets a copy of the instructions for what to do with the yeast starter. The latter part makes it somewhat like a chain letter. Of course, Amish Friendship Bread does not come with any promises of riches for those who spread it on or curses for those who don't.

The first time "Amish Friendship Bread" was discussed on Usenet was in a posting on February 5, 1990. It was an experiment by Girl Scout Troop 15, c/o Emilie Manning in Oswego, NY and was posted by Patrick Salsbury.

Bread made following the traditional Amish Friendship Bread recipe is sweet and tastes more like a cake. The starter may be used to make lots of different types of bread.

I asked our friend Carol for the recipe and she emailed it to me the other day. (Thanks Carol)

With the freezing rain, sleet and snow that is being called for the entire weekend here in Missouri, I know what I am planning on doing – making some of this tasty bread for some friends.

Amish Friendship Bread

Amish Friendship Bread Starter and Recipe

To start the bread:
“Day 1” mix together 1 cup flour, 1 cup sugar and 1 cup milk.

(Do not refrigerate. If air gets in the bag, let it out. It will be normal for the batter to thicken, bubble and ferment.)

__ __ __ __ __ __ __ Day 1 If you receive the bag – do nothing. (Or you make it from scratch)
__ __ __ __ __ __ __ Day 2 Squeeze the bag.
__ __ __ __ __ __ __ Day 3 Squeeze the bag.
__ __ __ __ __ __ __ Day 4 Squeeze the bag.
__ __ __ __ __ __ __ Day 5 Squeeze the bag.
__ __ __ __ __ __ __ Day 6 Add 1 cup flour, 1 cup sugar, 1 cup milk
__ __ __ __ __ __ __ Day 7 Squeeze the bag.
__ __ __ __ __ __ __ Day 8 Squeeze the bag.
__ __ __ __ __ __ __ Day 9 Squeeze the bag.
__ __ __ __ __ __ __ Day 10 Combine in a large non-metal bowl—the batter and add 1 cup flour, 1 cup sugar, and 1 cup milk

Mix with a wooden spoon (or plastic one). Pour four, 1 cup starters into 4 large ziplock bags. Keep one for yourself and give three starters with instructions to friends.

Mix in with the remaining batter:
1 cup oil
½ t. salt
1 cup sugar
½ t. baking soda
1 t. vanilla
1 ½ t. baking powder
3 large eggs
2 t. cinnamon
2 cups flour
½ cup milk
1 large box instant vanilla pudding

Pour into 2 large greased and sugared (cinnamon & sugar) loaf pans. Sprinkle cinnamon and sugar on top if desired. Bake at 325 degrees for 1 hour.

I usually split the recipe into four batches. Give away as many batches as you do not want, and use the rest for bread. Each batch would make 2 loaves.

Notes:
  • If you are starting this recipe from scratch, on “Day 1” mix together 1 cup flour, 1 cup sugar and 1 cup milk.

    If you mix the sugar and flour together and then mix the milk in with the sugar/flour mixture it does not clump together as much.

    Nuts may be added.

    Less rich bread? Substitute ½ cup oil and ½ cup applesauce for 1 cup oil.

    The sugar in the last addition may also be reduced by about half.

    Pistachio pudding or any other kind may be substituted.

January 11, 2007

Tortellini Alfredo with Prosciutto and Artichoke Hearts

I love pasta. As a kid my brothers would call me noodle head because all I wanted to eat was pasta. Spaghetti, lasagna, mac n’ cheese, even plain pasta with some sprinkles of parmesan cheese made me happy.

I have acquired quite a few pasta cookbooks through the years. From making homemade pasta (which I still have never tried) to creating the perfect cream sauce, these cookbooks are stacked full of great Italian recipes.

So, when I was putting together our company cookbook this past year and I came across a tortellini recipe that Clarice submitted I was intrigued.

I love pasta. I love prosciutto. And I love artichokes. This was a recipe for me. I was quite surprised to find how easy this recipe was. You know me, I like to add some ingredients to every recipe. On this dish I also added 1 clove of smashed garlic, ½ teaspoon of salt and pepper and 1 dash of basil.

Thanks for another great recipe Clarice!

Tortellini Alfredo with Prosciutto and Artichoke Hearts
by Clarice Brown


Makes up to 4 to 6 servings
Prep: 10 mins., Cook: 35 mins.

2 (9-oz) packages refrigerated cheese-filled tortellini
1 cup whipping cream
½ cup (2 oz.) freshly grated Parmesan cheese
3 strips prosciutto, chopped
3 marinated artichoke hearts, sliced

Cook tortellini according to package directions, drain and set aside.

Heat cream in a large skillet over low heat. Gradually sprinkle in cheese, stirring constantly, until blended. Simmer, stirring occasionally, 15 to 20 minutes.

Add tortellini, prosciutto, and artichoke hearts; simmer, stirring occasionally, 5 to 10 minutes or until sauce is slightly reduced. Serve Immediately.

January 10, 2007

Ozark Chicken Pot Pie

Over this past weekend I took some time to catch up on some much needed chores around the house: cleaning, re-arranging the closets, washing the windows and trying my hand at making my own chicken pot pie.


Chicken Pot Pie

Saturday afternoon while my husband was fishing at Lake Ozark I decided that for dinner I would try making my own chicken pot pie. Now I’ve cooked many pot pies before, but I’ve never really attempted to make my own recipe from scratch before.

I dug out one of my Paula Deen magazines because I had remembered seeing a crust recipe that I thought would be perfect for a pot pie in the last issue. Plus, the dough was made with a food processor, so this would give me the chance to use the new Kitchen Aid Food Processor I got for Christmas.

Next, I decided I would make a large pot pie, a casserole sized one so we could have dinner and lunch for a couple of days.

I began pulling out my ingredients, casserole dish, pots and pans and utensils.

Pastry Dough

I made the crust and was letting it chill in the fridge and by then the chicken and the potatoes were done. I chopped up the chicken and drained the potatoes and pulled out a couple of cans of mixed veggies. Now, this is where things went down hill fast.

I was at the sink opening the cans with my piece of junk can opener and it happened. I knew that someday it would happen, but it finally happened. My can opener doesn’t make very good clean cuts and leaves can lids very messy and hairy. I was trying to pop open the lid that was stuck in the can and I sliced the entire palm of my hand open.

It was my own fault, I shouldn’t have been trying to dig out the lid with my hand, but I was. I ran to the bathroom and all I could find was small band aids. About 12 band aids later I finally went back to cooking my pot pie. It was not easy finishing everything up with a damaged hand….have you ever tried rolling out pastry dough with a bandaged hand? It’s not very easy. But I finally got the casserole in the oven and baked.

On a side note: Later that day I went to Lowe’s to use a gift certificate I received for Christmas. I bought a brand-spanking new Kitchen Aid Can Opener and it works great!
Don’t be afraid to adjust this recipe to suit your own family’s tastes. A recipe is just guidelines, not rules you must follow. Be adventurous with your recipes and try new ingredients.

Chicken Pot Pie

Ozark Chicken Pot Pie
By Lane


2 cups peeled red potatoes cut about ¼ of an inch
2 cans of mixed veggies
3/4 cup butter
1 onion, chopped
½ all-purpose flour
2 teaspoons garlic powder
1 teaspoon ground sage
1 teaspoon Italian seasonings
½ teaspoon poultry seasonings
1 teaspoon salt
½ teaspoon black pepper
2 cans chicken broth
1 cup heavy cream
4 cups cooked chicken, chopped
1 crust (recipe follows)
1 large egg, beaten

Grease a 3 quart baking dish.

Boil potatoes over heat for 5-6 minutes, drain and add drained canned vegetables to pot.

Melt butter in a very large saucepan. Add onions and cook for 3 minutes, stir in flour and all seasonings and cook for 2 minutes, stirring. Stir in broth and cream and cook for 7 minutes. Stir in chicken and vegetables and cook for 18 minutes.

Pour into casserole dish. Preheat oven to 400 degrees.

On a floured surface roll out the pastry crust to about 1/8 inch thickness. Cut into ½ inch strips. Arrange crust in lattice design over the filling, trim strips even with the dish. Brush crust with beaten egg.

Bake 28 minutes. The casserole will be done when it is golden brown.

Flaky Pastry Crust
By Paula Deen

I love using this crust for the pot pie…very flaky. If you don’t have a food processor you’ll have to do everything by hand though.

2 ¼ cups all-purpose flour
½ teaspoon salt
½ cup cold vegetable shortening, diced
¼ cup cold butter, diced
¼ cup cold water

In a food processor add flour and salt, pulsing to combine. Add shortening and butter, pulse until mixture resembles corn meal. With the processor running, add cold water through the chute, processing until combined. Press mixture gently into a 4 inch disc; cover with plastic wrap and chill 1 hour.

January 9, 2007

Country Style Steak

Country Steak

Country fried steak is one of my favorite meals, only if it is cooked right though. But, the problem is there is a ton of fat in country fried steak because of the “fried” part. That doesn’t really fit in with my eating healthy kick right now, so here is a good substitution I’ve used.

After tenderizing the steak and then cooking it at a low temperature the meat comes out so tender and juicy. This is sure to be a crowd pleaser around your home in no time. Don’t be afraid to use whatever spices you prefer. I change this recipe about every time I make it, but usually these are the spices I always include.

Country Steak
By Lane


2 pounds beef bottom round, trimmed excess fat
2 teaspoons kosher salt
1 teaspoon ground sage
1 teaspoon garlic powder
1 teaspoon freshly ground black pepper
3/4 cup all-purpose flour
1/4 cup bacon drippings
2 cups chicken broth
1 teaspoon dried thyme

Preheat oven to 300 degrees. Cutting with the grain of the meat, cut into about ½ inch slices. Tenderize meat, then salt and pepper and dredge in the flour. Again, tenderize the meat until the slices are about ¼ inch thick. Dredge once more in the flour.

Heat a large Dutch oven or an oven-proof pot and cover the bottom of pot with bacon fat. Add steak and cook until browned. Remove and add broth and other seasonings to pot and bring mixture to a boil. Place steak back in pot and cover pot. Place in oven and cook for about one hour and 45 minutes.

(The meat will be very tender when it is ready.)

January 8, 2007

Healthy Sandwich Time

Here is a healthy meal for us that made a New Year's Resolution to eat healthier in 2007. This recipe comes from the newest edition of Cooking with Paula Deen.

I love panini sandwiches. They are quick to make and taste oh so good.

Chicken Sandwich

Chicken Panini
Makes 4 servings

1-1/2 pounds boneless skinless chicken breasts
1 teaspoon Greek seasoning blend
1 tablespoon olive oil
1/2 red bell pepper, thinly sliced
1/2 onion, thinly sliced
1/2 tomato, seeded and thinly sliced
4 slices mozzarella cheese
4 sandwich size loaves of ciabatta bread

Cut chicken breasts into thin slices. Sprinkle evenly with Greek seasoning.

In a medium skillet, heat olive oil over medium-high heat. Add chicken, and cook 4 minutes, stirring occasionally. Add bell pepper, onion, and tomato, and cook 5 minutes, or until tender.Preheat panini grill to high.

Slice ciabatta in half horizontally. Divide chicken mixture evenly over bottom halves of bread. Top each with a slice of cheese. Cover with tops of ciabatta.

Spray the grill with cooking spray. Place sandwiches on grill, and close grill lid, pressing down if needed. Grill panini until bread is crusty and browned, and cheese is melted (about 5 minutes). Serve immediately

January 5, 2007

The Podchef Site - Check it Out

In today’s age of food and genetics many are puzzled about what is safe and what’s not to put on their food. GMO’s, herbicides, fertilizers, EColi, BSE….all of these issues are on the minds of many.

From placing fertilizers on the gardens we grow at home to the farmers that use chemicals on their crops to remain competitive in the ag industry…What does all of this mean for the food that we consume?

The Podchef site discusses many of these issues. As the site reads: Welcome to the Podchef's Gastrocast! The podcast about cooking, food, and the politics of what we eat. I’ve listen to a few of the podcasts and I’m very impressed.

Whether you come from a farm or not, I think that everyone can gain a little knowledge from this site. Whether you agree or not it’s worth a read and an open mind.

Fruitcakes, they aren't bad

Fruitcake

A friend passed along an interesting article from the Chicago Sun Times to me yesterday about a lady that started a fruitcake specific blog. Although it’s past the holiday season I thought you all would enjoy reading the article.

This fellow food blogger tried a variety of fruitcakes from all over the place and posts on her blog photos and opinions about the cake.

Many loathe fruitcakes for some strange reason. Probably because their only taste of fruitcake was a bad one. But, good news, there are really good fruitcakes out there also. So, if you are one that has a bad taste in your mouth because of bad fruitcake, try out this recipe from the host of Good Eats, Alton Brown.

Free Range Fruitcake
By Alton Brown, Good Eats

1 cup golden raisins
1 cup currants
1/2 cup sun dried cranberries
1/2 cup sun dried blueberries
1/2 cup sun dried cherries
1/2 cup dried apricots, chopped
Zest of one lemon, chopped coarsely
Zest of one orange, chopped coarsely
1/4 cup candied ginger, chopped
1 cup gold rum
1 cup sugar
5 ounces unsalted butter (1 1/4 sticks)
1 cup unfiltered apple juice
4 whole cloves, ground
6 allspice berries, ground
1 teaspoon ground cinnamon
1 teaspoon ground ginger
1 3/4 cups all purpose flour
1 1/2 teaspoons salt
1 teaspoon baking soda
1 teaspoon baking powder
2 eggs
1/4 to 1/2 cup toasted pecans, broken
Brandy for basting and/or spritzing

Combine dried fruits, candied ginger and both zests. Add rum and macerate overnight, or microwave for 5 minutes to re-hydrate fruit.

Place fruit and liquid in a non-reactive pot with the sugar, butter, apple juice and spices. Bring mixture to a boil stirring often, then reduce heat and simmer for 5 to 10 minutes. Remove from heat and cool for at least 15 minutes. (Batter can be completed up to this point, then covered and refrigerated for up to 2 days. Bring to room temperature before completing cake.) Heat oven to 325 degrees.

Combine dry ingredients and sift into fruit mixture. Quickly bring batter together with a large wooden spoon, then stir in eggs one at a time until completely integrated, then fold in nuts. Spoon into a 10-inch non-stick loaf pan and bake for 1 hour. Check for doneness by inserting toothpick into the middle of the cake. If it comes out clean, it's done. If not, bake another 10 minutes, and check again.

Remove cake from oven and place on cooling rack or trivet. Baste or spritz top with brandy and allow to cool completely before turning out from pan. When cake is completely cooled, seal in a tight sealing, food safe container. Every 2 to 3 days, feel the cake and if dry, spritz with brandy. The cake's flavor will enhance considerably over the next two weeks. If you decide to give the cake as a gift, be sure to tell the recipient that they are very lucky indeed.

January 4, 2007

Pot Pies for Fair Weather Days

It’s a cold and rainy day here in Mid-MO today. It’s days like this that I want to curl up with a blanket and a bowl of some type of pot pie.

Wikipedia describes a Pot pie is a type of baked savory pie with a bottom and top (or just top) covered in flakey crusts and baked in its own pie tin.

This is in contrast to the Australian meat pie and many British regional variants on pie recipes which may have a top of flakey pastry, but the body is made from a heavier more mechanically stable, but still edible, shortcrust, hot water crust or similar pastry.

This is a recently modern advancement of the pasty which often required one to discard the crust as it was much harder than the rest of the pastry.

My definition is a little different. Pot pies are a true comfort food that brings a smile to any face. Some are very elaborate and some quick and easy.

Today’s pot pie recipe is one that I use when I’m in a rush to get dinner on the table. I came across it in one of my Paula Deen cookbook’s awhile ago and I’ve made this pot pie quite a bit since then.

It is a little different than most pot pies because the crust is just biscuit mix, no short crust to mix up, which really helps get this dish on your table in a snap. Curl up with a plate of this dish the next time the weather is gloomy…I guarantee it will make the day a little brighter.

Chicken Pot Pie

Quick and Easy Chicken Pot Pie
by Paula Deen
Makes 6 to 8 servings

2 (10.75-ounce) cans cream of chicken soup
1 cup sour cream
1/2 cup milk
1/2 teaspoon dried parsley flakes
1/4 teaspoon garlic powder
1/4 teaspoon salt
1/4 teaspoon ground black pepper
1 (1-pound) package frozen mixed vegetables, thawed
3 cups chopped cooked chicken
1-1/2 cups Bisquick baking mix
1/2 cup grated sharp Cheddar cheese
1/2 cup milk

Preheat oven to 350°F. Lightly grease a 13x9x2-inch baking dish.In a large bowl, combine soup, and next 6 ingredients. Stir in vegetables and chicken. Spoon mixture into prepared baking dish; set aside.

In a small bowl, combine baking mix and cheese. Add milk, stirring just until dry ingredients are moistened. Drop batter by heaping tablespoonfuls evenly over chicken mixture. Bake 35 to 40 minutes, or until biscuits are browned and pot pie is hot and bubbly.

January 3, 2007

Do you call yourself a Southern?

How many of you have had the opportunity in indulging in one of the true southern staple foods: GRITS?

Well, if you haven’t had the chance to sample this great side dish I’ve got a great recipe for you to try out in your kitchen.

Growing up a southern, when I went to college to the University of Missouri-Columbia, I found that not many people knew what grits were. I would tease and call some of my friends Yankees (meaning this in only a teasing and kidding way) because they had never eaten or even heard of grits.

If I say grits and a person knows that they are and how to fix them, then I call them a true southern.

Here is how Wikipedia explains this southern dish: Coarsely ground meal of dried and hulled corn kernels which is boiled and eaten, primarily in the Southern United States.

For you all who don’t know the south but do know your cooking, grits is what Southerners have while the Italians are fixing to eat polenta.

Plain Grits

Now, a better question would be what the heck is hominy, because that’s what grits are made of and if you’re going to try to speak the language, you might as well get your facts straight. Hominy is the dried kernel of corn, after the hull and germ have been removed. Hominy is a native American food dating back at least 5,000 years, and was one of the first foods the Indians gave to the colonists. (The Italians, by the way, only got their corn meal for polenta by way of the Indians and colonists, so grits has at least a 4,500-year head start on polenta.)

Grits are always present at breakfast, and also very popular as a side dish of a main course at other meals. I’ll admit, grits are pretty bland, but they are rarely served plain. They come with sausage, eggs, biscuits and red-eye gravy for breakfast. They’re mixed with eggs, cooked with grated cheese or garlic, or baked into a casserole. Southern cooks also sauté shrimp and bacon and scallions and serve it on a bed of grits, or serve a spring chicken on grits, or quail on grits, etc.

Today I’m going to use this fine southern food in a casserole. Now, this recipe is not from my kitchen, but from one of the true southern ladies herself, Paula Deen. I caught up on all my Food Network shows this past weekend, over the New Year’s break, and saw Paula make this and I just had to try it!

Baked Garlic Cheese Grits
By Paula Deen

6 cups chicken broth
1 teaspoon salt
1/4 teaspoon pepper
1/4 teaspoon garlic powder
2 cups regular grits
16 ounces Cheddar, cubed
1/2 cup milk
4 large eggs, beaten
1/2 cup (1 stick) unsalted butter
8 ounces grated sharp white Cheddar

Preheat the oven to 350 degrees F. Grease a 4-quart casserole dish. Bring the broth, salt, pepper, and garlic powder to a boil in a 2-quart saucepan. Stir in the grits and whisk until completely combined. Reduce the heat to low and simmer until the grits are thick, about 8 to 10 minutes. Add the cubed Cheddar and milk and stir. Gradually stir in the eggs and butter, stirring until all are combined. Pour the mixture into the prepared casserole dish. Sprinkle with the white Cheddar and bake for 35 to 40 minutes or until set.

January 2, 2007

Footprints in Our Lives

Have you ever thought about how you have made the friends and relationships in your life? I have.

As I was making a pot of crab soup last night I started thinking about the people I have met throughout my life and how they have made footprints in my life. For instance, the soup recipe I was making was given to me by some folks in Maryland.

Cecil and Michelle I met about two years ago. My parent’s had decided that they were going to sell our family farm and purchase another one closer to Springfield, Mo. As soon as they put the farm up for sale, people were visiting from all over the county to look over the farm. There were people from California, Florida, Colorado, New York…I was amazed by the response.

But while all this was happening my parents were having their doubts about their choice to sell. I was unhappy about the decision from the get go. The family farm meant the world to me. Every childhood memory I had steamed from those hills, trees, creeks, barns, cattle, the swimming hole, dirt roads, fences and the “love tree.”

The “love tree” you ask? This is a very special place on my parent’s farm. My niece named this tree. The love tree is on the largest hilltop on my parent’s farm. It overlooks the entire farm, stock and barns. On this very special hilltop my husband proposed to me in 2002. We engraved our initials in this tree, and that is why my niece calls it the “love tree.”

Every memory of mine is wrapped into our family farm. So, when a couple from Maryland came for a visit (Cecil and Michelle) and decided to make an offer on my parents farm that matched my father’s asking price…..I became very worried!

This was the first buyer that asked the full asking price. Would my parent’s sell? Would I loose my Ozark hills? Would I never see our love tree again? Would I never be able to take my kids to the farm?

I met Cecil and Michelle and they were a wonderful couple. They had decied to move form Maryland to the Ozarks to escape the big city life and move their family to the country. They always wanted to have a farm and timber and they loved my parent’s farm.

For about four months the couple made frequent visits to our farm, as they were trying to sell their business in Maryland. During that time my parents and the couple became very good friends.

Then one day my father called me and asked me, “Lane how would you feel is we didn’t sell the farm?” Although my father new the answer to this question I gave him an answer. “That would be the best news in the world.”

So it was. My parents after many months of “to sell or not to sell” had decided to remain on our Ozark farm. But the friends they had made: Cecil and Michelle did purchase a farm about 20 minutes from my parents and the couple remains close family friends of ours.

It’s experiences like this that bring all different type of people into our lives. Mt friends stem from Charolais cattle breeders, former FFA’ers, college friends, overseas experiences, co-workers, local Mid-Mo friends, a summer softball team my husband and I play on, many ag-related groups I serve on….all these experiences shape the relationships we acquire and the people we are. I am thankful to have met so many wonderful people throughout my life like Cecil and Michelle.

Here is the crab soup recipe that Michelle passed on to my mother and me. It is way too easy to be as good as it is!

Crab Soup Photo

Cream of Crab Soup
By Michelle
(This makes a Very large batch. I usually cut it in half, unless I’m serving it for a party.)

6 cans of cream of celery soup
2 quarts half and half
1 stick of butter
1 lb. of crabmeat (if using canned crab meat 4-5 (6 oz) cans) A bag of steamed broccoli florets
1 ½ tsps. of Old Bay seasonings (found in the spice area in your local grocery store)
2 T. garlic powder
3T. dry mustard powder

Put everything except the crabmeat and broccoli into a large pot. Bring ingredients to a slow simmer for 25 minutes. Be sure to stir quite often. Meanwhile, steam your broccoli florets and when steamed chop coarsely.

After the soup mixture has simmered for 25 minutes, place crabmeat and broccoli in pot and simmer till the mixture is thick enough for your own taste. Garnish with any white cheese and oyster crackers.

* After I add the crabmeat and broccoli I usually only simmer the soup for another 10 minutes and then remove it from the heat.