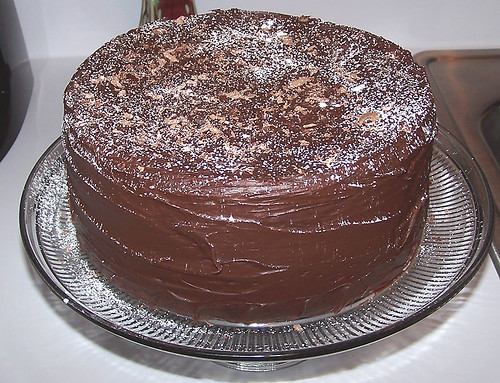
Looks pretty delectable doesn't it...and it is! This Lemon Meringue Pie comes from Marty Uhlmann in Dora, she's quite the pie maker!
Any dessert with lemon is blue ribbon in my book! For those of you who aren't a lemon fan- not to worry this pie doesn't have that traditional tart lemon flavor. It's smooth, creamy and the meringue is light and fluffy.
Lemon Meringue Pie
Jello Cook & Serve Lemon Pudding Mix
Heat 2 cups water in medium pan
In a bowl mix pudding mix, 1/2 cup sugar plus 2 Tbsp.
Add 1/4 cup water
Grate lemon rind from half of a lemon
Add 2 Tbsp. of lemon juice
Add 3 egg yolks, stir well & add to hot water. Cook until thick. Add 2 Tbsp. butter. Cool and put in a baked 9" pie crust. Top with meringue.
Meringue
3 egg whites
1/4 tsp. cream of tarter
dash of salt
Beat until foamy.
Add 1/3 cup sugar, 2Tbsp. at a time, & continue beating until stiff peaks
form. Bake 10-15 min. or until lightly browned at 350 degrees.
Pie Crust
Mix:
4 cups flour
1 1/2 tsp. salt
1 1/3 cups shortening (I use Crisco & vegetable shortening)
Blend with pastry cutter until well mixed.
In a cup beat 1 egg.
Add 2 tsp. sugar and 2 Tbsp. vinegar.
Add enough water to make 1/2 cup.
Stir into dry mixture & knead until smooth. Roll thin & place in 9" pie pans.
This recipe will make about 3 crusts.
September 11, 2010
Lemon Meringue Pie

September 9, 2010
Homemade Pizza Pie
 Around our house just about everything is homemade- pie crusts and fillings, mac n' cheese, baby food, lemonade- even the pizza!
Makes two crusts and two toppings
1 pkg. yeast
2 Cups lukewarm water
2 Tbsp. sugar
1 tsp. salt
7 Cups flour
1/4 Cup salad oil
Topping:
Pan fry the following ingredients:
1 lb. hamburger
1 lb. sausage
1/2 cup chopped onion
3 cups tomato paste
2 tsp. salt
1/4 tsp. pepper
1/2 tsp. oregano
1 lb. grated cheese (1/2 mozzarella, 1/2 cheddar)
Place ingredients in large skillet (we use a cast iron skillet) and cook.
January 24, 2009
Goat Cheese Pizza
 “Oh how yummy!” “One more piece….and another and another.”
Yes, that is what I sound like when I’m indulging in one of my favorite “treats” - goat cheese.
I had always liked goat cheese, but after our vacation to visit my husband’s family in Spain this past summer – I have become a fan of goat cheese. Goat cheese on crackers, with salami, top on a salad or pasta, stuffed with chicken….there are so many wonderful combinations.
Many folks say they don’t like the taste of goat cheese, but that’s probably because they have sampled goat cheese that wasn’t stored properly. Sometimes many of the grocery stores that sell goat cheese haven’t properly stored the cheese, therefore making the cheese have a “rancid” taste. I assure you there is nothing rancid tasting about goat cheese, quite the opposite – goat cheese is smooth, creamy and a “taste for the ages.”
If you are one of these type people that has tried goat cheese only once and now swears you will never try it again – I’m here to change your mind.
In Missouri we have lots of wonderful goat cheese operators that sell their products at many farmers markets and other marketing outlets.
One of my favorite goat cheese farms is from Goatsbeard Farm. The owners, Ken and Jenn Muno, are a wonderful couple whom I purchase lots of goat cheese from throughout the year at the Columbia Farmers’ Market. Goatsbeard is a small family farm dedicated to creating a sustainable livelihood from the land, as the family strives to produce excellent cheese while protecting the water quality of their watershed, enhancing the soils with natural fertilizers, and improving biodiversity.
Goat cheese, like goat milk, is easier on the human digestive system and lower in calories, cholesterol and fat than its bovine counterpart (but that doesn’t keep me from my cow’s milk). Goat cheese is rich in calcium, protein, vitamin A, vitamin K, phosphorus, niacin and thiamin. So, why not give it a try – improve your taste palate and your health!
One of my family’s favorite goat cheese recipes is our McConnell Goat Cheese Pizza. You can incorporate whatever your favorite vegetables are (we like to use bell peppers, eggplant, olives and sun-dried tomatoes).
McConnell Goat Cheese Pizza
Dough:
1 teaspoon honey or sugar
2 tablespoons yeast
3 cups unbleached white flour salt
2 tablespoons olive oil
Toppings:
Sauce (try using a pesto instead of a tomato based sauce)
8 ounces Goat Cheese (Chevre, Teleme and/or Feta)
1 1/2 cups topping of choice: sliced bell peppers or roasted red peppers, caramelized onions, sautéed mushrooms, eggplant, chopped olives, sun-dried tomatoes or anchovies.
Dissolve honey or sugar in 1 cup warm water. Add yeast, and set in a warm place for about ten minutes. Foam will form on the surface of the yeast.
Meanwhile, put the flour into the food processor (using metal blade) with a dash of salt. Drizzle in the olive oil, followed by the yeast mixture. When the dough forms a ball (motor will begin to slow down), place it in an oiled bowl, cover with plastic wrap, and let it rise in a warm place for 1-2 hours.
Punch down and roll into desired shape.
Cover the surface of the dough with sauce, and top with 8 ounces of goat cheese and toppings of choice. Bake in preheated 400 degree oven for 10-14 minutes until crust turns golden. Brush the edge of the crust with a little olive oil before serving.
November 7, 2007
It's Pumpkin Time
It's about that time isn't it? Pumpkin time. The leaves are turning and there's a bit of a "nip" in the air.
If you are going to make pumpkin pie this year for Thanksgiving dinner you have to try using real homemade pumpkin puree. No canned pumpkin can't quite compare to the real thing.
Refer to a previous post on How to Process Pumpkins. It's easier than you might think.
Let me know if you think there is a difference or not in the taste...I bet you'll agree that the real thing is much better than any canned pumpkin.
This recipe is my mother's that she came up with years ago when my parents first married. My mother only used fresh pumpkin when she cooked.
Pumpkin Pie
2 Eggs
1/2 teaspoon Salt
1 teaspoon Cinnamon
1/2 teaspoon Ginger
1/4 teaspoonNutmeg
1 1/2 C. Sugar
1 1/2 C. Fresh Pumpkin (key to making this pie the best it can be)
2 C. milk (1 5 oz can of evaporated milk fill rest with milk)
Mix well. Bake at 425 degrees for 15 minutes, then turn oven down to 350 degrees. It will be done when you can insert a knife into the pie and the knife comes out clean.
Again, I can't stess how important it is to use only fresh pumpkin for this recipe. My father and I grow our own pumpkins and then process them. We have enough pumpkin left for the whole year. If you use pumpkins to decorate with in the Fall, process the pumpkin, don't waste it.
October 10, 2007
It's Apple Season
 It’s apple season….and there might not be many Missouri apples available….which is a total shame, there are apples.
I’ve tried many, many apple pie recipes out and there is only one recipe that really takes the cake, or pie in this case. Martha Stewart’s Apple Pie is the best recipe out there.
Happy baking with this recipe!
Apple Pie
By Martha Stewart
1/4 cup all-purpose flour (spooned and leveled), plus more for rolling dough
2 Basic Pie Doughs
2 tablespoons freshly squeezed lemon juice (from 1 lemon)
4 pounds (8 to 10) apples, such as Empire, Granny Smith, Gala, Cortland, Winesap, or a mix
3/4 cup sugar
1 teaspoon ground cinnamon
1/2 teaspoon salt
2 tablespoons unsalted butter, cut into small pieces
Lightly flour a large piece of waxed paper; place a disk of dough in center. Rolling from center outward, form into a 12-inch circle. (Use paper to rotate dough, and flour rolling pin and paper as necessary to prevent sticking.) Transfer dough (still on paper) to a baking sheet; cover and refrigerate. Repeat with second disk of dough.
Preheat oven to 450 degrees with a rack set in lowest position. Remove first circle of dough from refrigerator; wrap around rolling pin (discarding paper), and carefully unroll over a 9-inch pie plate. Gently lift edges and lower dough into the pie plate so it hugs bottom and sides. Avoid stretching the dough, which will make it shrink during baking. Refrigerate.
Place lemon juice in a large bowl. Peel, core, and cut apples into 1/4-inch-thick slices; halve crosswise, and add to lemon juice (to keep them from turning brown) as you work. Add sugar, flour, cinnamon, and salt; toss to combine.
Remove dough-lined pie plate from refrigerator. Fill with apple mixture, gently packing apples and mounding slightly in center; dot with butter. Lightly brush rim of pie shell with water. Remove remaining circle of dough from refrigerator. Lay over apples; press along moistened rim to seal. Using kitchen shears, trim overhang to 1 inch.
With floured fingers, fold overhang under itself to form a thick rim; pinch between thumb and forefinger to form a uniform edge around the rim of the pie plate.
To crimp edges: With thumb and index finger of one hand, gently press dough against knuckle of other hand (photo, above); continue around pie. (Deep indentations anchor dough on rim and prevent it from sliding down sides of pie plate during baking.)
With a floured paring knife, cut 5 to 6 slits in top of pie, radiating from center; place pie plate on a rimmed baking sheet. Bake 20 minutes; reduce heat to 375 degrees and bake until crust is golden and juices are bubbling, 50 to 60 minutes more. If edges brown too quickly, cover with aluminum foil. Cool completely, at least 6 hours, before serving.
February 14, 2007
Learfield Bake-Off Results
Happy Valentine’s Day to All!

The judging took place at 11 am and the entire company was invited in the taste testing at noon.
I’ve been busy since Monday night getting everything prepared, cooked and garnished. I’m entering my Super Duper Chocolate Crinkle Cookies, Amish Bread, Smooth as Silk Chocolate Pie and a Double Chocolate Cake.

The Double Decadence Chocolate Cake is another rich dessert. The best part of this recipe is the combination of chocolate and coffee. These two ingredients are a match made in heaven!

Smooth as Silk Chocolate Pie
Filling
6 oz. package semi-sweet chocolate chips
¾ cup butter (1 ½ sticks), room temp.
1 cup sifted powdered sugar
1/8 tsp. salt
2 tsp. vanilla
3 eggs
Topping
1 cup heavy whipping cream
2 T. powdered sugar
1 square bitter sweet chocolate (shaved for curls to garnish)
I baked pie shell
Bake pie shell and cool completely.
Place chocolate bits in bowl over hot water to melt, set aside to cool.
In mixing bowl, combine butter, sifted powdered sugar and salt; beat at high for 10-15 minutes. Mixture should be think and fluffy. Add eggs one at a time, beating three minutes after each addition. Add vanilla.
Fold cooled chocolate into creamed mixture to complete the filling. Spoon into a baked pie shell. Beat whipping cream and powdered sugar and place on the top of filling. Place pie in refrigerator.
Serve small portions- very rich pie.
Double Decadence Chocolate Cake
½ cup semi-sweet chocolate chips
1 ½ cups hot coffee or espresso
3 cups sugar
2 ½ cups flour
1 ½ cups unsweetened cocoa powder
2 tsp. baking soda
¾ tsp. baking powder
1 ¼ tsp. salt
3 large eggs
¾ cup oil
1 ½ cups buttermilk
1 tsp. vanilla
Preheat 300 degrees.
Spray 2 (9x2) round cake pans with cooking spray and line bottoms with wax paper and spray again.
Combine chocolate chips and coffee in small bowl. Let mixture stand, whisking occasionally, until mixture is melted and smooth.
In a medium bowl whisk together sugar, flour, cocoa powder, baking soda, baking powder and salt.
In a large bowl beat eggs for 3 minutes, slowly add buttermilk, oil, vanilla and melted chocolate to eggs, beating well. Add dry ingredients to mixture and beat until smooth. Divide batter between pans and bake for about 48 minutes.
Shiny Chocolate Icing
2 cups semi-sweet chocolate chips
1 cup heavy whipping cream
2 T. sugar
2 T. light corn syrup
¼ cup butter flavor Crisco
In saucepan whisk together the cream, sugar and corn syrup. Bring to a boil over medium heat, whisking until sugar is dissolved. Remove pan from heat and add chocolate chips, whisking until mixture is smooth.
Cut Crisco into three pieces and add to mixture, whisking until smooth.
Transfer icing to a bowl and chill until spreadable (30 minutes). Spread icing between cake layers and all over. Keep cake covered and chilled and bring to room temperature to serve.

Sweet Breads and Pastries
1st: Lane McConnell
2nd: Clarice Brown
Candy
1st: Marcia West
2nd: Katie Bellers
3rd: Julie Harker
Cookies
1st: Lane McConnell
2nd: Clarice Brown
3rd: Julie Harker
Pie
1st: Clarice
2nd: Lane McConnell
3rd: Shelly Voss
Cake
1st: Sandy Dulle
2nd: Patti Rackers
3rd: Myra Versules
February 6, 2007
Super Bowl Party was a Hit

Last week in my post, Football Party Recipes , I provided the recipes for a lot of the party food, but I didn’t have the recipe for a dip that my friend Jeannie brought over.

This recipe is great for those friendly get-togethers and summer bbq’s that are not too far away…
Pizza Dip
By Jeannie
2 blocks of cream cheese (softened)
Mix with 1-2 Tbs. Italian Seasoning (optional)
Spread in stone baking dish
Top with:
Pizza Sauce
Shredded Cheese (any kind will work)
Pizza Toppings (olives, pepperoni, hamburger, etc)
Bake on 350 degrees for about 30 minutes (watch for the cheese to be bubbly)
Serve with sliced bread, crackers, or chips!
January 19, 2007
Meals that Last
I've talked about how my soup lasts for a couple of days, which I really appreciate because it gives me the night off from cooking. Let’s face it – even if you love to cook – there are nights when all you want to do is relax and do nothing.
I’ll admit it! Me, the one that loves to cook. Some nights when I’m drained from work by the end of the day, I’ll call my husband and ask him to pick up take-out. That only happens about twice a month though.
Meals that last a couple of nights are great family meals and are much more affordable. The Winter Beef Veggie Soup from yesterday is a perfect example. Between my husband and me, we could eat on that soup for three lunches and dinners, changing up the sides of coarse.
Other great “meals that last”:
Corn Beef and Cabbage
McConnell Holiday Meal
BBQ Beef
Chili
Stews and Soups
Homemade Pizzas Pies
Large Pot Pies
So, I came across this recipe for a Shepherd’s Pie. I had heard of this type of pie before, but never actually made it, so I took a shot at it.
Very tasty. I did however add a few things: 1 Tablespoon of garlic powder on the meat mixture, plus some cumin and parsley. In the potato mixture I added chives and a few shakes of garlic powder also.

By Paula Deen
1 small onion, peeled and chopped
14 tablespoons butter, divided (1 stick plus 3/4 stick)
1 1/2 pounds ground beef
Salt and black pepper
8 to 10 medium red new potatoes
2 cups milk
1/2 cup sour cream
2 cups instant biscuit mix
1 1/2 cups niblet corn or mixed vegetables, prepared according to package directions
Preheat oven to 350 degrees F.
Beef Layer:
In a large skillet over medium-high heat, sauté onion in 2 tablespoons butter. Add ground beef and cook until browned. Season with salt and pepper, to taste. Set aside.
Potato Layer:
Peel and slice potatoes 1/4-inch thick. Place in a saucepan, cover with cold water, and bring to a boil. Cook for approximately 15 minutes or until fork tender. Drain potatoes and transfer to a mixing bowl. Whip potatoes with an electric mixer, mixing until moderately smooth. Don't over beat them; a few lumps are nice. Add 1/2 cup heated milk, 1 stick butter, and sour cream. Season with salt and pepper, to taste. Whip again until mixed. Adjust thickness by adding more milk, if desired.
Biscuit Layer:
Combine biscuit mix and 1 1/2 cups of milk. The mix should be thinner than that of normal biscuit mix but not runny.
Spray a 9 by 9 by 2-inch pan (or any similar casserole dish) with cooking spray. Layer mashed potatoes halfway up the sides of the dish. Next, spread a layer of corn or mixed vegetables on top of the potatoes. Then add the layer of meat. Pour the biscuit mix over the meat. Melt 4 tablespoons of butter and drizzle over top. Bake for approximately 35 to 45 minutes or until top is golden brown. Let stand for a few minutes before serving.
January 16, 2007
Winter Weather Pizza
This was a winter weather nightmare for many across Missouri this past weekend. On Friday, the news was calling this storm system a 15-25 year storm and they were correct.
For three days the storm system dumped freezing rain, sleet and snow across the Midwest. Springfield and St. Louis areas were those that were hit the hardest. More than 3 inches of freezing rain and sleet have knocked down trees, transformers and lines in the areas.
Being from the Springfield area my heart goes out to the many residents that are without heat during this bitterly cold weather. My husband and I have many family members and friends that have been without electricity since Friday night. You can check out photos of the Springfield area from the News Leader site.
There is hope in sight for Missouri. Governor Blunt today announced President George W. Bush granted his request for a major disaster declaration following the deadly ice storms that swept across the state over the past weekend. In addition to helping share the cost of recovery, the approval of Blunt's request opens the door for new federal resources for Missouri such as generators.
After declaring a state of emergency early Saturday, Blunt sent approximately 550 Missouri National Guard Troops to the Springfield and St. Louis areas in response to the storms. In addition, the governor provided extensive state resources to communities hit with the severe ice storms including access to dozens of large power generators and Meals-Ready-to-Eat.
Blunt noted the severe winter storms caused eight deaths and knocked out power to over 330,000 Missourians.

Since my husband and I were trapped inside most of the weekend we did a lot of cooking. On Saturday we made some homemade pizzas with a new recipe for pizza dough that I found on Simply Recipes, which is a great cooking site. Here is the recipe instructions for the dough.

This pizza recipe from Simply Recipes
Makes enough dough for two 10-12 inch pizzas
1 1/2 cups warm water
1 package (2 1/4 teaspoons) of active dry yeast (check the expiration date on the package)
3 1/2 cups bread flour (can use all-purpose but bread flour will give you a crisper crust)
2 Tbsp olive oil
2 teaspoons salt
1 teaspoon sugar
In the large bowl of a heavy duty electric mixer add the warm water. Sprinkle on the yeast and let sit for 5 minutes until the yeast is dissolved. Stir to dissolve completely if needed at the end of 5 minutes.
Attach a mixing paddle to the mixer. Mix in the olive oil, flour, salt and sugar on low speed for about a minute. Remove the mixing paddle and replace with a dough hook. Knead using the mixer and dough hook, on low to medium speed, until the dough is smooth and elastic, about 10 minutes. If you don't have a mixer, you can mix and knead by hand.


Remove the plastic cover from the dough and punch the dough down so it deflates a bit. Divide the dough in half. Form two round balls of dough. Place each in its own bowl, cover with plastic and let sit for 10 minutes.
Prepare your desired toppings. Note that you are not going to want to load up each pizza with a lot of toppings as the crust will end up not crisp that way. About a third a cup each of tomato sauce and cheese would be sufficient for one pizza. One to two mushrooms thinly sliced will cover a pizza.

Brush the top of the dough with olive oil (to prevent it from getting soggy from the toppings). Use your finger tips to press down and make dents along the surface of the dough to prevent bubbling. Let rest another 5 minutes.
Repeat with the second ball of dough.
Tomato Sauce Recipe
by Lane
Easy way: Cheat and buy a good quality tomato sauce and add to it chopped shallots (or onions), crushed garlic, basil and whatever else seasonings you wish.

1 can crushed tomatoes
1 tsp of salt and pepper
1 (6 oz.) can tomato paste
2 cloves crushed garlic
1 tsp. basil or oregano
½ cup chopped shallots or onion
Cook over medium heat for about 10 minutes or until desired thickness.
Spread about 1/3 to ½ cups over pizza dough. Then apply your toppings.

Shrimp
Feta Cheese
Artichokes
Peppers
Hamburger
Sausage
Bacon (Pancetta is my favorite to use)
Chicken
Zucchini
Sun Dried tomatoes
Parmesan Cheese
The best part about making your own homemade pizza is you can be adventurous with the toppings. Whatever mood you are in you can create your own personal pizza. I love making homemade pizzas also because it gives my husband and I a chance to cook together and have fun.
January 10, 2007
Ozark Chicken Pot Pie
Over this past weekend I took some time to catch up on some much needed chores around the house: cleaning, re-arranging the closets, washing the windows and trying my hand at making my own chicken pot pie.

I dug out one of my Paula Deen magazines because I had remembered seeing a crust recipe that I thought would be perfect for a pot pie in the last issue. Plus, the dough was made with a food processor, so this would give me the chance to use the new Kitchen Aid Food Processor I got for Christmas.
Next, I decided I would make a large pot pie, a casserole sized one so we could have dinner and lunch for a couple of days.
I began pulling out my ingredients, casserole dish, pots and pans and utensils.

I was at the sink opening the cans with my piece of junk can opener and it happened. I knew that someday it would happen, but it finally happened. My can opener doesn’t make very good clean cuts and leaves can lids very messy and hairy. I was trying to pop open the lid that was stuck in the can and I sliced the entire palm of my hand open.
It was my own fault, I shouldn’t have been trying to dig out the lid with my hand, but I was. I ran to the bathroom and all I could find was small band aids. About 12 band aids later I finally went back to cooking my pot pie. It was not easy finishing everything up with a damaged hand….have you ever tried rolling out pastry dough with a bandaged hand? It’s not very easy. But I finally got the casserole in the oven and baked.
On a side note: Later that day I went to Lowe’s to use a gift certificate I received for Christmas. I bought a brand-spanking new Kitchen Aid Can Opener and it works great!
Don’t be afraid to adjust this recipe to suit your own family’s tastes. A recipe is just guidelines, not rules you must follow. Be adventurous with your recipes and try new ingredients.

By Lane
2 cups peeled red potatoes cut about ¼ of an inch
2 cans of mixed veggies
3/4 cup butter
1 onion, chopped
½ all-purpose flour
2 teaspoons garlic powder
1 teaspoon ground sage
1 teaspoon Italian seasonings
½ teaspoon poultry seasonings
1 teaspoon salt
½ teaspoon black pepper
2 cans chicken broth
1 cup heavy cream
4 cups cooked chicken, chopped
1 crust (recipe follows)
1 large egg, beaten
Grease a 3 quart baking dish.
Boil potatoes over heat for 5-6 minutes, drain and add drained canned vegetables to pot.
Melt butter in a very large saucepan. Add onions and cook for 3 minutes, stir in flour and all seasonings and cook for 2 minutes, stirring. Stir in broth and cream and cook for 7 minutes. Stir in chicken and vegetables and cook for 18 minutes.
Pour into casserole dish. Preheat oven to 400 degrees.
On a floured surface roll out the pastry crust to about 1/8 inch thickness. Cut into ½ inch strips. Arrange crust in lattice design over the filling, trim strips even with the dish. Brush crust with beaten egg.
Bake 28 minutes. The casserole will be done when it is golden brown.
Flaky Pastry Crust
By Paula Deen
I love using this crust for the pot pie…very flaky. If you don’t have a food processor you’ll have to do everything by hand though.
2 ¼ cups all-purpose flour
½ teaspoon salt
½ cup cold vegetable shortening, diced
¼ cup cold butter, diced
¼ cup cold water
In a food processor add flour and salt, pulsing to combine. Add shortening and butter, pulse until mixture resembles corn meal. With the processor running, add cold water through the chute, processing until combined. Press mixture gently into a 4 inch disc; cover with plastic wrap and chill 1 hour.
January 4, 2007
Pot Pies for Fair Weather Days
It’s a cold and rainy day here in Mid-MO today. It’s days like this that I want to curl up with a blanket and a bowl of some type of pot pie.
Wikipedia describes a Pot pie is a type of baked savory pie with a bottom and top (or just top) covered in flakey crusts and baked in its own pie tin.
This is in contrast to the Australian meat pie and many British regional variants on pie recipes which may have a top of flakey pastry, but the body is made from a heavier more mechanically stable, but still edible, shortcrust, hot water crust or similar pastry.
This is a recently modern advancement of the pasty which often required one to discard the crust as it was much harder than the rest of the pastry.
My definition is a little different. Pot pies are a true comfort food that brings a smile to any face. Some are very elaborate and some quick and easy.
Today’s pot pie recipe is one that I use when I’m in a rush to get dinner on the table. I came across it in one of my Paula Deen cookbook’s awhile ago and I’ve made this pot pie quite a bit since then.
It is a little different than most pot pies because the crust is just biscuit mix, no short crust to mix up, which really helps get this dish on your table in a snap. Curl up with a plate of this dish the next time the weather is gloomy…I guarantee it will make the day a little brighter.
by Paula Deen
Makes 6 to 8 servings
2 (10.75-ounce) cans cream of chicken soup
1 cup sour cream
1/2 cup milk
1/2 teaspoon dried parsley flakes
1/4 teaspoon garlic powder
1/4 teaspoon salt
1/4 teaspoon ground black pepper
1 (1-pound) package frozen mixed vegetables, thawed
3 cups chopped cooked chicken
1-1/2 cups Bisquick baking mix
1/2 cup grated sharp Cheddar cheese
1/2 cup milk
Preheat oven to 350°F. Lightly grease a 13x9x2-inch baking dish.In a large bowl, combine soup, and next 6 ingredients. Stir in vegetables and chicken. Spoon mixture into prepared baking dish; set aside.
In a small bowl, combine baking mix and cheese. Add milk, stirring just until dry ingredients are moistened. Drop batter by heaping tablespoonfuls evenly over chicken mixture. Bake 35 to 40 minutes, or until biscuits are browned and pot pie is hot and bubbly.

December 6, 2006
My Family in Photographs

In 2004, my dad sold the business to Lifetouch Studio’s, a large national company. It just goes to show, it is hard for the little guy to survive these days. It was smart for my family to sell the business because it took a lot of stress off my dad and my entire family. (NOTE: It’s never easy working with family, no matter how well you get along.)
My brothers and Kara still work for studio, which is now called Baldwin’s School Portraits by Lifetouch. As for my father, he is perfectly happy because now he is completely retired on the farm and his sons have a new business path to carry on.
To my point about telling about my family’s old business in photography….well we take a lot of photos in my family. I practically grew up with a camera in my face and now it’s the grandkids that are the little models in my mother’s camera lens.
Yes, my brothers and I had no choice when it came to picture time. Everything had to look right, our backs had to be straight, hair in order, smile perfect and eyes open wide and bright…then SNAP! Another family memory was snapped in time by the camera flash.
My dad used to tell us stories about taking photos all over the state of Missouri. He enjoyed his job because he only had three months of hard work and the rest of the time was spent on his own piece of heaven (the farm.) His job allowed him to spend time doing the things he loved (fishing, hunting, traveling, family) and he also was able to make a good living for his family.
Things have changed quite a bit, even since I was a youngster. But to me, if there is one thing that helps us remember our pasts, it’s those treasured photos we all possess. My father helped bring memories to families across Missouri through the school photos he took throughout the years. Now, my brothers do the same.
I can look through many of my family snapshots and remember the past just from a glance of a photo. Photos can tell a lot about a family….happy times, baby’s births, marriages, silliness between siblings. I love taking trips back in time through old family snapshots, each time I open any of my mother’s photo albums. I have started my own family albums since my husband and I were engaged.
Recipes also tell of a time long ago and can bring back old family memories just as photos do. From eating a piece of hot apple pie that reminds you of your grandmother cooling her pies on a window or cutting into a perfectly grilled steak and a memory of your father from a family bbq flashes by your thoughts. Recipes are a way for us all to connect with our past.
Please pass on your family recipes to future generations. If there is no one to snap that family photo or write down a cherished family recipe and teach it to a youngster….how will is be passed on to the next generation? This holiday pass on a recipe to your grandchildren or other family member, teach them the skill and love of cooking.
Here is a family recipe from my own kitchen. Try serving this pie in place of the traditional pumpkin pie this Christmas. It’s sure to be a hit!
Southern Classic Sweet Potato Pie
by Lane
1 1/2 cups sweet potato puree, cooled
2 eggs
4 T. melted butter
2 T. molasses syrup
1/3 cup light brown sugar
¼ tsp. salt
1 tsp. cinnamon
1/8 tsp. nutmeg
¼ tsp. allspice
½ tsp. ginger
1 tsp. vanilla
¾ cup heavy cream
Pecan Topping:
1 cup brown sugar1/2 cup pecans2 T. all purpose flour3 T. melted butter
Preheat oven to 350 degrees.
In a large bowl beat eggs, butter and sugar until combined with electric mixer. Add the rest of ingredients, except cream and beat on medium until smooth. Add cream and beat on low until combined.
Place pie in oven for 30 minutes. While pie is baking, mix up all ingredients for topping in a small bowl. After pie has baked for 30 minutes, sprinkle topping on top of pie and place back into oven for another 10 minutes. Pie is done when an inserted knife comes out clean.
December 5, 2006
College Dining Halls “beef up” their menus
Home recipes are on the menu in many campus dining halls, that’s according to an article my fellow co-worker Steve Mays passed on to me yesterday that CNN had published.
I found the article very funny. Imagine…college students want to eat home cooked meals because those type of meals (made with love from mom and dad ) are comfort foods.
Apparently, colleges across the nation are trying to incorporate more home cooked meals at dining halls because it’s been shown to aid in homesickness.
Students and parents are being asked to share their own family’s home cooked recipes to colleges and universities and then the recipes are placed in dining halls where students vote on their favorite.
I think this is a great idea and it’s about time. I remember eating those horrid college dining hall dinners. It just never tasted like my mother’s did. All I ever wanted was to be at my parent’s dinner table indulging in mom’s perfect roast beef, creamed corn, mashed potatoes and gravy and sweet rolls. YU---UM.
I did however find this part of the article a little strange (Side note: I am one of these so-called Millennials):
I do not share that same opinion. My parent’s were both very close to their parent’s. In fact, I believe that today these Millennials are less connected with their families. I can say this because I am of this generation and I know many of my friends that very seldom see the folks or have any type of emotional connection with their families. It’s disheartening to say that, but that is what I have seen from my college days to present day.
I do think that people in my generation realize what they missed out on from the separation of their family, but not until they mature quite a bit. Sometimes our families are taken for granted.
A family’s bond is the strongest of all. Yes, we get upset with our family members, even embarrassed sometimes, but no matter what they are the ones that know us like no other. They will always love and care for us, through all the bad, and they will help us celebrate and rejoice in the good.
Be thankful this holiday for your family. Give thanks to have loved ones and love those that love you.
Happy Holidays from my kitchen to yours…
Cheesecake with Praline Sauce
by Paula Deen
Makes 12 servings
Crust:
1-1/2 cups graham cracker crumbs
4 tablespoons sugar
1/4 cup (1/2 stick) butter, melted
Filling:
3 (8-ounce) packages cream cheese, at room temperature
1 cup sugar
5 large eggs
1 tablespoon vanilla extract
Topping:
1-1/2 cups sour cream
4 tablespoons sugar
1 teaspoon vanilla extract
Preheat oven to 350°F.For crust, stir together graham cracker crumbs, sugar, and butter. Pat this mixture into the bottom and sides of a 9-inch springform pan.
Make the filling:
In a large bowl, beat together cream cheese and sugar. Beat in eggs, one at a time, then beat in vanilla. Pour filling into crust and bake 1 hour. Remove cake from oven and cool for 10 minutes.
Meanwhile, make topping: in a bowl, mix sour cream, sugar, and vanilla until well blended. Spread this mixture over warm cake and return to oven for 5 minutes. Let cake cool to room temperature in the pan, then cover with plastic wrap and refrigerate for at least 4 hours, or overnight.At serving time, use a table knife to loosen cake from the pan. Remove the sides of the pan and place cake on a platter, leaving it on pan bottom.Serve cheesecake, passing Praline Sauce in bowl with a small ladle. Store any leftovers in the refrigerator.
Praline Sauce:
2 tablespoons light brown sugar
2 tablespoons cornstarch
1 cup dark corn syrup
1/2 cup chopped pecans
1 teaspoon vanilla extract
In a small heavy saucepan, stir together brown sugar and cornstarch. Stir in corn syrup and cook over medium heat, stirring constantly, until thick. Remove the pan from the heat and stir in nuts and vanilla. Cool slightly.
November 30, 2006
Making Homemade Pumpkin Puree
I very seldom purchase canned pumpkin. If I do though I only purchase plain pumpkin, not the pie filling kind because it usually has a ton of added spices.
I grew up in a family where we grew our own pumpkins in the garden. My dad always bought heirloom seed and planted a French variety pumpkin that made the BEST pumpkin pie.
We would grow our pumpkins, puree them and measure out a specific measurement of puree then place in freezer bags and freeze the puree until we were ready to use it. That way all we would have to do is go the freezer, de-thaw the pre-measured pumpkin and add it to our recipe.
Personally, I do not like ANY canned pumpkin. Maybe it’s the feeling of accomplishment eating my own processed pumpkin, I don’t’ know. But I know there is a major taste difference in canned vs. processed. It’s a fairly simple process to actually process your own pumpkin puree also. I think many folks think it’s a very complicated and time consuming process – not so!
First, pick out a small sugar pumpkin. Not the large Jack –o’-laterns you see in many farmer’s fields. Those types of pumpkins have a very fibrous flesh and are not as sweet tasting as the smaller varieties. The smaller variety only weighs about 4-8 lbs, has a good stem intact and needs to have no soft spots of blemishes. Here’s a list of good varieties for making your own pumpkin puree.
You can find these smaller cooking pumpkins at farmer’s markets, specialty stores and sometimes even grocery stores. But, the best way would be to grow them on your own. That way you know where your produce came from and what chemicals have been placed on the pumpkins.
To make your puree:
Cut the pumpkin in half lengthwise, remove seeds (but save them, they make excellent garnishes for dishes and are great toasted) and stringy fibers, and place cut-side down on a greased baking sheet. Add about 2 cups of water. Bake at 350 degrees F until the pumpkin is soft to the touch. Scoop out the pulp and puree in a food processor until smooth. You may have to add a little bit of water in the food processor or blender to get the mixture to puree smoothly. Cool before using or storing in freezer bags.
I like to pre-measure all my puree in freezer bags. This way it’s very easy to go to the deep freeze and pick out 1 cup 2 cups, ect of measured pumpkin puree.
See how easy it is to make your own processed pumpkin. Try it, I guarantee excellent results in taste, texture and aroma in your next pumpkin dish.
November 22, 2006
Thanksgiving is Finally Here
It’s the day before Thanksgiving and I can hardly wait. We always spend Thanksgiving Day with my in-laws in Mt. Vernon. My mother-in-law Josefa cooks a mean turkey and stuffing and a wonderful Chocolate Silk Pie.
I remember my first Thanksgiving with the McConnell family. The whole house smelled as good as my mother’s own house. Josefa makes everything from scratch, which I believe is the only true way to cook a Thanksgiving dinner.
Her turkey is what I recall the most though. She puts it in the oven the night before, stuffing and all, and bakes it all night at a very low temperature. I always wake up in the morning wanting to eat turkey for breakfast!
Her turkey is so moist, tender and succulent….Oh, I can hardly wait until tomorrow.
For the McConnell Thanksgiving I’ve made a couple of items to bring along for dinner. I made a batch of the Molasses Spice Cookies (Which if you haven’t tried this recipe yet, you really should. These cookies are the perfect snack while waiting to indulge in turkey and stuffing.), a Texas Pecan Pie (Josefa usually makes her Chocolate Silk Pie and a Cherry Pie for Charlie’s dad, Raymond), a bottle of Champaign (for a fun night) and a Sweet Potato Bake (A recipe a recently I tried from my most recent Paula Deen magazine.) I’ve included this recipe in today’s post. I hope you enjoy it as much as my family does.
Sweet potatoes are a true southern delicacy. What would a southern Thanksgiving be without sweet potatoes?
Sending you Happy Thanksgiving wishes and your best dishes!
Sweet Potato Bake
By Paula Deen
3 cups cooked, peeled and mashed sweet potatoes
1 cup sugar
1/3 cup melted butter
2 large eggs
1 tsp. vanilla
1 tsp. cinnamon
¼ tsp. nutmeg
¼ tsp. ginger
¼ cup heavy cream or half and half
Topping:
1 cup brown sugar
1 cup walnuts or pecans
1/3 cup all purpose flour
3 T. melted butter
Mix all ingredients for bake except the cream. Beat at medium speed. Then add cream and mix well. Pour into a 2 quart greased dish.
For the topping mix all ingredients together with a fork and sprinkle over the top of casserole.
Bake for 25-30 minutes in a 325 degree oven.
August 29, 2006
Oh Fall Where Art Thou
Here in good ole Missouri the temperature is actually below 80 degrees…I can’t believe it. And better news, it’s rained for the past four days here…Too bad it’s too late to green up yards and give gardens that much needed moisture, but some crops around the state might still have a good chance of good yields.

I mentioned soups and stews, but I left out one of the best fall recipes: Chicken Pot Pie. Nothing is better than pot pies when the weather finally cools off and the tree leaves start to turn. This recipe from FineCooking.com will produce six (12) ounce pies or one 2 quart pie. I like to make the 12 ounce pies and freeze some for another time.
Chicken Pot Pie
by Fine Cooking.com
One 3-lb. chicken
3 Tbs. olive oil
Salt and freshly ground black pepper
2 cups 1/2-inch potato chunks (1 to 2 medium peeled potatoes; I prefer Yukon gold)
24 pearl onions, peeled and left whole
2 cups 1/2-inch carrot chunks (2 to 3 medium carrots, peeled)
1 clove garlic, peeled and minced
8 mushrooms, halved or quartered
2 Tbs. chopped assorted fresh herbs (parsley, rosemary, thyme); more to taste
1 cup peas (fresh or frozen and defrosted)
For the sauce:
4 cups chicken stock (homemade or low-salt canned)
6 Tbs. butter (as needed)
6 Tbs. flour
Salt and freshly ground black pepper
For the pastry:
1 recipe Rough Puff Pastry for Chicken Pot Pie, refrigerated or make your own, but I will say I even cheat on this part.
For the egg wash:
1 egg yolk, beaten
1/2 cup cream
To roast the chicken and vegetables:
Heat the oven to 375°F. Rub the chicken with 1 Tbs. of the olive oil and sprinkle generously, inside and out, with salt and pepper.
Toss the potatoes, onions, carrots, garlic, and mushrooms with the remaining 2 Tbs. olive oil and the chopped herbs.
Set the chicken upside down in a large flameproof roasting pan and scatter the vegetables around the chicken. Roast for 1 hour and 15 min., stirring the vegetables several times.
Remove the chicken from the pan to cool. Remove the vegetables with a slotted spoon and reserve them in a bowl, with the peas. Don't rinse out the roasting pan.
To make the sauce:
Pour the fat and juices into a measuring cup or gravy separator. Spoon or pour the fat away from the juice; reserve the fat. Add the juices to the chicken stock. Measure out the fat and add enough butter (if needed) to make 6 Tbs.
Put the roasting pan (which should still have the caramelized bits from the chicken and vegetables) on the stove over medium heat. Pour in the 6 Tbs. of fat and butter mixture; when it's melted and bubbling, add the flour and stir constantly to make a smooth roux. Scrape up any caramelized remains from the chicken and vegetables. Cook the roux, stirring constantly, until lightly browned, about 5 min. Add the chicken stock, bring to a boil, and simmer. Continue to stir and scrape the bottom of the pan. Cook the sauce for at least 15 min., whisking occasionally, until it's as thick as heavy cream. Season with salt, pepper, and more herbs to taste.
When the chicken has cooled, pull the meat from the bones, discarding the skin and bones. Cut the meat into small (1/2- to 1-inch ) chunks and set aside.
To assemble the pot pies:
Heat the oven to 400°F. Choose four 12-oz. ovenproof bowls or a 2-qt. casserole.
Remove the dough from the refrigerator. Lay it on a floured board and roll it out 1/8 inch thick into a 20x16-inch rectangle. Set the dish for the pot pie upside down on the dough and cut around the rim with a knife or pastry cutter. (If you like extra pastry, cut the pastry a little larger than the top of the dish.) Stack the pastry pieces on a plate, separating each with waxed paper or plastic wrap. Refrigerate until ready to use.
Divide the chicken, vegetables, and sauce among the dishes. Lay the pastry on top, pressing along the edge of the dish to seal.
To make the egg wash:
Blend the egg yolk and cream. Brush the mixture onto the pastry with a pastry brush.
Put the pies on a baking sheet to catch any drips. Bake on the center rack in the 400°F oven for 50 to 55 min., or until the crust is thoroughly browned and puffed. Steam will escape along the edges of the pastry.
July 17, 2006
Bake-Off Results and Recipes
The Company Bake-Off was a total success on Friday. There were so many wonderful goodies and good fun with my fellow co-workers. One thing about us here at Learfield, we know how to have fun and EAT! Our motto proves the having fun part:
"Build the Team. Grow the Company. And Have Fun"
This is Roger Gardner, President and Chief Operating Officer at Learfield and me. He was in right after the judging to sample all the great food and he presented the awards to the winners.

Here are the final results:
Cake Contest:
1st place: Lane McConnell, Carrot Cake
2nd place: Craig Branum, Cherry Delight
3rd place: Paul Roberts, Cinnamon Rolls
Leah's Cinnamon Rolls (3rd Place Cake Division)
by Paul Roberts
Rhode's frozen dough loaves (Bridgeford's brand of dough is best but I can't find it here in MO. Ugh.)
2 cups brown sugar
¼ cup cinnamon MIX all bold items together
2 sticks of softened butter
To make a 13 x 11 pan, thaw two loaves of dough according to package directions.
Roll one loaf of bread dough into a 6 x 11 rectangle. Spread one stick of softened butter across rectangle. Spread 1 cup of brown sugar / cinnamon mixture across butter. Roll dough into a long log. Slide across log at 1 inch intervals and place rolls in greased 9 x 13 pan in rows of four, leaving space between rolls and room for them to rise. Repeat with second loaf. You will have left over rolls, and I usually make a small pan with leftovers.) Cover pan and let rise at least 2 hours, letting rolls double in size.
Bake at 350 degrees for 20 minutes.
Icing:
2 cups of powdered sugar and 4 tablespoons of milk whisked together. Pour icing over warn rolls.
Pie Contest:
1st place: Sarah Hoelscher, Banana Cream
2nd place: Lane McConnell, Pecan-Pumpkin
3rd place: Jason Vance, Strawberry
by Jason Vance
Bring to a boil and stir until thickened:
1 cup sugar
¼ cup of starch
1 ½ cups water
Add:
1 3oz/ strawberry jello
Let cool.
Add 1 quart strawberries, sliced.
Put in baked pie shell and let set in refrigerator for 3-4 hours.
Grandma's Pie Crust Crumble:
3 cups flour
1 ½ teaspoons salt
1 cup butter-flavored Crisco Add:
1/3 cup cold water with
1 egg
2 teaspoons vinegar
Mix and roll out. Makes 2 to 3 crusts.
Cookie Contest:
1st place: Pam Smith, Crinkled Molasses
2nd place: Clarice Brown, Chocolate Chip
3rd place: Rosie Dulle

Chocolate Chip Cookie- Cheesecake
by Clarice Brown
1 batch chocolate chip cookie dough,
Or 2 rolls of chocolate chip cookie dough
2 8-oz cream cheese (softened)
¾ cup sugar
1 teaspoon vanilla
2 eggs
Preheat Oven to 350 degrees
Mix cheese, sugar, vanilla & eggs until creamy.
Set Aside.
Press ¾ of cookie dough till flat in a 12 inch cake pan (spring loaded works well). Pour cream cheese over the top, then crumble the rest of the cookie dough on the top.
Bake uncovered 40 minutes or till just turning brown.
Cook in pan one hour, then refrigerate 1 hour before serving.
July 14, 2006
Company Bake-Off
Today is my company's Bake-Off. There are three categories: Pies, Cakes and Cookies. I've entered all three. There are sure to be some wonderful desserts entered. There are quite a few wonderful cooks around the office and I can't wait to indulge.

I entered a Pecan-Pumpkin Pie. This was the first time for this recipe, so I'm hopping it taste well. I got the recipe from a very old Farm Journal Pie Cookbook. It’s a book my mother-in-law Josefa gave to me. I think it should taste wonderful, plus it’s got an extra kick with toasted chopped pecans mixed in brown sugar and butter. Taste testers from the Farm Journal cookbook gave this pie excellent ratings…one person even said it was the best pie ever.

Pecan-Pumpkin Pie
2 eggs beaten
2 c. pumpkin (I use some that I processed last year and froze)
¾ c. sugar
½ tsp. salCinnamonmonnnamon
½ tsp. grated ginger root
¼ tsp. ground cloves
1 2/3 c. evaporated milk or light cream
Caramelized Pecan Topping
Blend eggs and pumpkin. Stir in sugar and other dry ingredients and mix well. Blend in milk or cream.
Place into an unbaked 9 inch pie shell.
Bake in preheated 400 degree oven for about 45 minutes or until a knife inserted in the middle comes out clean.
Cool Completely.
Caramelized Pecan Topping
Combine 4 tblsp. Soft butter, 2/3 c. brown sugar, and 2/3 c. coarsely chopped pecans. Sprinkle on top of cooled pumpkin pie and cover entire top. Place under broiler for about 3-4 minutes, but watch carefully so as not to burn.
The last category is cookies. I'm not a huge cookie fan. I like them, but I'd much rather have cake or pie. This recipe is from Elise at Simply Recipes.
Mine got a little browner than I would have liked, but they will do. I always double the batch on these.

Butter Pecan Cookies
from Simply Recipes
3/4 c. chopped pecans
1/2 c. unsalted butter, soft
1/3 c. sugar, plus more for dusting
1 tsp. vanilla
1/8 tsp. salt
1 c. flour
Preheat oven to 350 degrees. Toast pecans. Cream butter first, then add sugar and cream until fluffy.
Add all ingredients besides pecans. Mix well and fold in pecans.
Roll into small balls and roll into sugar. Then place on to a baking stone and flatten.
Cook until lightly browned.
And finally...here entriesof my entires for today's Bake-off.

June 5, 2006
A pie that is worth it all
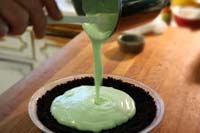 Are you ready for a cool and refreshing pie for the summer...then I have the pie for you. This pie will go perfect alongside a backyard bbq for the Fourth of July.
It calls for a few ingredients that you'll have to purchase special, but it's worth it.
Grasshopper Pie
(thanks for sharing Lynn)
20 oreo cookies (40 halves), fillings discarded, cookies crushed
5 Tbsp butter, melted
3/4 cup hot milk
24 large marshmallows
1/4 cup creme de menthe liqueur
2 tablespoons white creme de cacao
1 cup whipping cream, whipped
2 drops green food dye.
Preheat oven to 425°F.
Mix crushed oreo cookie halves and butter. Pat into bottom and sides of 9 inch pie dish. Bake in oven for 5 to 10 minutes; remove from oven and cool completely. Once cooled, place in freezer to chill.
In saucepan, melt marshmallows in milk over medium heat. Remove from heat and cool. Add creme de menthe and creme de cacao, and mix well. Add a drop or two of green food dye if desired. Fold in whipped cream. Pour into chilled pie shell. Freeze for 3 hours.
May 15, 2006
What's the mystery in this pie?
 Cream Cheese! That's the mystery in the delightful pie.
I know what you are thinking...cream cheese in a pecan pie? Trust me folks...it's totally worth it.
Last year in my company's pie contest, I entered my mother's famous Texas Pecan Pie. I will admit it wasn't the prettiest pie there. I hadn't yet master the art of decorating a pie crust. But I knew it tasted good. Another lady at work entered what she called a Mystery Pecan Pie.
I was intrigued...I had to know what the mystery was all about. When she told me I was surprised to hear the mystery was cream cheese. And, needless to say her pie took 1st place and my plain ole pecan pie took 2nd.
I 've searched for the perfect Mystery Pecan Pie recipe and I finally have it. Trust me, I've tried a lot of different recipes for this recipe, but Paula Deen takes the cake...or maybe I should say the "PIE" in this case.
Although, I do love this recipe, it's still nice to have the original thing every once in awhile....Mom's Texas Pecan Pie recipe!
Happy Baking!
Mystery Pecan Pie
by Paula Deen
Topping:
3 eggs
1/4 cup sugar
1 cup light corn syrup
1 teaspoon vanilla extract
Pie:
1 (8-ounce) package cream cheese
1/3 cup sugar
1/4 teaspoon salt
1 teaspoon vanilla extract
1 egg 1 un-baked deep-dish (9-inch) pie shell
1 1/4 cups chopped pecans
Preheat oven to 350 degrees F.
Combine all topping ingredients in a medium bowl. Set aside.
In a medium bowl, mix cream cheese, sugar, salt, vanilla, and egg until combined. Pour into pie shell. Top with chopped pecans. Pour topping over pecans. Bake for 45 minutes. Serve warm or at room temperature.


 Posts
Posts