I’m already thinking about Christmas around our house- where to put up all the Christmas trees in our new house, can I even have all my trees out with a 1 year old running around, Christmas shopping for family and making homemade gifts!
One special homemade gift my mother and I also enjoy making together is Jalapeno Jelly. We always have plenty of Jalapenos from the garden and it seems like we always have to find something to do with them.
Making jelly isn’t as difficult as most believe- it’s actually quite simple. Just be sure and wear gloves when preparing the peppers so your hands aren’t burning for a week.
This jelly makes a perfect holiday gift for neighbors and friends. Serve this jelly with a cream cheese topped cracker for your holiday gatherings!
>Jalapeno Jelly
Yields: about 5 half pints
from mom
¾ lb jalapeno peppers (or more if you want more heat)
2 pouches liquid pectin
2 c. cider vinegar (divided)
6 c. sugar
Green or red food coloring
Wash peppers; drain. Remove stems and seeds. Puree peppers and 1 c. vinegar and sugar in a large pot. Bring to a boil and boil for 10 minutes. Stir constantly.
Stir in liquid pectin and return to a rolling boil. Boil hard for 1 minute, while continuing to stir.
Remove from heat and skim foam if necessary. Stir in a few drops of food coloring of choice. Ladle hot jelly into jars in a boiling water canner.
NOTE: When cutting and seeding the peppers, wear rubber gloves to prevent hands from being burned.
Don't know how to can? Don't worry, I've got you covered! Check out the University fo Missouri Extension website for info on how to can.
September 25, 2010
Holiday Jalapeno Jelly

April 23, 2010
Guacamole Anyone
 When I was pregnant with Caston there was one food and one food alone that cured my carvings- Mexican!
September 10, 2009
Buffalo-Style Chicken Wings
 If there is one food that goes with a MU tailgate party it’s WINGS! MU takes on Bowling Green for the home opener this weekend and this recipe is sure to be a hit at your game day party!
Buffalo-Style Chicken Wings
Blue Cheese Dressing (recipe follows)
24 (about 4 pounds) chicken wings
Salt and freshly ground black pepper
4 cups vegetable oil
4 teaspoons butter
2 to 5 tablespoons hot pepper sauce or to taste
1 tablespoon white vinegar
Celery sticks
Make Blue Cheese Dressing first and refrigerate at least 1 hour before using.
Cut off the tip of each chicken wing and discard it. Cut the wing in half (cutting at the joint) to make two pieces. Wash and dry the chicken wings (they need to be very dry to be fried crisp). Sprinkle with salt and pepper.
In a deep fryer or large pot, add vegetable oil and heat to 400 degrees F. or until the oil starts to pop and sizzle. (Note: The oil should be able to cover the wings and still maintain the same temperature.) If using an electric fryer, set the temperature to 425 degrees F.
Add half of the chicken wings and cook 10 to 15 minutes or until golden and crisp, stirring occasionally. When done, remove from the hot oil and drain on paper towels (do not pile the wings in a bowl, because the fat will cool and congeal before it runs off). Repeat with remaining chicken wings.
In a large saucepan over medium heat, melt butter. Add hot sauce and vinegar; stir well and remove from heat immediately. Add drained and cooled chicken wings and mix together. Using tongs, take chicken wings out of sauce and let the excess sauce drain off. Place the wings on a hot grill or in a 350 degree F. oven for 2 to 3 minutes to bake in the sauce. Serve with Blue Cheese Dressing and celery sticks.
Makes 4 to 6 servings.
Blue Cheese Dressing:
1 cup mayonnaise
2 tablespoons finely chopped onion
1 clove garlic, minced
1/4 cup finely chopped fresh parsley leaves
1/2 cup sour cream
1 tablespoon fresh-squeezed lemon juice
1 tablespoon white vinegar
1/4 cup crumbled blue cheese
Salt and freshly ground black pepper to taste
Red (cayenne) pepper to taste
In a large bowl, combine mayonnaise, onion, garlic, parsley, sour cream, lemon juice, vinegar, blue cheese, salt, pepper, and cayenne pepper. Cover and refrigerate for at least 1 hour before serving.
Makes 2 1/2 cups.
August 24, 2009
Another State Fair Down
 I apologize for the blog not being updated for awhile. Each year during this time I sorta blank out because of the Missouri State Fair. We just got back today from the fair and I am so thankful for another fair to be done.
December 18, 2008
Christmas Dinner Menu
 Many folks stress about the holidays and for good reason. Our country is in economic distress, food prices are sky high and Christmas is just next week…which means all those presents, decorations, wrapping paper that you paid for by credit will be coming to haunt you in January!
I have to make frequent trips to the grocery store during the holidays because all of the baking I do. I was there this week and could not believe just the few items I had totaled $69.54 – and I only had two bags! WOW – I was speechless.
Of course, looking back on the receipt I ask myself – “Did I really need those Goat Cheese Stuffed Olives, or the extensive selection of Spanish cheeses. Or how about those oh so tasty, but so darn expensive gourmet potato chips.” I did however skimp on some things: sour cream, cream cheese and marshmallows. But, it just goes to say that sometimes we splurge a little too much, when we could be more thrifty.
Saying that though, there are just some things I will never cut corners on – and that’s my Christmas dinner!
We are hosting the McConnell family for the holidays next week and I’m so very excited! Last year I hosted Christmas for my family and it was so much fun and less stressful. You see we live 3 hours from both sides of our family and our families live about 2 ½ hours apart. So, this makes for very long holidays and gets very tiring going to and from. This year though will be a piece of cake since we only have to drive south for one Christmas.
I finally have the Christmas dinner menu planned out (and as you can tell – I’m not cutting any corners on this menu). In my opinion when it comes to food, especially Christmas dinner – you can only buy the best in ingredients for the ones you care the most about!
Merry Christmas from my kitchen to yours!
McConnell Christmas Dinner Menu
Appetizers
Olives (Black, Spanish and Stuffed with Goat Cheese)
Spanish Cheeses, Burgers Smokehouse Sausage (local Missouri company) and Crackers
Spudmaster Potato Chips and a Dip
Rosemary Pinwheels
Dinner
Three Meat Dish (Chicken, Ham and Beef Roast)
Holiday Sweet Potato Casserole
Country Green Beans
Pecan Grape Salad
Croissant Rolls
Corn Casserole
Desserts
Southern Red Velvet Cake
Texas Pecan Pie
Very Cherry Pie
Pumpkin Gooey Butter Cakes
Smooth as Silk Chocolate Pie
Be looking for these recipes to come…
September 6, 2008
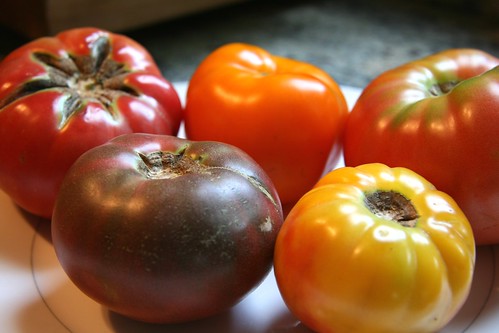
Heirloom Tomatoes: Taste the Freshness
 Although the farmers’ market season is winding down you can still get out to your local farm stand and markets and take part in one of the very best parts local food – heirloom tomatoes!
My family has grown heirlooms in our family garden since I was a child, as do I in my own garden. Heirlooms (or heritage tomatoes) are non-hybrid tomatoes. The definition of the use of the word heirloom to describe plants is highly debated, according to Wikipedia. I consider a true heirloom a cultivar that has been nurtured, selected, and handed down from one family member to another for many generations.
There are SO many varieties to choose from when it comes to heirloom tomatoes…endless possibilities. My favorites are Cherokee Purple and Green Zebra.
If you have never had the opportunity to taste the freshness of heirloom tomatoes, I highly suggest you visit your local market before the end of the season and give it a try.
This year at the Missouri State Fair visitors were able to taste 9 varieties of heirloom tomatoes at the Missouri State Fair Farmers’ Market I put together in the Ag Building. Read about the market events and the heirlooms on my Farmers’ Market Blog or check out other photos from the fair market.
Here are some good readings if you are interested in heirloom tomatoes as well. Or maybe you want to buy some heirloom seeds for your garden next season….take a look at Baker Creek Seeds (where I purchase a lot of my garden seed) or Morgan County Seed (both Missouri companies).
Suggested Heirloom Readings:
Smith & Hawken: 100 Heirloom Tomatoes for the American Garden (book)
The Heirloom Tomato Cookbook (book)
Why Grow Heirloom Tomatoes
How to plant heirloom tomatoes
Now for a heirloom tomato recipe that I hope you all enjoy!
Creamy Polenta-Stuffed Heirloom Tomatoes
1 Tbs. butter
1 Tbs. diced shallot
1/2 tsp. minced garlic
3 cups lower-salt chicken broth
1/2 cup heavy cream1 cup polenta (such as Bob's Red Mill brand)
1/2 Tbs. chopped fresh thyme
1/2 tsp. chopped fresh rosemary
1/4 cup plus
2 Tbs. freshly grated Parmigiano Reggiano
Kosher salt and freshly ground black pepper
8 large Roma-style heirloom tomatoes
2 Tbs. chopped parsley
In a medium saucepan over medium heat, melt the butter. Add the shallot and garlic and cook, stirring constantly, about 2 minutes. Add the chicken broth and bring to a boil. Add the cream and then whisk in the polenta. Reduce the heat to a simmer, stirring constantly with a wooden spoon. Add the thyme and rosemary and continue to cook, stirring frequently, until the polenta is tender, creamy, and thick, 15 to 20 minutes. Remove from the heat and whisk in 1/4 cup of the cheese. Season to taste with salt and pepper.
Position a rack in the middle of the oven and heat the oven to 400° F. Line a large rimmed baking sheet with parchment paper. Halve the tomatoes lengthwise and hollow them out. Cut a very thin slice off the bottom of each tomato half so the filled tomato can lie flat without rolling. Arrange the tomatoes on the baking sheet and season them lightly with salt. Fill each tomato half with some of the polenta, mounding just slightly (depending on the size of your tomatoes, you may or may not use all the polenta). Sprinkle the remaining 2 Tbs. of cheese and the parsley over each. Bake until the tomatoes are soft, about 20 minutes. Let cool slightly before serving.
June 25, 2008
Back With Many New Recipes from Spain
 Yes, I know it’s been a bit since I’ve posted and I do apologize but with being gone for three weeks in Spain put me a little behind in work when I arrived back. Thanks for the emails from some loyal readers, I appreciate the kind notes.
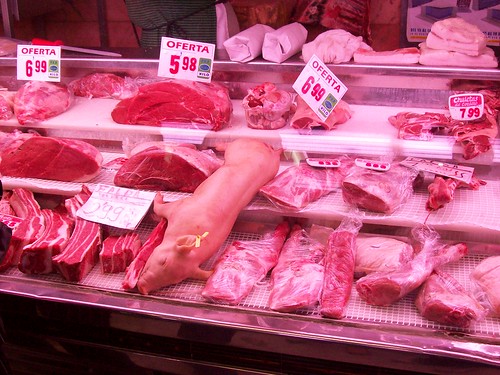
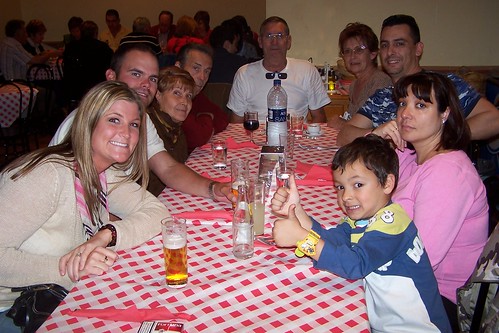
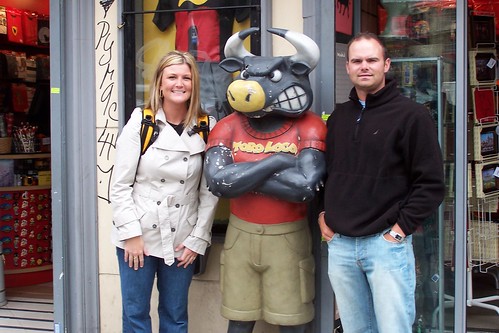
How was Spain? It was a wonderful experience that I will always remember. We walked up mountians, view world famous paintings and buildings, shopped at local farmers' markets for meat, fish and produce. From tours of palaces where I saw walls and ceilings of gold and beautiful paintings, fountains galore, to cathedrals that absolutely amazed me by the treasures that laid inside and not to mention the best part of all- THE TAPAS! View my photos from Spain.
Tapas, you ask? Tapas are snacks, canapés or finger food. Tapas come in many different forms and can vary from town to town! But, what are they?
Spain also showed me a new appreciation for new tastes to draw upon to create new recipes which I will be sharing. Today, I’ll pull out one of my favorite recipes from Spain that we had with dinner almost everyday – A Spanish Salad. No, salad dressing on Spanish Salads- just olive oil and vinegar.
March 18, 2008
Stromboli Anyone?
 Today is my co-worker Shelley's birthday and we started the day with breakfast food (almond coffee cake, breakfast casserole, milk, oj, a Double Chocolate Gooey Butter Cake....yes that's right cake for breakfast...so good). Now, we are moving on to lunch and afternoon snacks (stromboil, spinach dip, hot wings, chips, key lime pie, cake, cheesecake dip, fruit and cream and much more!)
My friend Veronica made the Stromboli and I love these yummy sandwiches. Here is the recipe she uses. And if you are interested in the background of the word Stromboli here is what Wikipedia says.
This rolled baked sandwich is perfect for feeding a crowd of hungry sports fans, or a hungry family for a casual supper. You can really use any combination of meats, cheeses and even veggies you choose, so take our suggestions with a grain of salt. One hint however, the more veggies you use, the more liquid they'll release, so too many veggies can make a somewhat soggy stromboli. Use as many different fillings as you like, but it's important to not layer them too thickly, as this will make it difficult to roll the stromboli.
February 1, 2008
Super Bowl Dip
Looking for a recipe for Sunday's Super Bowl....this is one that will leave them begging for more.
Shrimp and Crab Dip
by Lane
1/4 cup (1/2 stick) butter
1 large chopped red bell pepper
1 8oz. cream cheese, room temp.
1 pound medium fresh shrimp, peeled coarsely chopped
3 small cans of crab meat
1/3 cup sliced green onion or 1 small yellow onion, chopped fine
1 1/2 cups sour cream
1 T. lemon juice
¼ tsp. red pepper
½ tsp. basil
1 T. parsley
Salt and pepper
1 cup shredded Parmesan cheese
1 cup shredded mozzarella cheese
1 cup mayonnaise
Assorted Crackers or bread for serving
Preheat oven to 350°F.In a medium skillet, melt butter over medium heat. Add red bell pepper, and cook 3 minutes. Stir in shrimp, salt, parsley and green onion; cook 3 to 4 minutes, or until shrimp are firm and barley pink. In a large bowl mix cream cheese well add the sour cream, cheeses, seasonings, and mayonnaise and mix well. Add crab meat and mix in. Add shrimp, red bell pepper, and onion mixture to bowl. Spoon mixture into a large baking dish. Bake 50 minutes, or until lightly browned and bubbly. Serve with assorted crackers or bread.
September 19, 2007
Bread & Butter Pickles
 My grandmother used to make the best bread and butter pickles ever….straight from her garden to the table. I used to eat so many of these as a kid. My mother is now the canner in the family. I can occasionally produce from my garden, but working full-time makes it a little hard. Plus, my mother cans enough for our entire family, so I still get quite a few canned items from her.
If you want to make canned pickles here is an excellent recipe to start you off:
Bread and Butter Pickles
4 quarts pickling cucumbers
1 1/2 cups onions, sliced
2 large garlic cloves
1/3 cup pickling salt
2 quarts chopped ice
4 1/2 cups sugar
1 1/2 tsp. turmeric
1 1/2 tsp. celery seed
2 T. mustard seed
3 cups white vinegar
In large bowl, add sliced cucumbers and onions, garlic cloves and pickling salt; mix well. Cover with chopped ice, place towel over, and let stand 3 hours. Prepare brine by combining sugar, turmeric, celery seed, mustard seed and vinegar in large pot; bring to a boil.
Drain water and ice from cucumber slices and remove garlic cloves.
Add cucumbers to brine; simmer 5 minutes. Pack in sterile jars, leaving 1/2 inch headspace. Seal. Process in boiling water bath for 10 minutes. Allow to stand two weeks before opening.
June 25, 2007
Feta-Stuffed Zucchini
Have you visited your local farmers' market yet this season? If not you are missing out on some of the best local produce in your area.
I've changed career paths this past month and moved into a new position with the Missouri Dept. of Agriculture as an Ag Promotions Specialist. I now handled statewide promotions and marketing for the more than 115 farmers’ markets across Missouri, as well as Organics and Agri-tourism.
If you want more information about markets in your area please visit A Look at Missouri Farmers’ Markets, a new blog that I’m working on with my new position.
Speaking of the markets…this is one of my favorite recipes to make in the summer. Feta-Stuffed Zucchini goes perfect with anything you bbg outside and most all of the ingredients you can get from your local farmers’ market.
Feta - Stuffed Zucchini
5 medium zucchini, halved lengthwise
1 tablespoon olive oil
1 small onion, coarsely chopped
Freshly ground pepper
1/4 tsp salt
Italian bread crumbs
4 cloves of garlic, minced
1/2 tsp. fresh or dried basil
½ tsp. fresh or dried thyme
7 1/2 ounces feta cheese, crumbled
1 pint grape or cherry tomatoes, halved
Preheat oven to 475°.
Scoop out zucchini centers to form canoes, leaving a 1/4-inch border, set aside.
Arrange zucchini, cut sides down, on a rimmed baking sheet; bake 10 minutes. Remove from oven.
Meanwhile, heat oil in a large skillet over medium. Add onion and 1/2 teaspoon pepper, salt and basil and thyme; cook, stirring, until soft, 3 to 5 minutes. Add chopped zucchini and garlic, and cook, stirring, until most of the liquid has evaporated, about 8 minutes. Remove from heat; let cool slightly.
Fold in feta and tomatoes and fill zucchini with mixture. Sprinkle with bread crumbs and bake at 400 degrees for 20 minutes.
April 27, 2007
Stuffed Taters
I think everyone has their own version of stuffed potatoes, but here is my own take on this classic recipe.
I also like to sometimes add chopped up cooked shrimp in my stuffed potatoes, but you can add whatever mixture you want to the potato mixture. These also make great appetizers...just cut potatoes in half and serve smaller portions.
My Stuffed Potatoes
4 large baking potatoes
1/4 cup butter
1/3 cup finely chopped green onion, with tops
1/2 cup chopped red bell pepper
1 (3-ounce) package cream cheese, softened
1 cup mayonnaise
1 cup sour cream
1/2 cup chopped cooked bacon or ham
1 cup grated sharp Cheddar cheese
1 teaspoon salt
½ teaspoon pepper
1 teaspoon garlic powder
Preheat oven to 400°.
Line a baking sheet with foil. Wash potatoes and dry well. Place potatoes on prepared baking sheet, and bake for 40 to 45 minutes.
In a skillet, melt butter over medium heat, add green onion and bell pepper and cook until tender.
Cut potatoes in half lengthwise. Scoop out potato and place potato into a medium bowl. In bowl add cooked vegetables, cream cheese, mayonnaise, sour cream, ham, 3/4 cup cheese and seasonings and mix well.
Spoon mixture evenly into reserved potato shells. Place on baking sheet, and bake for 30 minutes. Sprinkle with remaining 1/4 cup cheese and sprinkle tops with paprika lightly. Bake for another 5 minutes or until lightly browned.
April 19, 2007
Cooking Up Okra
 If there is one thing a southern girl knows it’s good fried okra.
As a kid my brothers and I could be found most summers in my parent’s huge garden picking produce, mulching and helping gather peas, okra, corn and whatever else my parents needed help with.
I laugh when I look back of photos my mother shot of me in the garden. Usually I could be found barefoot, wearing this little blue summer dress my Grandmother Baldwin had given me and my mother’s straw gardening hat. I loved feeling the dirt between my toes and running through the sprinklers that were set up all throughout the garden.
I was reminder of these wonderful garden memories the other day when I was watching an episode of Paula’s Home Cooking where Paula was frying up a batch of Cajun fried okra (one of my favorite comfort foods).
Her recipe reminder me of when I was a little girl helping my mother fry up a batch of freshly picked okra for the boys in our family. My mother always used buttermilk and Cajun seasonings for her own fried okra and it was delicious every time. But, she always served fried okra with a homemade ranch dipping sauce. Paula, however, serves her okra with a Creamy Chili Sauce.
Thanks Paula for another wonderful southern fried recipe.
(Photo from Food Network)
Cajun Fried Okra
By Paula Deen
6 cups oil, for frying
1/2 cup cornmeal
1 cup all-purpose flour
2 teaspoons House Seasoning
1/4 teaspoon Cajun spice
2 pounds fresh okra, sliced, 1/2-inch thick
1/2 cup buttermilk Creamy Chili Sauce, recipe follows
Heat oil in a large, heavy-bottomed skillet or Dutch oven to 350 degrees F. (You may not need to use this much oil; do not fill the pan more than halfway up the sides with oil.)
April 18, 2007
Crab Cakes Anyone?
 A friend of mine was looking for a great crab cake recipe that wasn’t very difficult to put together. I saw Paula makes these and just had to try them.
These are wonderful with the lemon-dill sauce! I’m going to serve them for an upcoming wedding shower I’m throwing for one of my girlfriends.
(Photo from Food Network)
Crab Cakes with Lemon-Dill Sauce
By Paula Deen
Lemon Dill Sauce:
Crab Cakes:
To prepare the crab cakes, melt 1 tablespoon of butter in a heavy skillet over medium heat. Saute the onion, bell pepper, and garlic until the pepper is limp, approximately 3 minutes. Add the cream, mustard, 1 egg, parsley, cayenne pepper and 1/2 cup bread crumbs, to taste, and mix well. Gently fold in the crabmeat.
Form the mixture into 8 patties, about 1/2-inch thick. In a mixing bowl, combine the remaining 1/2 cup of bread crumbs with the Parmesan. Pat this topping onto both sides of the patties. Refrigerate until firm, about 2 hours.
Using a skillet, combine the oil and remaining 2 tablespoons of butter. Saute the crab cakes in the hot oil-butter mixture for approximately 3 minutes on each side or until golden brown. These crab cakes can also be baked for 7 to 10 minutes in a 400 degree F oven.
March 22, 2007
Another Great Dip
As I've said before I love experiementing with recipes and trying new ways to make a good recipe GREAT.
I did just that with a shrimp dip recipe from Paula Deen. I turned a good recipe into a GREAT one. I made this recently at my work's St. Pat's Pot Luck. It was a hit adn I've been asked for the recipe....here you go.
Shrimp and Crab Dip
by Lane
1/4 cup (1/2 stick) butter
1 large chopped red bell pepper
1 8oz. cream cheese, room temp.
1 pound medium fresh shrimp, peeled coarsely chopped
3 small cans of crab meat
1/3 cup sliced green onion or 1 small yellow onion, chopped fine
1 1/2 cups sour cream
1 T. lemon juice
¼ tsp. red pepper
½ tsp. basil
1 T. parsley
Salt and pepper
1 cup shredded Parmesan cheese
1 cup shredded mozzarella cheese
1 cup mayonnaise
Assorted Crackers or bread for serving
Preheat oven to 350°F.
In a medium skillet, melt butter over medium heat. Add red bell pepper, and cook 3 minutes. Stir in shrimp, salt, parsley and green onion; cook 3 to 4 minutes, or until shrimp are firm and barley pink. In a large bowl mix cream cheese well add the sour cream, cheeses, seasonings, and mayonnaise and mix well. Add crab meat and mix in. Add shrimp, red bell pepper, and onion mixture to bowl. Spoon mixture into a large baking dish. Bake 50 minutes, or until lightly browned and bubbly. Serve with assorted crackers or bread.
March 19, 2007
Cheesy Garlic Biscuits
I’m pulling a recipe from the archives today. It’s a recipe I use about twice a week and is a family favorite. The best part: Takes 1 minute to prepare and makes great leftovers.
I adapted my cheddar biscuit recipe from Paula Deen’s Garlic Cheddar Biscuits. Paula makes garlic butter, but I have found that I like to just put everything into the biscuit mix and I like to add different cheeses.
Many of my friends and family say these biscuits are better than the ones served at Red Lobster, but I’ll let you be the judge yourself. Serve these with just about any meal you want.
Cheesy Garlic Biscuits
By Lane, adapted from Paula Deen recipe
1 1/4 cups biscuit mix
1/2 cup grated sharp Cheddar
¼ cup parmesan cheese
1/2 cup milk
1/2 stick unsalted butter, melted
1 teaspoon garlic powder
1/4 teaspoon salt
1/4 teaspoon dried parsley flakes
Preheat the oven to 400 degrees F. Combine all ingredients and mix, not to over mix. If using cooking sheet, be sure to line sheet with parchment paper or spray with cooking spray.
Spoon out on to a baking stone or cooking sheet. Bake for about 10 minutes or until lightly browned.
February 6, 2007
Super Bowl Party was a Hit

Last week in my post, Football Party Recipes , I provided the recipes for a lot of the party food, but I didn’t have the recipe for a dip that my friend Jeannie brought over.

This recipe is great for those friendly get-togethers and summer bbq’s that are not too far away…
Pizza Dip
By Jeannie
2 blocks of cream cheese (softened)
Mix with 1-2 Tbs. Italian Seasoning (optional)
Spread in stone baking dish
Top with:
Pizza Sauce
Shredded Cheese (any kind will work)
Pizza Toppings (olives, pepperoni, hamburger, etc)
Bake on 350 degrees for about 30 minutes (watch for the cheese to be bubbly)
Serve with sliced bread, crackers, or chips!
February 2, 2007
Football Party Recipes
A small group of friends are gathering at my house this Sunday for a Super Bowl party. I love entertaining my friends and cooking for them, but instead of just me doing the cooking everyone is bringing along a dish.
I am making chocolate covered pretzels, a Double Chocolate Gooey Butter Cake, Cheesy Potato Casserole and probably a red pepper dip. I’ll also have plenty of mixed nuts and chips around for the boys to munch on.
Tyne is bringing chili and a shrimp dip, Shelly is bringing a spinach artichoke dip, Jeannie is bringing a pizza dip, chips and crackers and Kala is bringing along about 40 chicken wings and some little smokies.
There will be plenty of beer on hand. I am planning on bringing a couple of coolers and sitting them in the living room for easy access.
If you are still looking for some great Super Bowl party ideas or recipes, the Food Network has them. Go Bears!
January 8, 2007
Healthy Sandwich Time
Here is a healthy meal for us that made a New Year's Resolution to eat healthier in 2007. This recipe comes from the newest edition of Cooking with Paula Deen.
I love panini sandwiches. They are quick to make and taste oh so good.
Makes 4 servings
1-1/2 pounds boneless skinless chicken breasts
1 teaspoon Greek seasoning blend
1 tablespoon olive oil
1/2 red bell pepper, thinly sliced
1/2 onion, thinly sliced
1/2 tomato, seeded and thinly sliced
4 slices mozzarella cheese
4 sandwich size loaves of ciabatta bread
Cut chicken breasts into thin slices. Sprinkle evenly with Greek seasoning.
In a medium skillet, heat olive oil over medium-high heat. Add chicken, and cook 4 minutes, stirring occasionally. Add bell pepper, onion, and tomato, and cook 5 minutes, or until tender.Preheat panini grill to high.
Slice ciabatta in half horizontally. Divide chicken mixture evenly over bottom halves of bread. Top each with a slice of cheese. Cover with tops of ciabatta.
Spray the grill with cooking spray. Place sandwiches on grill, and close grill lid, pressing down if needed. Grill panini until bread is crusty and browned, and cheese is melted (about 5 minutes). Serve immediately

January 2, 2007
Footprints in Our Lives
Have you ever thought about how you have made the friends and relationships in your life? I have.
As I was making a pot of crab soup last night I started thinking about the people I have met throughout my life and how they have made footprints in my life. For instance, the soup recipe I was making was given to me by some folks in Maryland.
Cecil and Michelle I met about two years ago. My parent’s had decided that they were going to sell our family farm and purchase another one closer to Springfield, Mo. As soon as they put the farm up for sale, people were visiting from all over the county to look over the farm. There were people from California, Florida, Colorado, New York…I was amazed by the response.
But while all this was happening my parents were having their doubts about their choice to sell. I was unhappy about the decision from the get go. The family farm meant the world to me. Every childhood memory I had steamed from those hills, trees, creeks, barns, cattle, the swimming hole, dirt roads, fences and the “love tree.”
The “love tree” you ask? This is a very special place on my parent’s farm. My niece named this tree. The love tree is on the largest hilltop on my parent’s farm. It overlooks the entire farm, stock and barns. On this very special hilltop my husband proposed to me in 2002. We engraved our initials in this tree, and that is why my niece calls it the “love tree.”
Every memory of mine is wrapped into our family farm. So, when a couple from Maryland came for a visit (Cecil and Michelle) and decided to make an offer on my parents farm that matched my father’s asking price…..I became very worried!
This was the first buyer that asked the full asking price. Would my parent’s sell? Would I loose my Ozark hills? Would I never see our love tree again? Would I never be able to take my kids to the farm?
I met Cecil and Michelle and they were a wonderful couple. They had decied to move form Maryland to the Ozarks to escape the big city life and move their family to the country. They always wanted to have a farm and timber and they loved my parent’s farm.
For about four months the couple made frequent visits to our farm, as they were trying to sell their business in Maryland. During that time my parents and the couple became very good friends.
Then one day my father called me and asked me, “Lane how would you feel is we didn’t sell the farm?” Although my father new the answer to this question I gave him an answer. “That would be the best news in the world.”
So it was. My parents after many months of “to sell or not to sell” had decided to remain on our Ozark farm. But the friends they had made: Cecil and Michelle did purchase a farm about 20 minutes from my parents and the couple remains close family friends of ours.
It’s experiences like this that bring all different type of people into our lives. Mt friends stem from Charolais cattle breeders, former FFA’ers, college friends, overseas experiences, co-workers, local Mid-Mo friends, a summer softball team my husband and I play on, many ag-related groups I serve on….all these experiences shape the relationships we acquire and the people we are. I am thankful to have met so many wonderful people throughout my life like Cecil and Michelle.
Here is the crab soup recipe that Michelle passed on to my mother and me. It is way too easy to be as good as it is!

By Michelle
(This makes a Very large batch. I usually cut it in half, unless I’m serving it for a party.)
6 cans of cream of celery soup
2 quarts half and half
1 stick of butter
1 lb. of crabmeat (if using canned crab meat 4-5 (6 oz) cans) A bag of steamed broccoli florets
1 ½ tsps. of Old Bay seasonings (found in the spice area in your local grocery store)
2 T. garlic powder
3T. dry mustard powder
Put everything except the crabmeat and broccoli into a large pot. Bring ingredients to a slow simmer for 25 minutes. Be sure to stir quite often. Meanwhile, steam your broccoli florets and when steamed chop coarsely.
After the soup mixture has simmered for 25 minutes, place crabmeat and broccoli in pot and simmer till the mixture is thick enough for your own taste. Garnish with any white cheese and oyster crackers.
* After I add the crabmeat and broccoli I usually only simmer the soup for another 10 minutes and then remove it from the heat.


 Posts
Posts