I’m already thinking about Christmas around our house- where to put up all the Christmas trees in our new house, can I even have all my trees out with a 1 year old running around, Christmas shopping for family and making homemade gifts!
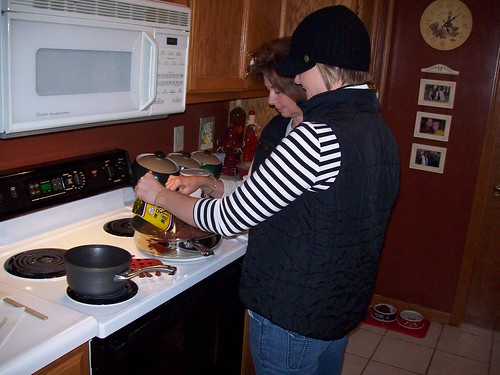
One special homemade gift my mother and I also enjoy making together is Jalapeno Jelly. We always have plenty of Jalapenos from the garden and it seems like we always have to find something to do with them.
Making jelly isn’t as difficult as most believe- it’s actually quite simple. Just be sure and wear gloves when preparing the peppers so your hands aren’t burning for a week.
This jelly makes a perfect holiday gift for neighbors and friends. Serve this jelly with a cream cheese topped cracker for your holiday gatherings!
>Jalapeno Jelly
Yields: about 5 half pints
from mom
¾ lb jalapeno peppers (or more if you want more heat)
2 pouches liquid pectin
2 c. cider vinegar (divided)
6 c. sugar
Green or red food coloring
Wash peppers; drain. Remove stems and seeds. Puree peppers and 1 c. vinegar and sugar in a large pot. Bring to a boil and boil for 10 minutes. Stir constantly.
Stir in liquid pectin and return to a rolling boil. Boil hard for 1 minute, while continuing to stir.
Remove from heat and skim foam if necessary. Stir in a few drops of food coloring of choice. Ladle hot jelly into jars in a boiling water canner.
NOTE: When cutting and seeding the peppers, wear rubber gloves to prevent hands from being burned.
Don't know how to can? Don't worry, I've got you covered! Check out the University fo Missouri Extension website for info on how to can.
September 25, 2010
Holiday Jalapeno Jelly

December 19, 2009
Making Fudge with Baby Caston
 My life has truly changed....I used to be the ultimate "multi-tasker", but with a 1 month old I've learned that there are some things that I just can't do like I used too.
November 11, 2009
Eat Local This Thanksgiving
 Do you want "Eat Local this Thanksgiving?" Well it's not as difficult as you might think.
October 19, 2009
Praline-Apple Bread Using Local Apples this Season
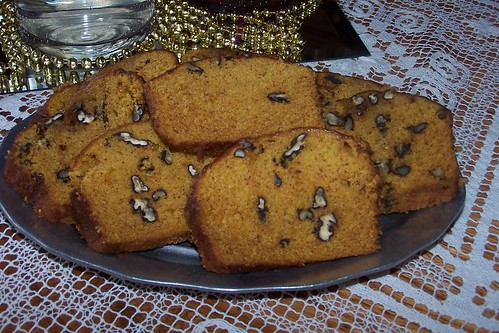
 My gal pal Tyne Morgan has been a busy cook it seems lately- she’s been baking up a storm and trying lots of new recipes. On a recent visit she was telling me about this Praline-Apple Bread recipe she had made and how simply delicious it was. She has Facebooked me the recipe about 3 weeks ago and I finally got around the making it the other day. She was right- a great recipe for this fall.
Be sure and visit a local orchard and pick up some local Granny Smith apples to make the bread and don’t forget to use Missouri Northern Pecans (they are wonderful to use in recipes like this). I just bought some at the recent Chestnut Festival this weekend for my holiday baking this season!
Praline-Apple Bread
From Southern Living Magazine
1 cup granulated sugar
2 large eggs
1 tablespoon vanilla extract
2 cups all-purpose flour
2 teaspoons baking powder
1/2 teaspoon baking soda
1/2 teaspoon salt
1 1/2 cups finely chopped, peeled Granny Smith apples (about 3/4 lb.)
1/2 cup butter
1/2 cup firmly packed light brown sugar
Preheat oven to 350°. Bake 1/2 cup pecans in a single layer in a shallow pan 6 to 8 minutes or until toasted and fragrant, stirring after 4 minutes.
December 29, 2008
Three Meat Dish

I love when a plan comes together. Christmas week was both wonderful and tiring. Wonderful because we spent the week with the ones that mean so much to us- our families and tiring because of all the cooking, cleaning and ensuring everyone was well entertained.
We started the week on Monday night with a long and late night’s drive to my folks house. The weather was supposed to get bad Tuesday morning, so we decided at the last moment to leave the night before. Tuesday was filled with lots of cooking for the Baldwin Family Christmas Eve Dinner.
I made a Southern Red Velvet Cake, Sweet Potato Casserole and a Corn Bread Casserole for Christmas Eve dinner. There were lots of presents opened Christmas Eve when my brothers and their families arrived and my niece and I spent some of the night practicing on her crocheting (part of her present that Charlie and I gave her was a crochet hook, yarn and a pretty basket to place everything in. She’s been begging her Auntie Lane to teach her how to crochet.)
Christmas morning my mother made her traditional Christmas pancakes and we all relaxed, joked and told old stories all morning long. Charlie and I had to leave later on that afternoon to drive back up north to Jeff City, because the McConnell crew was headed up to our house Friday night for family Christmas on Saturday.
I spent Friday cleaning the house, setting up the holiday table decorations and making pies. I make a lot of things the night before, so I could actually enjoy myself and not have as much to cook the day of the dinner.
Friday Charlie parents (Josefa and Raymond) plus his two twin nephews Michael and Stephen arrived. We did a simple grilled dinner that night (lamb chops, sirloin steak and chicken.)
Saturday went easier than I expected it would. Since most of the food was prepared (not cooked, just mixed up and in a dish) the day was very easy. You can tell from the Christmas Dinner Menu it was pretty extensive, but with some time put in the day before even this menu was easy. Charlie's sister and family came on up Saturday afternoon as well.
The Three Meat Dish was incredible. I could not even believe how tasty, tender and amazing it was. There were no leftovers at all! My gal pal Michelle, from Down on the Dairy called me about cooking this dish, so I thought it would be the first recipe I share from the Christmas Dinner menu. This is an easy meal, because you stick it all in a pan, cover and let it cook away. I think it’s important to use good meat though. With any meat – the dish will only be as good as the meat is.
Three Meat Dish
1 beef roast, about 2 lbs.
1 chicken, about 2-3 lbs.
1 ham or pork roast, about 2 lbs.
2 cups of dry white wine
2 cups chicken broth
1 cup of fresh parsley, chopped very coarse
2 cups of carrots, chopped rustic
2 cups of celery, chopped rustic, plus all the leaves
4 bay leaves
2 small onions, chopped coarsely
Garlic powder, lots of it
1 tsp. dried basil
½ tsp. pepper
Preheat oven to 300 degrees. In a large roasting pan place half the celery, onions, carrots and parsley. Lay all three meats side by side on top of the freshly cut veggies. Add your liquids (chicken broth and wine). Place the rest of the veggies in the dish around and on top of the meats. Sprinkle the pepper, dried basil and bay leaves all around the dish. Then, take about 4 T. of garlic powder and sprinkle all over the meat. (This is a lot I know, but is key to the great taste of the meat.)
Cover the entire dish tightly with alumni foil. When I say tight, I mean tight! You don’t want any steam to get out.
For the pounds of meat that I have listed in this recipe your cook time will be about 4 ½ hours to 5 hours. This will all depend up on the pounds of meat you are cooking though! The meat is done when you can stick a fork in it and the meat falls apart! Cooking this dish slow on low heat is very important.
* You can also add potatoes to the dish as well.
* All three meats need to be around the same size, except the chicken can be a little larger. * Depending on how many you will be serving will depend on the size of your meats. I think the ham is the most delicious out of all three of the meats, but trust me they are all very good.
* This recipe won’t disappoint you!
December 22, 2008
Family Times and Fantasy Fudge
 This weekend was almost a blur…Friday my friend Tyne and I went to Lake Ozark so she could finish up some Christmas shopping at the outlet mall, then we headed back to Jeff City because my folks were coming up for the weekend. When we got home they were already there with my husband enjoying in some wonderful Missouri wine, so Tyne and I joined in the festivities.
We had a wonderful pot roast that night and hung around the house that night talking about good ole times. My mother had brought me up a few little Christmas gifts, including some old Christmas ornaments from my childhood and an antique Betty Crocker Cookbook from the 1950’s. How fantastic, I love the smell of old cookbooks!
Tyne also opened her Christmas gifts from my husband and I…she was very excited!
Saturday, was just as hectic. The boys went fishing (which I don’t know how they could stand the cold weather and wind chill) at Lake Ozark, while mom and I headed into town to do some grocery shopping and a stop at Hobby Lobby to get some yarn for crocheting.
Saturday night I wanted to teach my mother how to make Paella, a Spanish dish. We only had time to make the quicker American version Paella though, since we had plans to go to the movies to see the movie Australia. (Which btw was wonderful. I spent time in Australia in high school and it brought back great memories and how can any movie go wrong with Nicole Kidman and Huge Jackman.)

Which brings me to today’s recipe (that I’ve been promising to post.) This is my mother’s own recipe for fudge. I’ve always had great reviews from this fudge and it’s fairly simple to make. There are two ways to make it. Some folks like rich fudge, others like a milk chocolate fudge. Therefore, I’ve show the difference in making the two versions below.
Happy Baking and Merry Christmas!
Baldwin’s Fantasy Fudge
By my mother
4 cups white sugar
1 tall can of condensed milk (12 oz)
2 sticks of butter

When a soft ball forms, remove from heat and add:
For milk chocolate fudge, (add 12 oz. of chocolate chips)
For richer, darker fudge, (add ¾ of a 24 oz. of chocolate chips)

2 cups of nuts of your choice (pecans are the very best though)
1 tsp. vanilla
Fold mixture, until all dissolved. Cool fudge in a buttered 13x9 dish. You can freeze the fudge as well.
December 18, 2008
Christmas Dinner Menu
 Many folks stress about the holidays and for good reason. Our country is in economic distress, food prices are sky high and Christmas is just next week…which means all those presents, decorations, wrapping paper that you paid for by credit will be coming to haunt you in January!
I have to make frequent trips to the grocery store during the holidays because all of the baking I do. I was there this week and could not believe just the few items I had totaled $69.54 – and I only had two bags! WOW – I was speechless.
Of course, looking back on the receipt I ask myself – “Did I really need those Goat Cheese Stuffed Olives, or the extensive selection of Spanish cheeses. Or how about those oh so tasty, but so darn expensive gourmet potato chips.” I did however skimp on some things: sour cream, cream cheese and marshmallows. But, it just goes to say that sometimes we splurge a little too much, when we could be more thrifty.
Saying that though, there are just some things I will never cut corners on – and that’s my Christmas dinner!
We are hosting the McConnell family for the holidays next week and I’m so very excited! Last year I hosted Christmas for my family and it was so much fun and less stressful. You see we live 3 hours from both sides of our family and our families live about 2 ½ hours apart. So, this makes for very long holidays and gets very tiring going to and from. This year though will be a piece of cake since we only have to drive south for one Christmas.
I finally have the Christmas dinner menu planned out (and as you can tell – I’m not cutting any corners on this menu). In my opinion when it comes to food, especially Christmas dinner – you can only buy the best in ingredients for the ones you care the most about!
Merry Christmas from my kitchen to yours!
McConnell Christmas Dinner Menu
Appetizers
Olives (Black, Spanish and Stuffed with Goat Cheese)
Spanish Cheeses, Burgers Smokehouse Sausage (local Missouri company) and Crackers
Spudmaster Potato Chips and a Dip
Rosemary Pinwheels
Dinner
Three Meat Dish (Chicken, Ham and Beef Roast)
Holiday Sweet Potato Casserole
Country Green Beans
Pecan Grape Salad
Croissant Rolls
Corn Casserole
Desserts
Southern Red Velvet Cake
Texas Pecan Pie
Very Cherry Pie
Pumpkin Gooey Butter Cakes
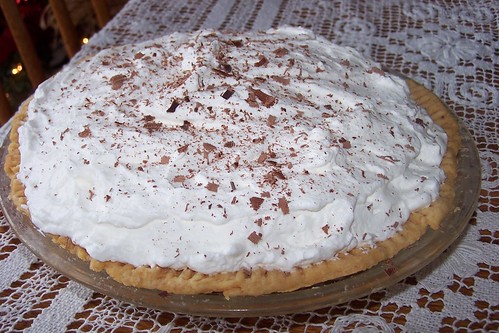
Smooth as Silk Chocolate Pie
Be looking for these recipes to come…
December 17, 2008
Beef Tenderloin for Christmas Dinner
 Why is it during the holidays we always cook up the traditional turkey and stuffing? Why not try something new?
Heat a large cast-iron skillet over high heat. Without adding any cooking fat, brown the roast on all sides (approximately 10 minutes). When browned, remove from heat. Place the browned roast and cast-iron pan in the oven and bake, uncovered, until a meat thermometer registers desired temperature (see below).
December 15, 2008
Holiday Baking 2008 Gets Underway

Nothing beats receiving homemade goodies during the Christmas in my opinion. I would much rather someone give me something they spent time thinking about and making that any store bought gift.
It might be a lot of work for the cook, but making holiday goodies brings smiles to faces and joy to the heart!

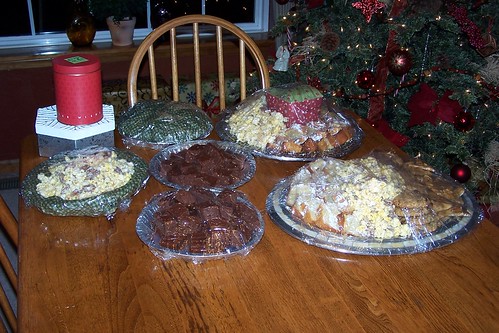
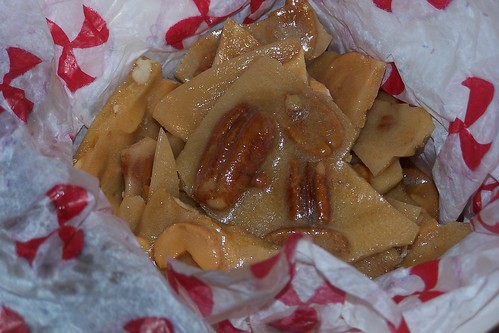
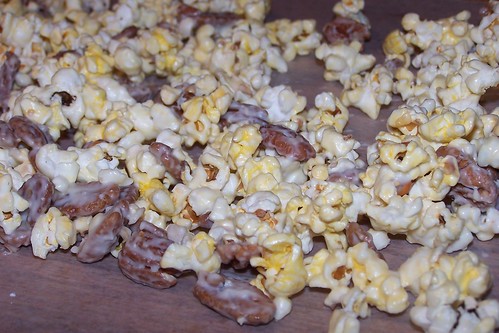
I switch up the menu each year when I bake. This year’s menu: Cashew and Pecan Brittle, Mini-Pound Cakes, Oatmeal Chocolate Chip Cookies, Almond Bark Popcorn (Pictured to the left), Fantasy Fudge and I still have three homemade Pumpkin Pies to make for some neighbors.
The Mini-Pound Cakes are my favorite because they are light and airy. The recipe comes from Martha Stewart, but of coarse!
Classic Pound Cake
Makes one 9-by-5-inch loaf
1 1/2 cups (3 sticks) unsalted butter, softened, plus more for pan
2 cups all-purpose flour
1 teaspoon salt
1 1/2 cups granulated sugar
1 teaspoon pure vanilla extract
6 large eggs
Confectioners' sugar, for dusting
Preheat oven to 350 degrees. Butter a 9-by-5-inch loaf pan; set aside. Whisk flour and salt in a medium bowl; set aside.
Put butter, granulated sugar, and vanilla in the bowl of an electric mixer fitted with the paddle attachment. Mix on medium-low speed until pale and fluffy, 3 to 5 minutes. Add eggs, one at a time, beating until combined after each addition. Reduce speed to low; mix in flour mixture until just combined.
Spoon batter into prepared pan, and smooth with an offset spatula. Bake, rotating pan halfway through, until cake is golden and a cake tester inserted into center comes out clean, 50 to 55 minutes. Let cool on a wire rack 10 to 15 minutes. Turn out onto rack, and let cool completely. Before serving, dust cake with confectioners' sugar, if desired. Cake can be stored at room temperature, wrapped well in plastic, up to 3 days.
December 10, 2008
Cranberries Make the Season
 I love Christmas time because it gives me the chance to bake with cranberries (which are a great treat in any baked good). So, I was really excited when I saw that Farmgirl Fare had a post on Cranberry Christmas Scones (Photo by Faregirl Fare)
I love making all types of scones. According to JoyofBaking.com, scones are believed to have originated in Scotland and are closely related to the griddle baked flatbread, known as bannock. They were first made with oats, shaped into a large round, scored into four to six triangles, and cooked on a griddle either over an open fire or on top of the stove.
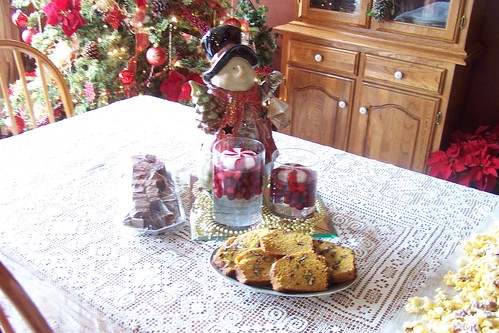
Side Note: Cranberries also make a beautiful dinner centerpiece for your holiday table. Take tall glass vases and place fresh cranberries at the bottom and place a white piller candle on top of the cranberries. Set vases ontop f glass mirrors on tables. This looks very elegant and makes for a very festive touch! You can also float the cranberries in any glass vase or bowl, or try making a cranberry wreath.
Here is an easy recipe from Farmgirl Fare’s blog that I hope you enjoy this holiday!
Farmgirl's Cranberry Christmas Scones
1/2 cup (1 stick) butter, chilled & cut into bits
On a floured surface, divide dough in half and gently pat each half into a circle 5 or 6 inches in diameter. With a sharp knife cut each circle into 6 wedges and place on a greased or parchment-lined.
December 9, 2008
Holiday Candy Makin’
Do you remember when you were a child and you watched your grandmother or maybe even mother make candy for the holidays? Fudge, peanut butter cups, peanut brittle, sugared pecans, divinity…these are the types of candy I helped my mother make in our country kitchen.
I loved to watch my mother’s hands when she was cooking. I thought they were magical and it always amazed me how she could make such sweet tasting treats.
My mother would make goodies for neighbors that lived in the Ozarks that had helped us with farm chores, like getting cattle up to be worked, pulling a calf, or rounding all the cattle up when they got out. She would also make goodies for folks that provided great services like the postal man, hairdresser, school bus drivers and even the local 4-H leader.

One of my favorite holiday candies is brittle. I found this brittle recipe from the Martha Stewart website. BTW- there is no other site to log on to – to find the best in everything than Martha Stewart. I don’t care what you think about the lady- she is classy through and through and has helped me survived many dinners and holiday dinners.

From Martha Stewart
Makes 1 1/2 pounds
Nonstick cooking spray
1 1/2 cups sugar
1/2 cup light corn syrup
3/4 teaspoon salt
2 tablespoons butter
1 1/2 cups mixed nuts, such as pecan halves, cashews, pistachios, coarsely chopped if large
1 teaspoon vanilla extract
1/4 teaspoon baking soda
Spray a rimmed baking sheet and a wide metal spatula with cooking spray; set aside.
In a 2-quart glass measuring cup, combine sugar, corn syrup, and salt, stirring until sugar is moistened. Microwave on high for 4 minutes. Stir in butter and nuts; return to microwave for about 5 minutes, until the sugar mixture is thick, bubbly, and very pale brown in color. Mixture is very hot; use handle when holding and pouring.
Remove from microwave, stir in vanilla and baking soda (mixture may foam up). Immediately pour onto prepared baking sheet, spreading mixture as thinly as possible with the prepared spatula. Let stand 20 minutes until hardened, then lift off sheet, and break brittle into bite-size pieces.
December 8, 2008
Get Your Wassail Here

Time for shopping for our loved ones, holiday baking for our co-workers and neighbors, trimming the tree, plugging in all the lights to see which ones work and which don’t, Christmas cards, table centerpieces made of holly, greenery and cranberries, choosing the perfect wine to accompany the perfectly planned out Christmas dinner and all the laughter and joy around the Christmas tree opening gifts and treasures. What isn’t there to love about Christmas!
I’ve been busy decorating our house since right before Thanksgiving. Yes, I’m one of those people that like to get a jump start on Christmas decorating. But, before you judge - let me explain.
I put out 10 trees (all with themes), plus outside decorations- so that takes a lot of time. My goal each year is to have the house decorated by Dec 1 and have Christmas cards mailed out the first week of December. Both of which I accomplished this year! Thank goodness. After I get all of that done I can kick back and relax.

My husband and I took a getaway this past weekend to Branson to “see the lights” and stay at my most favorite place in the world – Chateau on the Lake. SDC always gets us in the holiday spirit with the hot wassail, beautifully decorated trees, holiday music and Christmas parade (which is every night at 7pm). Plus, I always get great ideas for next year’s Christmas trees from walking through the Christmas ornament shop at SDC.

Wassail is a mulled cider type drink that is a holiday tradition in many countries. This hot, spiced punch is most popular at Christmas. It usually contains fruit juices, cinnamon, cloves and other spices.
McConnell Holiday Wassail
1 qt. apple juice
1 qt. orange juice
2 c. cranberry juice
2 tsp. lemon juice
3 T. honey
1 cup sugar
4 cloves
3-4 cinnamon sticks
8 whole allspice
Navel Orange Slices
Combine all ingredients in listed order to your crockpot, at least a 4 quart crock. Cook on low setting for about 4 hours or until heated to desired temperature. You may also cook it on high initially for an hour and reduce the heat to save time. This reheats well for 3 days, plus your entire house will smell like Christmas – what gets better than that!
November 26, 2008
To Brine Your Turkey or Not
 That is the question. Some folks say that turkeys don’t need to be brined, but in my opinion a brine can really make a tasty turkey for your holiday dinner.
Brine you may ask? Brining adds moisture and flavor to poultry and helps to keep it from drying out. A turkey can be a serious investment in time so you want to make sure it is perfect, especially if you're entertaining. Whether you grill, smoke, fry, or roast your turkey, you should use a brined bird.
A brine is simply a salt and liquid mixture that adds lots of great flavor and moisture to your bird. There are many recipes out there for the perfect brine, but all do about the same thing. But- there is one step that is a must when brining a bird- you must brine the bird for at least 24 hours. Otherwise the entire brining process just isn’t worth it.
To properly brine a turkey you need to start the night before you plan to cook. You will need at least 10 to 12 hours (plan on 1 hour per pound of turkey), a container large enough to hold your turkey and enough brine to cover it. You'll also need salt, water, sugar, seasonings, and enough room to refrigerate it. A large stainless steel stock pot or even a 5 gallon clean plastic bucket ( or my family has used a clean cooler before) would make excellent containers. Whatever container you choose, the turkey needs to have enough room to be turned so it should be big.
Now let's get to the turkey. The turkey should be cleaned out, completely thawed, and should not be a self-basting or Kosher turkey. Self-basting and Kosher turkeys have a salty stock added that will make your brined turkey too salty. A fresh turkey works best, but a completely thawed, previously frozen turkey will work just as well.
To make the brine
Mix 1 cup of table salt in 1 gallon of water. You will need more than 1 gallon of water but that’s the ratio to aim for. One way of telling if you have enough salt in your brine is that a raw egg will float in it. Make sure that the salt is completely dissolved before adding the seasonings you like, making sure not to add anything that contains salt. Brines can be spicy hot with peppers and cayenne, savory with herbs and garlic, or sweet with molasses, honey and brown sugar.
Sugar is optional to any brine, but works to counteract the flavor of the salt. While you may choose a brine without sugar, I do recommend that you add sugar (any kind of "sweet" will do) to maintain the flavor of the turkey. Add up to 1 cup of sugar per gallon of brine. Like the salt you need to make sure that the sugar is completely dissolved.
Place the turkey in a container and pour in enough brine to completely cover the turkey with an inch or two to spare. You do not want any part of the turkey above the surface of the brine. Now you put the whole thing in the refrigerator. If you are like me, making enough room in the fridge is the hardest part of this project. The turkey should sit in the brine for about 1 hour per pound of turkey. Brining too long is much worse than not brining enough so watch the time.
Don't have room in the refrigerator? Try a cooler. A cooler big enough to hold your turkey makes a good container for your turkey and brine. The cooler will help keep it cool and allow you to brine your turkey without taking up precious refrigerator space. If the weather is cool, but not freezing you can put the whole thing outside until you need the turkey.
When you are ready to start cooking your turkey, remove it from the brine and rinse it off thoroughly in the sink with cold water until all traces of salt are off the surface inside and out. Safely discard the brine and cook your turkey as normal. You will notice the second you start to carve your turkey that the brining has helped it retain moisture. The first bite will sell you on brining turkeys forever, and after you've tried this you will want to brine all your poultry- I promise!
Whether you decide to brine this Thanksgiving or Christmas or not- I wish your family happy holidays and the best to the new year!
November 18, 2008
Brussels Sprouts: The New Wave
 Brussels sprouts get a bum wrap in my opinion. Yes, they are strange-looking and large and round, but they are so tasty. Most folks don’t know who to go about preparing them. I like them all different ways. I found this recipe on All Recipes.com and thought it sounded interesting. A breaded Brussels sprout? Hum, might be good…and it is!
Try serving a plate of these at your Thanksgiving dinner this year- they are sure to be a hit!
Breaded Brussels Sprouts
1 1/2 pounds Brussels sprouts
1 teaspoon salt
4 tablespoons butter, melted
4 tablespoons grated Parmesan cheese
4 tablespoons dried bread crumbs
1/4 teaspoon garlic powder
1/4 teaspoon ground black pepper
1/2 teaspoon seasoning salt
Wash and trim Brussels sprouts. Cut an "X", about 1/8 inch deep in the stem of the sprouts, (this helps cook the sprouts more evenly and quickly).
In a medium-size pot, cover Brussels sprouts with water, add 1 teaspoon salt and bring to boil. Cover and simmer for 6 minutes or until tender; drain. Be careful not to overcook sprouts.
Place sprouts in a small casserole dish. Sprinkle 2 tablespoons of melted butter over the sprouts and mix well to coat.
Combine parmesan cheese, dried bread crumbs, garlic powder, black pepper, seasoning salt and remaining butter and mix well; sprinkle mixture over sprouts.
Heat sprouts under broiler (about 4 inches away from heat) for about 5 minutes or until crumb mixture is lightly browned. Serve hot.
October 31, 2008
Pumpkin Whoopie Pies
 My fellow co-worker Sarah brought in these deliciousally little pumpkin cookies today at work, that kind look like ice cream cookies. Even though I started my diet today I had to try one, they looked too good to pass up.
I’m so glad I did because they were wonderful! I asked her for the recipe, which comes from the Martha Stewart website. I’m planning on making these for Thanksgiving dinner this year. I know they will be a hit for my niece and nephews.
Pumpkin Whoopie Pies with Cream-Cheese Filling
Makes 12 whoopie pies
3 cups all-purpose flour
1 teaspoon salt
1 teaspoon baking powder
1 teaspoon baking soda
2 tablespoons ground cinnamon
1 tablespoon ground ginger
1 tablespoon ground cloves
2 cups firmly packed dark-brown sugar
1 cup vegetable oil
3 cups pumpkin puree, chilled
2 large eggs
1 teaspoon pure vanilla extract
FOR THE CREAM-CHEESE FILLING
3 cups confectioners' sugar
1/2 cup (1 stick) unsalted butter, softened
8 ounces cream cheese, softened
1 teaspoon pure vanilla extract
Make the cookies: Preheat oven to 350 degrees. Line two baking sheets with parchment paper or a nonstick baking mat; set aside.
In a large bowl, whisk together flour, salt, baking powder, baking soda, cinnamon, ginger, and cloves; set aside. In another large bowl, whisk together brown sugar and oil until well combined.
Add pumpkin puree and whisk until combined. Add eggs and vanilla and whisk until well combined. Sprinkle flour mixture over pumpkin mixture and whisk until fully incorporated.
Using a small ice cream scoop with a release mechanism, drop heaping tablespoons of dough onto prepared baking sheets, about 1 inch apart. Transfer to oven and bake until cookies are just starting to crack on top and a toothpick inserted into the center of each cookie comes out clean, about 15 minutes. Let cool completely on pan.
Make the filling: Sift confectioner' sugar into a medium bowl; set aside. In the bowl of an electric mixer fitted with the paddle attachment, beat butter until smooth. Add cream cheese and beat until well combined. Add confectioners' sugar and vanilla, beat just until smooth. (Filling can be made up to a day in advance. Cover and refrigerate; let stand at room temperature to soften before using.)
Assemble the whoopie pies: Line a baking sheet with parchment paper and set aside. Transfer filling to a disposable pastry bag and snip the end. When cookies have cooled completely, pipe a large dollop of filling on the flat side of half of the cookies. Sandwich with remaining cookies, pressing down slightly so that the filling spreads to the edge of the cookies. Transfer to prepared baking sheet and cover with plastic wrap. Refrigerate cookies at least 30 minutes before serving and up to 3 days.
March 18, 2008
Stromboli Anyone?
 Today is my co-worker Shelley's birthday and we started the day with breakfast food (almond coffee cake, breakfast casserole, milk, oj, a Double Chocolate Gooey Butter Cake....yes that's right cake for breakfast...so good). Now, we are moving on to lunch and afternoon snacks (stromboil, spinach dip, hot wings, chips, key lime pie, cake, cheesecake dip, fruit and cream and much more!)
My friend Veronica made the Stromboli and I love these yummy sandwiches. Here is the recipe she uses. And if you are interested in the background of the word Stromboli here is what Wikipedia says.
This rolled baked sandwich is perfect for feeding a crowd of hungry sports fans, or a hungry family for a casual supper. You can really use any combination of meats, cheeses and even veggies you choose, so take our suggestions with a grain of salt. One hint however, the more veggies you use, the more liquid they'll release, so too many veggies can make a somewhat soggy stromboli. Use as many different fillings as you like, but it's important to not layer them too thickly, as this will make it difficult to roll the stromboli.
March 13, 2008
Corn Beef & Cabbage for St. Patrick's Day
 From the recipe archives.....Corn Beef and Cabbage is one of my all-time favorite meals. Corn beef is also one of the easiest meal to prepare and can be excellent leftovers that will last and last.
This is from the archives... Happy St. Patrick's Day and hope you get the chance to grab a green beer.
Corn Beef & Cabbage
By Lane
1 corned beef (I usually get a 3-4 pound one)
1 head of cabbage
2 T. butter
1 red onion, chopped, coarsely
1 parsnip, chopped
4-5 new potatoes, quartered
Seasoning packet with corned beef.
Plus add:
1 T. garlic powder
1 bay leaf
Place all veggies in large crock pot on low setting. Place corned beef on top and add all seasonings (including the packet that comes with the corned beef.) Cook on low for about 8 hours. I usually put the crock on around 7:30 and turn it off when I get home about 5:00 pm. The meat will be so tender it will fall apart.
I like to serve this with a simple salad and dinner rolls.
December 20, 2007
Amish Bread for the Holidays
My husband came home the other night with Amish Friendship Bread some friends of ours had made. I had never heard of Amish Friendship Bread before, nor eaten it before then. It was wonderful! And after some research on the internet, I discovered the bread has a long standing history that I want to share with you all.
From Wikipedia: Amish Friendship Bread (along with Amish Cinnamon Bread) is the chain letter of the baking world. The idea is very simple: a friend gives you a cup of yeast culture (also known as "starter") and a copy of instructions. Following the instructions, you add sugar, flour and milk and it rises. Eventually, you end up with 4 cups of the starter. You use one cup to make bread (the instructions provide you with the recipe), keep one cup to start a new cycle and give two cups to your friends. Each of your friends also gets a copy of the instructions for what to do with the yeast starter. The latter part makes it somewhat like a chain letter. Of course, Amish Friendship Bread does not come with any promises of riches for those who spread it on or curses for those who don't. The first time "Amish Friendship Bread" was discussed on Usenet was in a posting on February 5, 1990. It was an experiment by Girl Scout Troop 15, c/o Emilie Manning in Oswego, NY and was posted by Patrick Salsbury. Bread made following the traditional Amish Friendship Bread recipe is sweet and tastes more like a cake.
The starter may be used to make lots of different types of bread.I asked our friend Carol for the recipe and she emailed it to me the other day. (Thanks Carol)
With the freezing rain, sleet and snow that is being called for the entire weekend here in Missouri, I know what I am planning on doing – making some of this tasty bread for some friends.
Amish Friendship Bread Starter and Recipe
To start the bread:“Day 1” mix together 1 cup flour, 1 cup sugar and 1 cup milk.
(Do not refrigerate. If air gets in the bag, let it out. It will be normal for the batter to thicken, bubble and ferment.)
Day 1 If you receive the bag – do nothing. (Or you make it from scratch)
Day 2 Squeeze the bag.
Day 3 Squeeze the bag.
Day 4 Squeeze the bag.
Day 5 Squeeze the bag.
Day 6 Add 1 cup flour, 1 cup sugar, 1 cup milk
Day 7 Squeeze the bag.
Day 8 Squeeze the bag.
Day 9 Squeeze the bag.
Day 10 Combine in a large non-metal bowl—the batter and add 1 cup flour, 1 cup sugar, and 1 cup milk. Mix with a wooden spoon (or plastic one).
Pour four, 1 cup starters into 4 large ziplock bags. Keep one for yourself and give three starters with instructions to friends.
Mix in with the remaining batter:
1 cup oil
½ t. salt
1 cup sugar
½ t. baking soda
1 t. vanilla
1 ½ t. baking powder
3 large eggs
2 t. cinnamon
2 cups flour
½ cup milk
1 large box instant vanilla pudding
Pour into 2 large greased and sugared (cinnamon & sugar) loaf pans. Sprinkle cinnamon and sugar on top if desired. Bake at 325 degrees for 1 hour.I usually split the recipe into four batches. Give away as many batches as you do not want, and use the rest for bread. Each batch would make 2 loaves.
Notes:
If you are starting this recipe from scratch, on “Day 1” mix together 1 cup flour, 1 cup sugar and 1 cup milk.
If you mix the sugar and flour together and then mix the milk in with the sugar/flour mixture it does not clump together as much.
Nuts may be added.Less rich bread? Substitute ½ cup oil and ½ cup applesauce for 1 cup oil.
The sugar in the last addition may also be reduced by about half.Pistachio pudding or any other kind may be substituted.
December 7, 2007
The Gift that Keeps on Giving
 Happy Holidays to All! (See Larger Image)
Christmas is just around the corner, can’t believe how quickly it’s came this year. I wish there was more of a break between Thanksgiving and Christmas.
My co-worker Sarah Gehring is the Membership Coordinator for AgriMissouri™, a marketing program through the Missouri Dept. of Agriculture that promotes Missouri made products.
She is also a fellow blogger, with her AgriMissouri Showcase Blog. She posted today on finding the right gift to give to those names on our Christmas lists that have everything. One of her favorite gifts to give are AgriMissouri gift baskets, full of great local Missouri food products such as meat sticks, salad dressings, soups, spices, bbq sauce, cheese ball mixes, summer sausages, pasta sauces…plus you'll be supporting Missouri's largest industry-AGRICULTURE and the farmers and farm families.
From Sarah’s post:
Lots of AgriMissouri members offer holiday gift baskets. This makes gift giving so easy. All you have to do is visit their web site or call the company, discuss the baskets they have available and place your order. Several of them will even let you customize the gift basket so that you can include specific products. I've given grandparents, neighbors and out-of-state family AgriMissouri gift baskets and they are always a hit.
To help you find AgriMissouri members offering holidays gifts, the AgriMissouri Holiday Gift Guide is located on the web site. It's the easiest shopping you will do!
*The gift box above is available at Missouri Mercantile.
December 6, 2007
Venison Back Strap Recipe
During the holidays at my folk's house the dinner table is usually set with the traditional holiday foods, but in addition to those cherished foods a very non—traditional food can also be found.
Some years it might be pheasant from my dad’s most recent pheasant hunting trip with his friends, salmon from my parent’s fly fishing trip to Alaska or venison from the most recent deer season.
This year was a treat! My brother Mike made a Stuffed Venison Back Strap that was out of this world. If you have never had venison before, some think it tastes “gamey”, but this recipe really takes away that taste.
Try something different this holiday season with this very special recipe.
Rolled and Stuffed Back Strap
By Mike Baldwin, my brother
Use any flavor of venison for this recipe and make sure the meat is no more than 1 inch thick after cutting. Filet meat out with long knife until meat lay flat, like a sheet of paper.
6 slices of bacon
1 medium onion (Vidalia), chopped up
½ cup of celery, chopped up
1 teaspoon salt
1/8 teaspoon pepper
½ cup of carrot. chopped up
On 1/3 cup seasoned bread crumbs
2 teaspoons parsley flakes
2-4 lb. venison back strap (Deer, Elk, Moose, and even Wild Pig)
4-slices of bacon (cut in half)
The Nitty Gritty
Fry the cut bacon over medium heat until crisp. Drain on paper towels and finely crumble. Reserve 4 tablespoons of bacon fat for later.
Cook onion, celery, and carrot in bacon fat until soft. Remove from heat and stir in crumbled bacon, breadcrumbs, parsley flakes, salt and pepper.
Spread veggie mixture evenly on meat. Pat mixture and roll up with the grain of meat. Tie loin with butcher string. Place bacon on top of roll slightly wrapped around meat. Put in roasting pan or above water pan in smoker.
Heat oven or smoker to 250 degrees the slower the better. Cook meat about 150 degrees (RARE) take off and wrap in tin foil. Wait about 30 minutes and enjoy!


 Posts
Posts