Showing posts with label Baked Goods. Show all posts

November 17, 2010

The Best BOX Cake

Was it really more than a month ago that I updated my blog? Yes, it’s true. We’ve had a lot of changes come about recently in my family and the blog just wasn’t a priority.


A couple of friends emailed me today and asked if, “I was still cooking?” They were being cute of coarse- “Yes, I’m still cooking….all the time!”

Let me explain the delay in my posting on the blog first.
1.) I have a one-year-old! Yes, Caston will turn ONE tomorrow. Wow…that is so hard to say. Can my baby really no longer be a baby?

2.) I have begun making cakes. I finally finished my professional cake classes (2 night classes a week) and started making cakes. It’s been a blast and a ton of work, but it was on my bucket list and I’ve got it knocked out. I promise to post some of my cakes is the future! (PHOTO: One of my first cakes for my mother-in-law)
3.) I went from a part-time working mama to a full-time employee in October! HUGE change for our entire family, including the youngest- Caston. I was working part-time as a writer and marketing consultant (although the last couple months had really became a full-time job). Then, a blessing and dream job popped into my lap! I’m working as an editor for a farm publication and I get to do what I’ve always wanted to- tell the story of agriculture!
So, between all of this….the blog has suffered. I do hope to change that now! So, stay with me all…I promise not to let you down.

From the title of my post, you can tell I’m going to share a great recipe! I’ve been doing some baking to find the best cake mix and I have a winner! Duncan Hines Moist Deluxe Cake Mixes- truly the best cake mix I’ve eaten. And, I’ve ate a lot of cake.

My favorite has become the Golden Butter mix. But, I don’t just follow the mix recipe – I add to it. Lots of folks do this…they take a mix and add some things to make it taste homemade! Well, this really does taste homemade- ask anyone that I’ve made cakes for lately.

Here is how I turn a boxed mix into something delectable!
Add to a boxed mix some of the following:
- 1 cup sour cream
- 1 box instant pudding
- ½ cup chocolate chips
- Butter instead of oil
- Milk instead of water
- Add vanilla flavoring
- Add extra butter flavoring
- Add other extract flavorings (lemon, mint, orange, almond)Add some spirits to the spice up the flavoring. Rum is always good, but my favorite is Irish cream or amaretto. You will substitute for half of the water called for in the mix.
- Do the same with coffee (strong). Great with chocolate!
- Grate in some citrus peel
By adding some of the above ingredients you can make a boxed cake mix moist and tasty! You will follow the boxed mix instructions, but replace the water and oil with butter and milk and add extra vanilla flavoring (usually about 1 T.).
Or, you can follow the mix recipe and add instant pudding before you add the liquid ingredients. Next, add the liquid ingredients and mix well. When your mix is mixed well and not powdery add sour cream and beat.
That’s all you do! Enjoy and happy baking….

September 27, 2010

Mama's Chocolate Cookies

I'm going to share a HUGE secret today! One that is probably going to be surprising to many, so sit down.

I make chocolate cookies for a lot of picnics and occasions. The cookies are always gone in no time and a lot of friends have asked for the recipe. I say, "it's my little secret."

Well, I'm going to share the secret recipe and it's going to be a shocker to most that have tried these lovely cookies!

It's starts with a chocolate cake mix (YES, really!) I like to use Duncan Hines Moist cakes mixes. There it is, my secret is no more.

Chocolate Cookies from the Heart
by Lane


1 stick of butter
3 T. brown sugar
2 eggs
1 chocolate cake mix

Mix and place on cookie sheet. DO NOT GREASE THE COOKIE SHEET.

Bake at 350 for about 10 minutes.

August 27, 2010

Life's Crazy Tales

I sometimes wonder where the time goes these days. I saw that my blog was last updated the first of August- I am so sorry to readers. I've been so busy with work that I haven't had time to myself for much of anything lately.

We celebrated Caston turning 9 months last week (9 month photo to right)...can't imagine him being 1 year in less than 3 months. My mother was correct about time flying when you have kids. My husband and I sit and laugh about how this year has already came and went- but we've had so many laughs, trips and cherished memories!

If you've read the blog, you've seen my baby food venture- which is still going strong. I'm also adding another venture, one that I've always had on my bucket list- Cake Decorating!

I've taken classes in the past and made cakes for folks, but I've decided to really dive into it. I'm registered for Master Level Courses Sept- Dec to brush up on my skills and learn to make amazing and unique cakes. Who needs the Cake Boss, when you've got the Cake Queen, right? Be looking for some creations coming soon.


As far as cooking goes around the McConnell house, strong and steady. I'm even going to sign-up for a cooking course in European Cuisine (my fave) in Nov.

But, in the meantime, hope you enjoy this recipe from my cupboard. Around our house cornbread is a table favorite. My parent's grind their own cornmeal and it makes the most amazing cornbread. Hope your family enjoys this Summer Cornbread

Summer Cornbread
by Lane

1 3/4 cups buttermilk
1 c corn kernels
1 1/2 cups white self-rising cornmeal
2 eggs, well beaten
3 T. melted butter


Preheat oven to 450 degrees. Combine in a medium bowl the buttermilk and eggs. Add butter and cornmeal, stir. Then add corn and fold into mix.


Pour into a cast iron skillet, that has been coated with vegetable oil and heated. Cook for 10-15 minutes, or until golden brown.

July 19, 2010

Lemon Pound Cake with Fresh Blueberry Sauce

Blueberries and lemons go hand and hand...

I decided to take one of my "go-to" recipes to the next level this weekend. Some friends of ours finally sold their house in St. Louis and are moving south near us to live at Table Rock Lake! They were down visiting and I decided to make a pound cake, but wanted to dress it up a bit.

I had blueberries from the farm in the fridge, so thought a blueberry sauce would do just the trick.

I added lemon zest to the traditional pound cake recipe- which comes from Martha Stewart. Then I added lemon juice and zest to the blueberry sauce. The dessert was perfect topped with some vanilla bean ice cream.

You can do the same with any berries. We also like the cake with strawberries and whipped cream during strawberry season. This pound cake is a must have in your recipe box!

Classic Pound Cake
from Martha Stewart
Makes one 9-by-5-inch loaf

1 1/2 cups (3 sticks) unsalted butter, softened, plus more for pan
2 cups all-purpose flour
1 teaspoon salt
1 1/2 cups granulated sugar
1 teaspoon pure vanilla extract
6 large eggs
Confectioners' sugar, for dusting (optional)

1.Preheat oven to 350 degrees. Butter a 9-by-5-inch loaf pan; set aside. Whisk flour and salt in a medium bowl; set aside.

2.Put butter, granulated sugar, and vanilla in the bowl of an electric mixer fitted with the paddle attachment. Mix on medium-low speed until pale and fluffy, 3 to 5 minutes. Add eggs, one at a time, beating until combined after each addition. Reduce speed to low; mix in flour mixture until just combined.


3.Spoon batter into prepared pan, and smooth with an offset spatula. Bake, rotating pan halfway through, until cake is golden and a cake tester inserted into center comes out clean, 50 to 55 minutes. Let cool on a wire rack 10 to 15 minutes. Turn out onto rack, and let cool completely. Before serving, dust cake with confectioners' sugar, if desired. Cake can be stored at room temperature, wrapped well in plastic, up to 3 days.

Bluberry Sauce
1 1/2 cups blueberries
1/2 cup sugar
1/2 cup water
2 lemons, zested and juiced


Cook over medium-high heat until reduced and thickened.

June 25, 2010

Blueberry Lemon Pie

Our family visited Persimmon Hill Berry Farm on Wednesday night in Lampe (which is just about 18 minutes from our house) and had an incredible time! The farm is a berry farm and agritourism destination for many each year…as the farm is famous for their Blueberry Thunder Muffins!


We picked up some muffins and blueberries while on our visit. And sampled the farm's newest treat- Blueberry Bread Pudding. We plan on going back next week for some blackberries!

With 3 pounds of blueberries I decided to try out a new pie recipe. I haven’t yet sliced the pie, but how can you go wrong with this list of ingredients? Enjoy!

Blueberry Lemon Pie
by Lane


Single Pie Crust (My grandmother Garrison’s recipe)
1 1/3 c flour
½ tsp salt
½ c Crisco shortening
3 T ice cold water
½ tsp vinegar

In a food processor pulse flour and salt. Add shortening and pulse into combined (it will resemble cornmeal). Add water and vinegar and pulse until combined- the mixture will form a ball. Roll out first dough and then repeat for second dough.

Filling:
¾ c sugar
2 T cornstarch
1 tsp cinnamon
¼ tsp allspice
¼ tsp nutmeg
½ c water
3 c fresh blueberries
1 T lemon juice
Zest of 1 large lemon

Combine sugar, cornstarch, cinnamon, nutmeg and allspice and water in a saucepan and bring to a rapid boil. Cook until thickened (about 5 minutes). Remove from heat and let mixture cool. After the mixture has cooled add blueberries, lemon juice and zest.

Preheat oven to 425 degrees. Pour filling into pie and top with second crust. Brush top of pie dough with mixture of (1 egg and 2 T milk).

Bake for 18 minutes at 425 degrees, then reduce heat to 325 degrees for another 20 minutes. Let pie cool before slicing.

May 3, 2010

Muffins with Fresh Strawberry Sauce

Some friends and I have been tampering with Weight Watchers recipes because each recipe is nutritionally balanced and I've heard good things about many of the system's meals. So, I had to try some to see if it was worth it. It is!


Since having a baby I've become very health conscious (not that I wasn't before), but I'm really trying to cut back on the butter (Paula Deen would be disappointed) and pump up good oils (like olive and canola).

I want to live a long life and see my babies (yes I meant to use the plural word and no I'm not pregnant right now - I know that would be the next question) grow old, marry and have babies of their own. I want to Live Strong - have you checked out that website?

Our family has always eaten well, but too much of anything isn't a good thing. So, that's why we've decided to make healthier eating choices. Now, don't think that means you won't see deliciously divine desserts or my favorite southern foods- anything fried! It's just I'm going to be trying to combine a little health kick here and there.

Starting with this. The first Weight Watchers recipe I decided to try was of coarse a dessert! I love my sweets. These muffins with homemade strawberry sauce are amazing and healthy!

I was stunned on how good the strawberry sauce was.....I could have just eaten it alone. The best part is it's almost strawberry season in Missouri...look for strawberries to be ripe for the pickin' in about two more weeks!

Try it out for yourself and let me know what you think!

Lemon Yogurt Muffins with Fresh Strawberry Sauce

2 spray(s) cooking spray
2 cup(s) strawberries, finely chopped, divided
2 Tbsp strawberry jam
1 Tbsp sugar
1 tsp fresh lemon juice
1 tsp cornstarch
2 cup(s) all-purpose flour
1 tsp baking soda
1 Tbsp baking powder
1/4 tsp table salt
2 large egg(s)
8 oz Yoplait Original 99% Fat Free Lemon Yogurt, or similar product
1/3 cup(s) sugar
1/4 cup(s) canola oil
2 Tbsp fresh lemon juice
1 Tbsp lemon zest, or more to taste

Preheat oven to 350°F. Coat a 12-hole muffin pan with cooking spray.

In a small saucepan, combine 1 cup strawberries with next 4 ingredients; set over medium-low heat. Cook until boiling, whisking constantly, about 2 to 3 minutes. Stir in remaining 1 cup strawberries; set aside to cool.

In a large bowl, whisk together flour, baking soda, baking powder and salt. In a small bowl, lightly whisk eggs; whisk in remaining ingredients until smooth.

Make a well in center of dry ingredients and spoon in egg mixture; gently fold to combine.

Fill each muffin hole 3/4s full with batter. Bake until a toothpick inserted in center of a muffin comes out clean, about 15 to 17 minutes. Remove from oven and serve each muffin with 1 heaping tablespoon strawberry sauce on top.

April 18, 2010

Another Day, Another Story

Our son has been persistent on waking up at 4:30 am every morning the past week- which before he slept till at least 5:30 am. He's teething so, I'm sure that has a little to do with it. But, we've been trying to make him hold off for a feeding 10 minutes extra each morning. (That's what I've read to do...but I've learned that the so-called expert books don't know it all.)

My husband was out of town one night this week and Caston woke up crying like no other...nothing would make it better so I made a bottle for him. (He's been switched over to formula now.) He went to town eating...when Caston is hungry you better watch out! I usually burp him when he's half way through, so I proceed to do so. But, he just would not burp and his little belly was so tight! (Caston has acid reflux very bad...so it sometimes take forever to get him to burp.)

He wouldn't burp and was screaming by this time bc all he wanted was his food. So, we started feeding again. After he finished he was completely satisfied. I laid him on my shoulder and he laid his head down gently and was cooing. (Nothing is more sweet than a baby cooing.)

Then is came.

On big ole loud, nasty, hard burp! I mean LOUD...

And the chair, my back, my hair and my neck was covered in baby puke. (We call Caston "Mr. Puke" around the house...his reflux makes him spit up a lot and even hours after a feeding.)

I couldn't believe I was sitting in living room at 5 am covered in puke...funny thing Caston didn't have a drop of spit up on him. Just my luck right. I had to laugh...I mean my husband was gone, it was the wee hours of the morning and I was covered in puke. I was just thankful that our furniture was leather, not cloth.

Oh, what we go through for our children, so that someday they can grow-up and become teenagers and forget all the things their parents did for them. The sacrifices they made, the many nights they stayed up with us when we had a cold, those blow-out diapers, the puke, the sleeplessness...the list goes on and on.

Wait. I need to call my parents and thank them. You should do the same.

If you are really trying to tell mom how much you appreciate all she's done for you...try these Chocolate Cupcakes. You are sure to make her day! (BTW I lived off these when I was pregnant...so good.)

Chocolate Cupcakes
from JoyofBaking.com
Makes about 16 cupcakes

1/2 cup (50 grams) Dutch-processed cocoa powder
1 cup (240 ml) boiling hot water
1 1/3 cups (175 grams) all purpose flour
2 teaspoons baking powder
1/2 teaspoon salt
1/2 cup (113 grams) unsalted butter, room temperature
1 cup (200 grams) granulated white sugar
2 large eggs
2 teaspoons pure vanilla extract

Chocolate Fudge Frosting:
4 ounces (120 grams) unsweetened chocolate, coarsely chopped
2/3 cup (150 grams) unsalted butter, room temperature
1 1/3 cups (160 grams) confectioners (powdered or icing) sugar, sifted
1 1/2 teaspoons pure vanilla extract

Chocolate Cupcakes:
Preheat oven to 375 degrees F (190 degrees C). Lightly butter, or line 16 muffin cups with paper liners.

In a small bowl stir until smooth the boiling hot water and the cocoa powder. Let cool to room temperature.

In another bowl, whisk together the flour, baking powder, and salt.

Then in the bowl of your electric mixer, or with a hand mixer, cream the butter and sugar until light and fluffy. Add the eggs, one at a time, beating until smooth. Beat in the vanilla extract. Add the flour mixture and beat only until incorporated. Then add the cooled cocoa mixture and stir until smooth.

Fill each muffin cup two-thirds full with batter and bake for about 16-20 minutes or until risen, springy to the touch, and a toothpick inserted into a cupcake comes out clean. Remove from oven and place on a wire rack to cool. Once the cupcakes have completely cooled, frost with icing. You can either spread the frosting on the cupcakes with a small spatula or if piping, use a large Wilton 1M open star tip to make lovely swirls.

Chocolate Frosting: Melt the chocolate in a heatproof bowl placed over a saucepan of simmering water. Remove from heat and let cool to room temperature.

In the bowl of your electric mixer, or with a hand mixer, beat the butter until smooth and creamy (about 1 minute). Add the sugar and beat until it is light and fluffy (about 2 minutes). Beat in the vanilla extract. Add the chocolate and beat on low speed until incorporated. Increase the speed to medium-high and beat until frosting is smooth and glossy (about 2 -3 minutes).

January 11, 2010

Cookies that Will Save Your Soul

We haven't been cooking a whole lot around our house lately- with a new baby and packing up the house for our move down south it's been a lot easier to get take out or throw a pizza in the oven. We do manage to cook a big breakfast about every morning though- bc my husband is what I call "the Breakfast King." He enjoys making breakfast and I'm not going to turn down his offer to make a meal.

We've been having a lot of meals at our friends houses lately since this is the last week that we will be residing in Jefferson City. We have been getting together with many of our friends for dinner and I always offer to make a dessert. The main dessert I've been turning to is Orange Baby Cookies- a recipe that comes from a dear friend and previous manager- Cyndi Young.

I recently wrote an article over my friend Cyndi and her cookie making skills for Missouri Farmer Today. When I went to Cyndi and her husband Jim's farm, they had four different cookies laid out for me to take photos of and taste for the article! I fell in love with the Orange Baby Cookies and I know you will too!

These cookies are delicious and can be whipped up in a snap! I say that these cookies will save your soul bc no matter what mood you are in- after one cookie you will feel like you are in heaven! And I bet you can't eat just one...

Orange Babies
By Cyndi Young
1 C. softened butter
½ C. sugar
½ C. brown sugar (packed)
1 egg
1½ T. grated orange peel
2¼ C. flour
¾ tsp. baking soda
½ tsp. salt
1½ C. vanilla baking chips

Cream the butter and sugars. Beat in egg and orange peel. Gradually add dry ingredients and mix well. Stir in vanilla chips. Form into walnut-sized balls and bake on ungreased cookie sheets at 350 degrees for 10 minutes or until golden brown.

December 19, 2009

Making Fudge with Baby Caston

My life has truly changed....I used to be the ultimate "multi-tasker", but with a 1 month old I've learned that there are some things that I just can't do like I used too.


Each holiday I make homemade goodies for friends and neighbors. Things like fudge, pumpkin bread, candies and cookies. So, I put Caston down for a nap today and I knew I had some time to get some baking done- he always sleeps about 20 minutes after eating. WRONG!

I began making my Baldwin Family Fudge. I was in the middle of bringing the butter, sugar and milk to a soft ball (if any of you have made fudge you will understand) when Caston starting fussing. I thought - oh no! I couldn't leave the fudge because at this point in the cooking process it needed to be stirred the entire time until it reached the soft ball form. Caston began fussing more....."Oh come on fudge hurry the heck up," I was saying.

Now my little man was officially "irate." I left the fudge, ran to Caston's room and picked him up and returned back to the fudge. At this point I was stirring the fudge, bouncing Caston and trying to keep the pacifier in his mouth- I was a sight to see I'm sure.

It wasn't working. Caston was mad. So, I put him in his car seat (he loves his car seat). I placed the car seat on the floor next to me and was rocking it with my foot, while stirring the fudge- which by the way still hadn't reached the soft ball form. Why me!

It was somewhere in the middle of all this that I wonder what the heck I was thinking trying to do my annual holiday baking with a 1 month old! I officially learned my lesson! Maybe next year will work out better...
The fudge did get made, but it was a challenge to say the least!

So, if you are one of the lucky ones that get some of my annual fudge this year you can have a little chuckle because you know the story behind this sweet treat!
If you feel like making some fudge- here's our family recipe.

November 5, 2009

Pumpkins, Pumpkins Galore

Some folks have thought I've had the baby, since I haven't posted in awhile. No- just busy "nesting" and doing a lot of freelance work at home. I have another blog that I'm using as part of my freelance work: Taste of Missouri. You can also find me busy at work on Twitter as TasteofMissouri or look me up on Facebook.

Last night I was busy in the kitchen finishing up processing the last of my pumpkins and decided to make some pumpkin bread- which is my favorite part of the holidays! Instead of baking two loafs, which the following recipe makes, I made two trays of pumpkin muffins! Let me tell you- the muffins are the perfect size for snacks and go so perfect with a nice frosty mug of milk!

I can't stress how important it is to use only fresh pumpkin for this recipe. My father and I grow our own pumpkins and then process them. We have enough pumpkin left for the whole year. If you use pumpkins to decorate with in the fall, process the pumpkin.

Read an old post of mine about how to process pumpkins at home for the very best pumpkin puree for your holiday baking needs!

Baldwin Pumpkin Bread
3 C. Sugar
3 1/2 C. Flour
1 C. Oil (1/2 vegetable, 1/2 sunflower oil- don't have sunflower oil- don't fret, you can still just use vegetable oil)
2/3 C. Water
2 cups Pumpkin
4 eggs well beaten
1 1/2 teaspoons salt
2 teaspoons soda
1 teaspoon nutmeg
1 1/2 teaspoons cinnamon

Mix well about 50 strokes. Stir in nuts (I like walnuts).
Fill in bread pan half full and bake at 350 degrees for about 1 hour.

October 19, 2009

Praline-Apple Bread Using Local Apples this Season

My gal pal Tyne Morgan has been a busy cook it seems lately- she’s been baking up a storm and trying lots of new recipes. On a recent visit she was telling me about this Praline-Apple Bread recipe she had made and how simply delicious it was. She has Facebooked me the recipe about 3 weeks ago and I finally got around the making it the other day. She was right- a great recipe for this fall.

Be sure and visit a local orchard and pick up some local Granny Smith apples to make the bread and don’t forget to use Missouri Northern Pecans (they are wonderful to use in recipes like this). I just bought some at the recent Chestnut Festival this weekend for my holiday baking this season!

Praline-Apple Bread
From Southern Living Magazine

1 1/2 cups chopped pecans, divided
1 (8-oz.) container sour cream
1 cup granulated sugar
2 large eggs
1 tablespoon vanilla extract
2 cups all-purpose flour
2 teaspoons baking powder
1/2 teaspoon baking soda
1/2 teaspoon salt
1 1/2 cups finely chopped, peeled Granny Smith apples (about 3/4 lb.)
1/2 cup butter
1/2 cup firmly packed light brown sugar

Preheat oven to 350°. Bake 1/2 cup pecans in a single layer in a shallow pan 6 to 8 minutes or until toasted and fragrant, stirring after 4 minutes.

Beat sour cream and next 3 ingredients at low speed with an electric mixer 2 minutes or until blended.

Stir together flour and next 3 ingredients. Add to sour cream mixture, beating just until blended. Stir in apples and 1/2 cup toasted pecans. Spoon batter into a greased and floured 9- x 5-inch loaf pan. Sprinkle with remaining 1 cup chopped pecans; lightly press pecans into batter.

Bake at 350° for 1 hour to 1 hour and 5 minutes or until a wooden pick inserted into center comes out clean, shielding with aluminum foil after 50 minutes to prevent excessive browning. Cool in pan on a wire rack 10 minutes; remove from pan to wire rack.

Bring butter and brown sugar to a boil in a 1-qt. heavy saucepan over medium heat, stirring constantly; boil 1 minute. Remove from heat, and spoon over top of bread; let cool completely (about 1 hour).

Note: To freeze, cool bread completely; wrap in plastic wrap, then in aluminum foil. Freeze up to 3 months. Thaw at room temperature.
(PHOTO: From Southern Living Magazine and recipe from Debbie Grusska, Hobart, Indiana)

October 8, 2009

Double Cranberry Muffins

Cranberries have been one of my favorite dried fruits to snack on during my pregnancy. I’ve put them on everything- salads, pork stuffing and I really like these healthy cranberry muffins from the recipe archives of What to Expect!

Yes, the muffins are a sweet treat, but they are very healthy. Notice the ingredients! I like to have a muffin for breakfast with a tall glass of milk! Enjoy...

Double Cranberry Muffins
From What to Expect.com

¾ cup whole wheat flour
¼ cup ground flaxseed or oat bran
2 tsp baking powder
1 tsp baking soda
½ tsp salt
1½ cups old-fashioned oats
2 large eggs
1 cup white grape juice concentrate
½ cup all-fruit cherry or raspberry preserves
1/3 cup canola oil
2 tsp vanilla extract
½ cup fresh or frozen cranberries
½ cup dried cranberries (preferably unsweetened)

Preheat oven to 375F. Line a standard-sized 12-cup muffin tin with paper liners. In large bowl, combine flour, flaxseed, baking powder, soda, and salt. Stir in oats. In another bowl, combine eggs, juice concentrate, preserves, oil, and vanilla until smooth. Slowly stir into flour mixture; be careful not to overmix. Gently fold in all the cranberries.

Spoon batter into prepared muffin tin. Bake 18 minutes, until a toothpick inserted into the center comes out clean. Transfer to wire rack; let cool completely. Store muffins at room temperature in tightly sealed container for 3 days or frozen for 3 months.

August 25, 2009

Blueberry Cheesecake Muffins

It's surprising to me that being pregnant I haven't really cooked a whole lot of new dessert recipes. Guess i just turn to the old stand byes- guess that's human nature in us all though.

(PHOTO: 28 weeks and counting)

My sister-in-law Annie gave me a cookbook awhile ago and I was thumbing through it last week (I finished my fifth baby book and was in the reading mood- just completed the book Your Best Birth...I think it's the one book every pregnant woman should read). I came across a recipe for Blueberry Cheesecake Muffins and thought to myself...cream cheese, blueberries and lemon peel- how could you go wrong!

I also liked that the recipe included healthy ingredients like bran flakes! I just took these lovely muffins out of the oven about 30 minutes ago and they smell and taste wonderful!

They will make me and Caston (our little one that's on the way) a great late night snack tonight and a sweet start to breakfast in the morning!

Blueberry Cheesecake Muffins
1 pkg cream cheese, softened
1 cup, plus 1 T sugar or sugar substitute
2 eggs
1 tsp grated lemon peel
1 tsp vanilla
3/4 cup bran flakes cereal
1/2 cup all purpose flour
1/2 cup soy flour (or just use another 1/2 cup of ap flour)
2 tsps baking powder
1/4 tsp salt
3/4 cup milk
3 T melted butter
1 jar of no sugar added blueberry fruit spread (you'll find it with the jams and jellies at your local grocery store)
1/2 tsp. ground cinnamon

Preheat oven to 350 degrees. spray 12 muffin cups with nonstick cooking spray.

Beat cream cheese in medium bowl until smooth. Add 3/4 cup sugar, 1 egg, lemon peel and vanilla and beat.

Combine cereal, flour(s), 1/4 cup sugar, baking powder and salt in medium bowl. Whisk milk, butter and 1 egg in small bowl, then add to cereal mixture. Mix gently until blended.

Spoon about 2 T of cereal batter into all muffin cups. Spread a about 1 tsp of fruit spread on top of batter. Then spread cream cheese mixture over fruit spread. Combine remaining 1 T of sugar and cinnamon; sprinkle mixture over cream cheese mixture.

Bake 33 minutes or until toothpick comes out clean when inserted. Cool muffins for about 10 minutes. Refrigerate leftover muffins.

July 30, 2009

Missouri State Fair Will Bring Local Produce from the Farm to the Fork

The Missouri State Fair is right around the corner and I’ve been gearing up for some of the local food cooking demos that I will be conducting at the fair. Both professional and amateur chefs will putting on daily local foods cooking demonstrations centered on using local foods and simple fresh ingredients.

I wanted to make sure my recipes were simple and really made local foods the main component of the recipe. Here are the two recipes I will be performing at the fair.

Localvore’s Tomato Sandwich
By Lane McConnell, Missouri Department of Agriculture


1 large loaf ciabatta (local bread)
Herb Vinaigrette, below
2 large ripe, local heirloom tomatoes
1 large local yellow or red bell pepper, roasted, peeled and quartered
4 ounces of fresh local goat cheese
Sea salt and freshly ground pepper

Herb Vinaigrette
¼ cup local basil leaves
1 tablespoon chopped local parsley
1 small local garlic clove, minced
1/3 cup extra virgin olive oil
4 teaspoons aged red wine vinegar
Sea salt and freshly ground pepper

Slice the top third off the loaf of bread and set it aside. Pull out the inside (use to make bread crumbs for a later date). Paint the inside of the bread with some of the dressing, then make layers of sliced tomatoes, pepper and cheese. Bathe each layer with more dressing and season with salt and pepper.

Add the top, press down, the cut into quarters or sixths. This recipe packs well if wrapped up tightly.

Melon Salad with Thai Basil
Thai Basil
By Lane McConnell, Missouri Department of Agriculture


1 large shallot, finely diced
Seas salt and freshly ground pepper
1 cup cilantro
Juice and zest of 2 limes
1/3 cup Thai basil leaves
¼ cup mint leaves
1 jalapeno chile, finely diced
1 teaspoon minced ginger
1 small garlic clove, minced
1 Tablespoon olive oil
1 ½ to 2 pounds melon (honeydew, watermelon, cantaloupe), chilled
1 bunch arugula

Put shallot in bowl with lime juice, zest and ¼ teaspoon salt. Chop the herbs and add them to bowl along with the chile, ginger, garlic and oil. Stir and taste for salt.

Halve the melon, remove the seeds and cut into wedges. Slice off the skins, then cut the melon diagonally into bite sizes pieces or into very small cubes, as you prefer.

Pour the dressing over the melon and toss well. Season with pepper. Arrange the greens on small plates and spoon the melon into the center. If the melons are extra sweet, add as extra lime wedge to each plate. Garnish with the purple tipped Thai basil leaves.

May 4, 2009

The True Way to a Pregnant Woman’s Heart

I have discovered the way to any pregnant woman’s heart - that’s right. And there’s no rhyme or reason to it.

I was making Red Velvet Cupcakes the other night for a co-workers wedding shower when I discovered the way to my heart- Red Velvet Cake! After frosting one of the delicate little bright red cupcakes with loads of homemade cream cheese icing I decided that I needed to taste one of my homemade treats- just to be sure that it was kitchen approved.

As I slowly enjoyed the first bite my taste buds came alive! WOW- Red Velvet cake had never tasted so good. I finished eating the cupcake and began to ice the rest of my cupcakes. My husband was laughing at me- knowing that I would just have to go back for one more cupcake eventually. (And he was right)

I iced a few more cupcakes, then put a glass in the freezer. I iced some more cupcakes and then decided it was time for another cupcake- paired alongside my frozen glass of milk. WOW!

I ended up having three cupcakes that night and two frozen mugs of milk- but it was so worth it!

Here is the recipe for the Red Velvet Cake (which by the way is now officially my favorite cake). This is a wonderful recipe because the cake calls for buttermilk. I also get cake recipes that call for buttermilk because the buttermilk makes the cake crumbs so soft and flaky. Hope your taste buds agree that this cake is a winner.


Red Velvet Cake
2 1/2 cups sifted cake flour
1/2 teaspoon salt
2 tablespoons Dutch-processed cocoa powder
1/2 cup unsalted butter, at room temperature
1 1/2 cups granulated white sugar
2 large eggs
1 teaspoon pure vanilla extract
1 cup buttermilk
2 tablespoons liquid red food coloring- don't skimp on this or your cake will not have that pretty red color
1 teaspoon white distilled vinegar
1 teaspoon baking soda
Cream Cheese Frosting
1 1/2 cups heavy whipping cream
1 -8 ounce cream cheese, room temperature
1 - 8 ounce tub of Mascarpone cheese, room temperature
3/4 teaspoon pure vanilla extract
1 cup confectioners' (icing or powdered) sugar, sifted

Preheat oven to 350 degrees F and place rack in center of oven. Butter two - 9 inch round cake pans and line the bottoms of the pans with parchment paper. Set aside.In a mixing bowl sift together the flour, salt, and cocoa powder. Set aside.

In bowl of your electric mixer, or with a hand mixer, beat the butter until soft (about 1-2 minutes). Add the sugar and beat until light and fluffy (about 2-3 minutes). Add the eggs, one at a time, beating well after each addition. Scrape down the sides of the bowl. Add the vanilla extract and beat until combined. In a measuring cup whisk the buttermilk with the red food coloring. With the mixer on low speed, alternately add the flour mixture and buttermilk, in three additions, beginning and ending with the flour.In a small cup combine the vinegar and baking soda. Allow the mixture to fizz and then quickly fold into the cake batter.

Working quickly, divide the batter evenly between the two prepared pans and smooth the tops with an offset spatula or the back of a spoon. Bake in the preheated oven for approximately 25 - 30 minutes, or until a toothpick inserted in the center of the cakes comes out clean. Cool the cakes in their pans on a wire rack for 10 minutes. Place a wire rack on top of the cake pan and invert, lifting off the pan. Once the cakes have completely cooled, wrap in plastic and place the cake layers in the freezer for at least an hour. (This is done to make filling and frosting the cakes easier.)

April 16, 2009

Gotta a Craving

What to do when a craving hits…that’s been my dilemma lately. Do I indulge, do I ignore the craving, what is a healthy option to fulfill the grumble in my tummy.


I’ve had cravings and food aversions all at the same time for the past month and a half- how does this happen- will being pregnant your body is totally out of wack. At least that is what I have decided, but I wouldn’t change it for the world! (Yes, many readers lately have been asking about the new label on the blog “pregnancy recipes” and yes they were correct the McConnell’s are expecting a little one November 18.) We are very excited - here is our Week 9 photo!

I’ve been reading What to Expect When Your Expecting and I laugh at some of the things I have learned about the pregnant body. Like that “gotta go feeling” that stays with you, the sleepless nights because you have to get up to go to the bathroom 5 times a night, or maybe it’s the way I can be so sick feeling at my stomach- BUT at the same time crave Honey Nut Cheerios or Bananas by the dozen! (Yes- that’s right Cheerios!) Or my favorite- being so tired that I fall asleep at 6pm after eating dinner.

You have to love being a woman! And no matter what-I wouldn’t change it for the world!
I’ve read that for those that have the all day morning sickness or upset stomachs that lemons help- and it’s worked for me. Drinking lemonade, making lemon spaghetti, or simply putting lemon in my water has soothed my stomach so far.

But, if you’re craving a nice indulging dessert this Lightened-Up Lemon Bar recipe from one of my favorite new websites , http://www.fitpregnancy.com/, is a true winner.

Lightened-Up Lemon Bars
From FitPregnancy.com

Crust
Nonstick cooking spray
1/4 cup unsalted butter, softened at room temperature
1/4 cup granulated sugar
1 cup flour
1/4 teaspoon salt
1/2 teaspoon grated lemon zest
Topping
1 whole egg
2 egg whites
1 cup granulated sugar
1 teaspoon flour
1/2 teaspoon baking powder
1/3 cup lemon juice, freshly squeezed (about 2 juicy lemons)
1 teaspoon grated lemon zest
Confectioner's (powdered) sugar for dusting

Preheat oven to 350° F. Coat an 8-by-8-inch pan with cooking spray. For crust: Cream together butter and sugar; add flour, salt and lemon zest. Beat until crumbly and pat into pan. Bake for 18-20 minutes or until golden. Remove from oven; let cool. While crust is baking, prepare the topping: Whisk egg and egg whites until frothy. Add sugar, flour, baking powder, lemon juice and lemon zest; mix until combined. Pour mixture over crust and bake for an additional 25 minutes or until topping is set and slightly golden. Cool on a wire rack; dust with confectioner's sugar and cut into 16 2-inch squares. Refrigerate if not serving immediately.

Serves 8.

February 1, 2009

Savannah Georgia I Have Arrived

What could be better than being in Georgia for a week in February? Nothing!

I’m blogging from Savannah, GA…yes that’s right…home of you know who. And for you reading buffs- setting of the novel (which is one of my favorites) Midnight in the Garden of Good and Evil ( or you might know this as the wonderfully director movie from Clint Eastwood).

Although I’m on a work trip for a NAFDMA Conference, I’ve got some downtime to do some sightseeing and begging for a reservation at the Lady and Sons Restaurant. Yes – begging. Apparently, the Lady and Sons doesn’t take reservations unless you are a party of ten, but you can go to the restaurant (in person) early in the morning to “beg” for a reservation for lunch or dinner. So, tomorrow morning my co-worker Sarah and I have a Breakfast Cruise on the Savannah River, then we are planning on walking to part of the Historic District of Savannah to the Lady and Sons to try and get a reservation. Wish us luck!

Savannah looks to be a beautiful city – charming and warm – just like the south should feel. I haven’t had the chance to do much sightseeing, but hope to do some tomorrow.

One part of the NAFDMA Conference that I’m looking forward to is the three day bus tour. I’m participating in the “Foodie Tour” which will travel for three days around Georgia visiting local food producers – how fitting right! Take a look at the schedule.

I’ll have lots to blog about this week…so stay tuned!

How fitting today to highlight one of Ms. Paula’s recipes – Krispy Kreme Bread Pudding (yes only Paula would put together Krispy Kremes into a bread pudding). Enjoy and “ya’ll take care and check back soon!”

Bill Nicholson’s Krispy Kreme Bread Pudding
1 pinch salt
1 9 ounce box raisins
2 Eggs, beaten
2 4.5-oz cans fruit cocktail (undrained)
1 14-oz can Sweetened Condensed Milk (not evaporated)
2 dozen Krispy Kreme Donuts
1 or 2 teaspoon cinnamon

Directions
Cube donuts into a large bowl. Pour other ingredients on top of donuts and let soak for a few minutes. Mix all ingredients together until donuts have soaked up the liquid as much as possible.
Bake at 350 degrees for about an hour until center has jelled. Top with Butter Rum Sauce.

Butter Rum Sauce:
1 stick butter
1 pound box confectioner’s sugar
Rum to taste

Melt butter and slowly stir in confectioner’s sugar. Add Rum and heat until bubbly. Pour over each serving of Krispy Kreme Bread Pudding.

December 22, 2008

Family Times and Fantasy Fudge

This weekend was almost a blur…Friday my friend Tyne and I went to Lake Ozark so she could finish up some Christmas shopping at the outlet mall, then we headed back to Jeff City because my folks were coming up for the weekend. When we got home they were already there with my husband enjoying in some wonderful Missouri wine, so Tyne and I joined in the festivities.

We had a wonderful pot roast that night and hung around the house that night talking about good ole times. My mother had brought me up a few little Christmas gifts, including some old Christmas ornaments from my childhood and an antique Betty Crocker Cookbook from the 1950’s. How fantastic, I love the smell of old cookbooks!

Tyne also opened her Christmas gifts from my husband and I…she was very excited!

Saturday, was just as hectic. The boys went fishing (which I don’t know how they could stand the cold weather and wind chill) at Lake Ozark, while mom and I headed into town to do some grocery shopping and a stop at Hobby Lobby to get some yarn for crocheting.

Saturday night I wanted to teach my mother how to make Paella, a Spanish dish. We only had time to make the quicker American version Paella though, since we had plans to go to the movies to see the movie Australia. (Which btw was wonderful. I spent time in Australia in high school and it brought back great memories and how can any movie go wrong with Nicole Kidman and Huge Jackman.)

08 Christmas card

Sunday my folks left to go back to the farm and get things ready for Christmas this week. Charlie and I also got ready for Christmas around our house, since we are hosting the McConnell family this year for Christmas. We made some Baldwin Fantasy Fudge, so it would be one last thing we had to prepare for our Christmas party later on this week.

Which brings me to today’s recipe (that I’ve been promising to post.) This is my mother’s own recipe for fudge. I’ve always had great reviews from this fudge and it’s fairly simple to make. There are two ways to make it. Some folks like rich fudge, others like a milk chocolate fudge. Therefore, I’ve show the difference in making the two versions below.

Happy Baking and Merry Christmas!

Baldwin’s Fantasy Fudge
By my mother

4 cups white sugar
1 tall can of condensed milk (12 oz)
2 sticks of butter

Fudge Making

On medium-high and in a large pot, cook and stir constantly, until mixture forms a soft ball. Best way to do this is with a candy thermometer. But, be sure and continue to stir this all the way through the soft ball stage.

When a soft ball forms, remove from heat and add:
For milk chocolate fudge, (add 12 oz. of chocolate chips)
For richer, darker fudge, (add ¾ of a 24 oz. of chocolate chips)


Fudge Making

40 marshmallows
2 cups of nuts of your choice (pecans are the very best though)
1 tsp. vanilla

Fold mixture, until all dissolved. Cool fudge in a buttered 13x9 dish. You can freeze the fudge as well.

December 18, 2008

Christmas Dinner Menu

Holidays in MissouriMany folks stress about the holidays and for good reason. Our country is in economic distress, food prices are sky high and Christmas is just next week…which means all those presents, decorations, wrapping paper that you paid for by credit will be coming to haunt you in January!

I have to make frequent trips to the grocery store during the holidays because all of the baking I do. I was there this week and could not believe just the few items I had totaled $69.54 – and I only had two bags! WOW – I was speechless.

Of course, looking back on the receipt I ask myself – “Did I really need those Goat Cheese Stuffed Olives, or the extensive selection of Spanish cheeses. Or how about those oh so tasty, but so darn expensive gourmet potato chips.” I did however skimp on some things: sour cream, cream cheese and marshmallows. But, it just goes to say that sometimes we splurge a little too much, when we could be more thrifty.

Saying that though, there are just some things I will never cut corners on – and that’s my Christmas dinner!

We are hosting the McConnell family for the holidays next week and I’m so very excited! Last year I hosted Christmas for my family and it was so much fun and less stressful. You see we live 3 hours from both sides of our family and our families live about 2 ½ hours apart. So, this makes for very long holidays and gets very tiring going to and from. This year though will be a piece of cake since we only have to drive south for one Christmas.

I finally have the Christmas dinner menu planned out (and as you can tell – I’m not cutting any corners on this menu). In my opinion when it comes to food, especially Christmas dinner – you can only buy the best in ingredients for the ones you care the most about!

Merry Christmas from my kitchen to yours!

McConnell Christmas Dinner Menu
Appetizers
Olives (Black, Spanish and Stuffed with Goat Cheese)
Spanish Cheeses, Burgers Smokehouse Sausage (local Missouri company) and Crackers
Spudmaster Potato Chips and a Dip
Rosemary Pinwheels

Dinner
Three Meat Dish (Chicken, Ham and Beef Roast)
Holiday Sweet Potato Casserole
Country Green Beans
Pecan Grape Salad
Croissant Rolls
Corn Casserole

Desserts
Southern Red Velvet Cake
Texas Pecan Pie
Very Cherry Pie
Pumpkin Gooey Butter Cakes
Smooth as Silk Chocolate Pie


Be looking for these recipes to come…

December 15, 2008

Holiday Baking 2008 Gets Underway

08 Christmas card

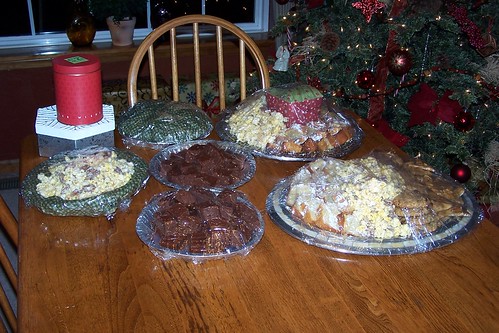
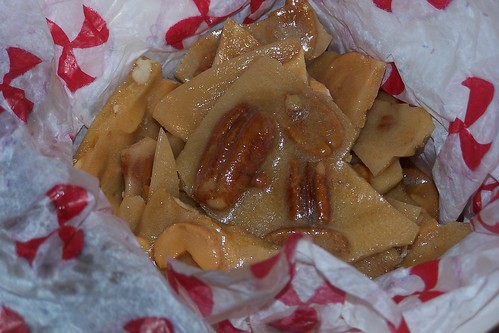
Today is goodie day…I’ve been dropping off holiday goodies I spent the weekend making to co-workers, friends and neighbors. It has become somewhat of a tradition in our house. I told my husband yesterday as I was making the last batch of pecan brittle that we needed some little ones in the kitchen to help out and make the experience even more of a family tradition.

Nothing beats receiving homemade goodies during the Christmas in my opinion. I would much rather someone give me something they spent time thinking about and making that any store bought gift.

It might be a lot of work for the cook, but making holiday goodies brings smiles to faces and joy to the heart!

08 Christmas card

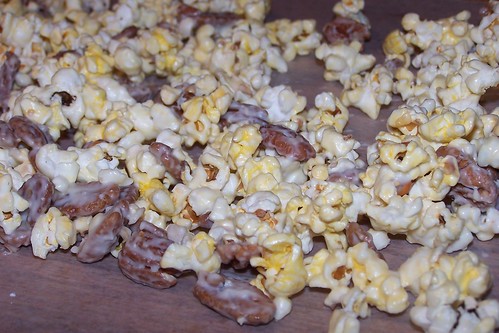
I switch up the menu each year when I bake. This year’s menu: Cashew and Pecan Brittle, Mini-Pound Cakes, Oatmeal Chocolate Chip Cookies, Almond Bark Popcorn (Pictured to the left), Fantasy Fudge and I still have three homemade Pumpkin Pies to make for some neighbors.

The Mini-Pound Cakes are my favorite because they are light and airy. The recipe comes from Martha Stewart, but of coarse!


Classic Pound Cake
Makes one 9-by-5-inch loaf

1 1/2 cups (3 sticks) unsalted butter, softened, plus more for pan
2 cups all-purpose flour
1 teaspoon salt
1 1/2 cups granulated sugar
1 teaspoon pure vanilla extract
6 large eggs
Confectioners' sugar, for dusting

Preheat oven to 350 degrees. Butter a 9-by-5-inch loaf pan; set aside. Whisk flour and salt in a medium bowl; set aside.

Put butter, granulated sugar, and vanilla in the bowl of an electric mixer fitted with the paddle attachment. Mix on medium-low speed until pale and fluffy, 3 to 5 minutes. Add eggs, one at a time, beating until combined after each addition. Reduce speed to low; mix in flour mixture until just combined.

Spoon batter into prepared pan, and smooth with an offset spatula. Bake, rotating pan halfway through, until cake is golden and a cake tester inserted into center comes out clean, 50 to 55 minutes. Let cool on a wire rack 10 to 15 minutes. Turn out onto rack, and let cool completely. Before serving, dust cake with confectioners' sugar, if desired. Cake can be stored at room temperature, wrapped well in plastic, up to 3 days.