Showing posts with label Cooking with Children. Show all posts

December 9, 2008

Holiday Candy Makin’

Do you remember when you were a child and you watched your grandmother or maybe even mother make candy for the holidays? Fudge, peanut butter cups, peanut brittle, sugared pecans, divinity…these are the types of candy I helped my mother make in our country kitchen.

I loved to watch my mother’s hands when she was cooking. I thought they were magical and it always amazed me how she could make such sweet tasting treats.

My mother would make goodies for neighbors that lived in the Ozarks that had helped us with farm chores, like getting cattle up to be worked, pulling a calf, or rounding all the cattle up when they got out. She would also make goodies for folks that provided great services like the postal man, hairdresser, school bus drivers and even the local 4-H leader.

08 Christmas card

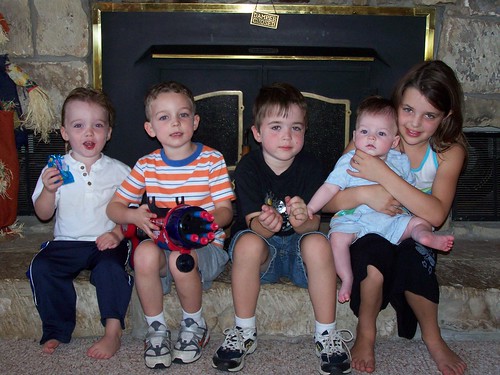
My mother still makes her holiday goodies each year, but now they are focused around her grandchildren (Sydnee, Hunter, Luke, Logan and Landon). She likes to make mini pumpkin breads, peanut butter cups, snowmen cookies and many other special treats for her grandbabies. Pictured to the right is Sydnee, Luke, myself and Hunter at Luke's 4th birthday party this past weekend.

One of my favorite holiday candies is brittle. I found this brittle recipe from the Martha Stewart website. BTW- there is no other site to log on to – to find the best in everything than Martha Stewart. I don’t care what you think about the lady- she is classy through and through and has helped me survived many dinners and holiday dinners.

08 Christmas card

Nut Brittle
From Martha Stewart
Makes 1 1/2 pounds


Nonstick cooking spray
1 1/2 cups sugar
1/2 cup light corn syrup
3/4 teaspoon salt
2 tablespoons butter
1 1/2 cups mixed nuts, such as pecan halves, cashews, pistachios, coarsely chopped if large
1 teaspoon vanilla extract
1/4 teaspoon baking soda

Spray a rimmed baking sheet and a wide metal spatula with cooking spray; set aside.

In a 2-quart glass measuring cup, combine sugar, corn syrup, and salt, stirring until sugar is moistened. Microwave on high for 4 minutes. Stir in butter and nuts; return to microwave for about 5 minutes, until the sugar mixture is thick, bubbly, and very pale brown in color. Mixture is very hot; use handle when holding and pouring.

Remove from microwave, stir in vanilla and baking soda (mixture may foam up). Immediately pour onto prepared baking sheet, spreading mixture as thinly as possible with the prepared spatula. Let stand 20 minutes until hardened, then lift off sheet, and break brittle into bite-size pieces.

July 16, 2008

Time Goes On

It always amazes me how fast time flies by the older I become. It’s almost as if one week disappears and before I know it it’s the end of the month.

This weekend my husband and I were fishing on Lake Ozark. It’s times with my husband like this that I can truly let my mind be free and put behind me the work that’s piling up on my desk or what things need to be done around the house or what friends or family members I need to call to just say hi. And- I cherish these time with my husband to relax, enjoy the lake and take in the sun!

My family continues to grow…the Baldwin family now has 5 grandkids (Sydnee, Hunter, Luke, Logan and little Landon – who recently celebrated his 1st birthday!) I wish everyday that I was closer to all of them to spend more time with them.

(PHOTO: Sydnee and Lane, June 2008)

My little niece Sydnee is growing up fast and becoming quite the little beauty! Sydnee loves to cook and enjoys watching the Food Network. Hunter likes to help Aunt Lane in the kitchen and terrorize his big sister and well Luke (he is still pretty little) just wants to be part of the cooking fun! I was recently at my brother David’s home and had the opportunity to cook dinner with the family, which is always a treat!

Yes, it’s always a family affair in the kitchen when I visit my brother’s house and I love that the whole family cooks together. My brothers and I grew up the same way in my mother’s kitchen and I hope that someday when I am fortunate enough to have children of my own that I will be able to cherish memories in the kitchen cooking cherished family recipes as well.

Something special from my own kitchen: Fried Potatoes (a true country girl’s favorite)

Mom’s Fried Potatoes
6-8 new potatoes, halved and sliced thin, skin on
Vegetable oil
1 tsp. Lawry’s Seasoned Salt
½ tsp. black pepper
½ of a red onion, diced
¼ tsp. garlic powder
½ tsp. dried basil

Fill a large skillet with about ½ inch of oil. Heat oil. Drop in onions and sauté for 1 minute. Add potatoes and seasonings.

Cook potatoes until a light golden brown. Drain potatoes on paper towel to remove excess oil.

Serve with hamburger or bbq anything!

February 29, 2008

Kid Style Peanut Butter Cookies

Syd Hunter and Lane

I love cooking with kids. They ask the funniest questions while cooking, things that us adults just don’t think about.

My favorite part though is that I know I’m teaching the beauty and joy of cooking to a young person.

My niece Sydnee called me the other night and told me she needed a recipe with peanuts in it, as she was learning about George Washington Carver in school – Carver was a peanut farmer. So, I thought about it for awhile and remembered a cookie recipe I had come across and was in my recipe box that I had never tried before. I emailed the recipe to my sister-in-law so she could get the ingredients.

I traveled down to my brother’s house the next night, to spend the night as his house…I was traveling on business all this week putting on farmers’ market workshops for my job. That night Syndee, my nephew Hunter and I baked up some of the yummiest cookies.

The best part of this recipe is that it is very kid friendly. Hope you enjoy these wonderful cookies as much as we did.

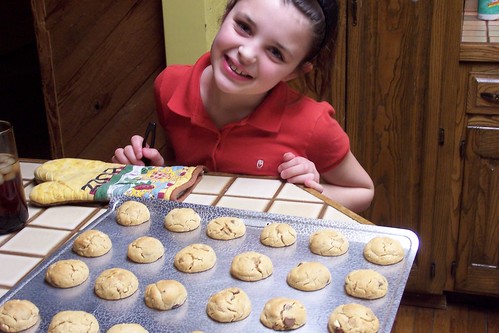
Take a look at Syd rolling up her cookies.

Kid Style Peanut Butter Cookies
Recipe courtesy Family Circle Magazine


1 package (about 18 ounces) prepared sugar cookie dough

1/2 cup peanut butter

1/2 mini chocolate chips

1/2 cup peanut butter chips

1/2 cup peanuts, coarsely chopped

Heat oven to 350 degrees F.


Beat together cookie dough and peanut butter in large bowl until blended and smooth. Stir or knead in mini chips, peanut butter chips and peanuts until evenly distributed.

Drop 1 heaping tablespoon of dough for each cookie onto ungreased baking sheets. Bake for 15 minutes. Cool slightly on baking sheets. Then transfer to wire rack and cool.

February 28, 2007

Working Women Meals

Being a working woman isn’t always the easiest life, especially if you have children. Then life is even more hectic with juggling dinner, school functions, your job, house chores, ect.

Paula Deen did a show awhile ago that was meals for working women, which I thought was perfect for today. Ms. Paula includes recipes for Baked Shrimp & Crab Salad, Easy Corned Beef & Cabbage and Hoe Cakes.

Corn Beef and Cabbage is one of my all-time favorite meals, as Paula’s hoe cakes are. Corn beef is one of the easiest meal to prepare and can be excellent leftovers that will last.

My recipe is much different than Paula’s, but I think it’s just as good and perfect for us that are on the go. Here’s my own recipe for Corn Beef & Cabbage.

Corned Beef & Cabbage

Corn Beef & Cabbage
By Lane


1 corned beef (I usually get a 3-4 pound one)
1 head of cabbage
2 T. butter
1 red onion, chopped, coarsely
1 parsnip, chopped
4-5 new potatoes, quartered
Seasoning packet with corned beef
Plus add 1 T. garlic powder
1 tsp. salt
1 bay leaf

Place all veggies in large crock pot on low setting. Place corned beef on top and add all seasonings (including the packet that comes with the corned beef.)

Cook on low for about 9 hours. I usually put the crock on around 7:30 and turn it off when I get home about 5:00 pm. The meat will be so tender it will fall apart.

I like to serve this with a simple salad and dinner rolls.

February 9, 2007

Making your own Rock Candy

I’ve got something really special for you all today. It’s a little project you can do over the weekend with your kids.

When I was little my parents introduced me to so many neat projects like making stalactites and stalagmites, cooking, knot tying, paper mache, preserving leaves….you get the idea.

We usually did these types of fun activities during the winter months. I am sure many of you with children are having a hard time finding activities for the kids to do inside the house, besides watching tv.

Rock Candy

Here is a great activity that your kids will love because they can make their own sweet treats with you in the kitchen.

My mother and I used to have so much fun making rock candy in her kitchen. As a kid I thought it was the coolest thing that my mother knew the exact ingredients to make the candy.

Now you and your children can have some fun this weekend making your own rock candy!

Rock Candy Recipe

1 Glass jar or drinking glass
1 Piece of cotton string
1 Pencil or stick
1 Paper clip
1 Food coloring (optional)
1 c Water
2 c Sugar
Additional sugar

Tie a short piece of cotton string to the middle of the pencil or stick. Attach a paper clip to the end of the string for a weight.

Moisten the string very lightly, and roll in a bit of sugar (this will "attract" the sugar crystals from the syrup to the string). Place the pencil or stick over the top of the glass or jar with the string hanging down inside.

Heat the water to boiling, and dissolve the 2 cups of sugar into it. For the biggest crystals, heat the sugar-water solution a second time, and dissolve as much additional sugar as you can into it. Add a few drops of food coloring to the solution if you want colored candy.

Pour the solution into the prepared glass or jar and leave undisturbed for a couple of days. Depending on how much sugar you were able to dissolve into the water, you should start to see crystals growing in a few hours to a few days.

January 29, 2007

Making the Kitchen Fun for Your Kids

When I was a youngster from time to time things seemed so boring on the farm. My parent’s farm is about 20 minutes from ANY town and there were not many children my age to play with.

Now, don’t get me wrong there was plenty to do when the weather was nice outside. I would ride horses, go swimming in the creek, ride the four wheeler all around the back roads through-out the farm, catch bugs and craw daddies, help my mother plant flowers or help dad in the garden, take walks through the woods and I had my daily chores every morning and night as well. So, as you can see there was always plenty to do, but when the weather was rainy, cold, snowy….You couldn’t really do all the fun things outside you wanted to.

It was days like these that my mother would pull me into the kitchen (this is when I was a youngster, remember) and she and I would make crafts together like play dough and homemade bubbles.
It’s funny how it’s these small things that have really stuck in my mind. In fact, if I really think back this is how my mother really introduced to me the kitchen. She made the kitchen not a place where eating was done, but made the kitchen a place of fun for me at an early age. I truly believe this is one reason I enjoy being in the kitchen so much today as a grown woman.

So, today I want to share not traditional “cooking” recipes, but fun “craft” recipes that can help you teach the joys of the kitchen to your children. I know you and your kids will have as much fun making these crafts as I did with my mother, plus you’re making memories and traditions together.

I don’t have children, but I do have a niece, three nephews and another nephew on the way, so I do have quite a bit experience with youngsters. Here are some of my suggestions for making crafts in the kitchen with your kids a bit easier on you:

· Embrace the mess. Children are messy. Children in the kitchen are even messier. If it makes you feel better, cover the table or counter with newspaper or plastic bags. After that, let it go and enjoy the activity.

· Keep the projects appropriate for the child's age and skill and the time you have.

· Make maracas: Fill clean screw-top plastic bottles with different quantities of dry foods (such as beans, rice or peanuts) to create a variety of maracas. Children also can decorate paper labels to tape around the outside of the bottles.

· Fashion jewelry out of pasta and cereal: String cereal O's and different shapes of pasta tubes on yarn or kitchen twine to make necklaces and bracelets. Use markers to color the pasta. (This was one of my favorites!)

· Paint with pudding: Make several different batches of instant pudding, then let children paint on paper with it using large brushes or their fingers. And the best part: it’s ok if they lick their fingers.

· Plant a forest: Of sugar cone trees, that is. Hopkins says that overturned ice cream cones can be decorated like trees (or spaceships or towers or...) using candy sprinkles, peanut butter, prepared frosting, or anything else that sticks.

All the following recipes are from: — Exploratorium, www.exploratorium.eduPlay

Play-Dough
(Start to finish: 10 minutes)

1/2 c. kosher salt
1 c. all-purpose flour
1 T. cream of tartar
1 T. vegetable oil
1 c. water
Liquid food coloring

In a small saucepan, combine all ingredients except the food coloring. Stir until well-mixed, then add food coloring a few drops at a time until desired color is reached. The mixture will start out soupy.

Set the saucepan over medium heat and stir until the mixture begins to clump, dry and gets difficult to move the spoon through, about 3 to 4 minutes. Remove from the heat and transfer the dough to a dry work surface.

When the dough has cooled to the touch, knead until smooth and cool. To store, refrigerate the dough in plastic bags. Makes about 2 cups of dough.

Colored Salt
(Start to finish: 10 minutes)
Zip-close plastic bag
3 T. coarse salt (such as kosher)
Food coloring
White glue
Construction paper

In the plastic bag, combine the salt and 2 or more drops of food coloring. Seal the bag and shake until the salt is colored. Use the glue to create patterns or designs on the paper, then sprinkle the salt over it. Let the glue and salt set for a few minutes, then tip the paper to remove excess salt. Repeat the process with different colors.

Bubbles
2/3 c. Joy dish soap
1 gallon water
2 to 3 T. glycerin (available at pharmacies)

In a large bowl, gently stir together all ingredients. Let sit uncovered overnight. To blow bubbles, fashion hoops from pipe cleaners or tubes from toilet paper and paper towels.

September 13, 2006

Passing on Traditions

My boss recently put together a radio segment for our Rural Issues Forum program that I thought many of you would enjoy, titled. "Who'll make the gravy?" This program made me think how lucky I was to have parents and grandparents teach me the simple things in life.

Like to cook squash and zucchini, growing herbs, baking the perfect chocolate chip cookies and how to be adventurous in making new recipes.

I have talked a lot about learning to cook old fashioned recipes from my mother and grandmothers before...from sweet potatoes to biscuits. I am amazed how many people my age don't know how to cook or prepare so many meals that our parents and their parents lived on.

For instance, one of my girlfriends calls me just about everytime she cooks anything...about twice per week. She called the other day and asked me how to make mashed potatoes! I laughed. "Well, "I said, "boil your potatoes until they are done."

"Done? she asked.

"Yes, they are done when you stick a fork in them and they are soft." I replied.

"Soft, how soft?" she asked.

"Umm..." I thought to myself how do I explain this? "The fork will easier slide through the potatoes, you will know."

After giving my friend further instructions on the ingredients and the perfect mashing techniques I felt as though she could make her mashed potatoes.

It's amazing how many of the easiest recipes so many young people today have no idea how or where to begin. Why were they not taught? Why weren't the lessons learned? How will grandma's sweet potato recipe be taught to future grandchildren and family members?

I am in the process of recording all of my mothers and soon, my mother-in-laws family recipes. Because someday I might be the only one that knows how to make my mother's famous fried chicken...or my mother-in-laws wonderful shrimp and fettuccine.

Think about it...those cherished secret family recipes could be lost if our young adults and children are not given the opportunity to have traditions passed onto them.

Don't let those traditions be lost....