Showing posts with label Healthy Meals. Show all posts

May 17, 2010

Making Baby Food...So Easy

When I told folks I was going to make my own homemade baby food..they laughed. "Yeah, we will see how much time you have for that after the baby comes..." Mind over matter people!

Well, come on over to my house and see the bags of baby food I've made over the past couple weeks - in a very short amount of time I might add. Only the best for Caston!


I choose fresh vegetables mostly (how lucky that it's starting summer and I'll be able to shop at the farmers' markets for most all vegetables and fruits), but the fruits and vegs that are high in pesticides typically, I'm buying either locally or frozen.

I look at it this way...why wouldn't I want my baby to have the freshest most nutritious food? Plus, have you smelled some of that jarred baby food- YUCK! I wouldn't eat it.

I made sweet pea puree the other day and looked at how brightly colored the peas were. The jarred stuff looks like a brown-green color and I've never known a baby to like peas. Well, mine does! It's his favorite thus far.

I'm also making sure Caston has an adventurous palate by incorporating things like avocado, salmon, pumpkin, butternut squash and even kale. I think kids are picky eaters bc they aren't shown how fun food is!

And, you save money! Trust me on this or read this.

If you are interested in making your own baby food check out these resources:
Baby Center
Wholesome Baby Food
Cookbook: So Fresh

Once a week I take about an hour and make a couple batches of baby food and freeze the food in ice cube trays and some freezer cups. Then, just pull out the different foods at each meal. Simple as that.

The older Caston gets the more he will just eat what we eat. I whole-heartily believe this is the best food for your baby....no preservatives and additives- just fresh and healthy food!

Give it a shot!

May 3, 2010

Muffins with Fresh Strawberry Sauce

Some friends and I have been tampering with Weight Watchers recipes because each recipe is nutritionally balanced and I've heard good things about many of the system's meals. So, I had to try some to see if it was worth it. It is!


Since having a baby I've become very health conscious (not that I wasn't before), but I'm really trying to cut back on the butter (Paula Deen would be disappointed) and pump up good oils (like olive and canola).

I want to live a long life and see my babies (yes I meant to use the plural word and no I'm not pregnant right now - I know that would be the next question) grow old, marry and have babies of their own. I want to Live Strong - have you checked out that website?

Our family has always eaten well, but too much of anything isn't a good thing. So, that's why we've decided to make healthier eating choices. Now, don't think that means you won't see deliciously divine desserts or my favorite southern foods- anything fried! It's just I'm going to be trying to combine a little health kick here and there.

Starting with this. The first Weight Watchers recipe I decided to try was of coarse a dessert! I love my sweets. These muffins with homemade strawberry sauce are amazing and healthy!

I was stunned on how good the strawberry sauce was.....I could have just eaten it alone. The best part is it's almost strawberry season in Missouri...look for strawberries to be ripe for the pickin' in about two more weeks!

Try it out for yourself and let me know what you think!

Lemon Yogurt Muffins with Fresh Strawberry Sauce

2 spray(s) cooking spray
2 cup(s) strawberries, finely chopped, divided
2 Tbsp strawberry jam
1 Tbsp sugar
1 tsp fresh lemon juice
1 tsp cornstarch
2 cup(s) all-purpose flour
1 tsp baking soda
1 Tbsp baking powder
1/4 tsp table salt
2 large egg(s)
8 oz Yoplait Original 99% Fat Free Lemon Yogurt, or similar product
1/3 cup(s) sugar
1/4 cup(s) canola oil
2 Tbsp fresh lemon juice
1 Tbsp lemon zest, or more to taste

Preheat oven to 350°F. Coat a 12-hole muffin pan with cooking spray.

In a small saucepan, combine 1 cup strawberries with next 4 ingredients; set over medium-low heat. Cook until boiling, whisking constantly, about 2 to 3 minutes. Stir in remaining 1 cup strawberries; set aside to cool.

In a large bowl, whisk together flour, baking soda, baking powder and salt. In a small bowl, lightly whisk eggs; whisk in remaining ingredients until smooth.

Make a well in center of dry ingredients and spoon in egg mixture; gently fold to combine.

Fill each muffin hole 3/4s full with batter. Bake until a toothpick inserted in center of a muffin comes out clean, about 15 to 17 minutes. Remove from oven and serve each muffin with 1 heaping tablespoon strawberry sauce on top.

April 23, 2010

Guacamole Anyone

When I was pregnant with Caston there was one food and one food alone that cured my carvings- Mexican!


I wanted it all....chips and dip, tacos, burritos, enchiladas....but mostly guacamole!

Guacamole is very simple to make too. We usually have avocados laying around the kitchen as well (did you know that avocados are very good for your health)! Doctors even believe that avocados are a cancer fighter....so eat up!

Here's my simple guacamole recipe that will suit your fancy!

Kick-Up Guacamole
3 medium avocados, very ripe
1 shallot, minced
1 small jalapeno chili, seeded and minced
2 garlic cloves, minced
1/3 cup cilantro, chopped
1/4 cup lime juice, fresh
1/2 tsp. lime zest
1 T. olive oil
1 tsp. salt

Place avocados and lime juice in bowl and mash with a fork, lightly. Stir in the rest of the ingredients and serve with chips!
(PHOTO: Caston turned 5 months recently...this was a couple days after his 5 month birthday!)

February 26, 2010

More Photos of Baby Caston

More photos of Baby Caston are posted on Tiffany Kelley's blog....take a look at our big boy!


I've had a couple of folks ask if I'm cooking as much anymore with the new little one- the answer is yes! I've just been busy with work and baby time it's been a little difficult to keep up with my blogs and other social media sites. But I'm learning how to get more done with an infant more and more each day....plus the little man is on a pretty good schedule now and gives mama time to get her work done.

Here's a new recipe that we really enjoy around our house. With just having a baby, I'm now trying to get back into "prebaby" shape. This recipe is sure to please not only the taste buds, but also the waist. Most Chicken Piccate recipes are made with a fatty, rich cream sauce- but this recipe is just the opposite- and tastes just as good.

Chicken Piccata with Pasta and Mushrooms
Recipe courtesy EatingWell.com

6 ounces whole-wheat angel hair pasta
1/3 cup all-purpose flour, divided
2 cups reduced-sodium chicken broth
1/2 teaspoon salt, divided
1/4 teaspoon freshly ground pepper
4 chicken cutlets (3/4-1 pound total), trimmed
3 teaspoons extra-virgin olive oil, divided
1 10-ounce package mushrooms, sliced
3 large cloves garlic, minced
1/2 cup white wine
2 tablespoons lemon juice
1/4 cup chopped fresh parsley
2 tablespoons capers, rinsed
2 teaspoons butter

Bring a large pot of water to a boil. Add pasta and cook until just tender, 4 to 6 minutes or according to package directions. Drain and rinse.

Meanwhile, whisk 5 teaspoons flour and broth in a small bowl until smooth. Place the remaining flour in a shallow dish. Season chicken with 1/4 teaspoon salt and pepper and dredge both sides in the flour. Heat 2 teaspoons oil in a large nonstick skillet over medium heat. Add the chicken and cook until browned and no longer pink in the middle, 2 to 3 minutes per side. Transfer to a plate; keep warm.

Heat the remaining 1 teaspoon oil in the pan over medium-high heat. Add mushrooms and cook, stirring, until they release their juices and begin to brown, about 5 minutes. Transfer to a plate. Add garlic and wine to the pan and cook until reduced by half, 1 to 2 minutes. Stir in the reserved broth-flour mixture, lemon juice and the remaining 1/4 teaspoon salt. Bring to a simmer and cook, stirring, until the sauce is thickened, about 5 minutes.

Stir in parsley, capers, butter and the reserved mushrooms. Measure out 1/2 cup of the mushroom sauce. Toss the pasta in the pan with the remaining sauce. Serve the pasta topped with the chicken and the reserved sauce.

August 24, 2009

Another State Fair Down

I apologize for the blog not being updated for awhile. Each year during this time I sorta blank out because of the Missouri State Fair. We just got back today from the fair and I am so thankful for another fair to be done.


At the fair I help organize and run the Missouri State Fair Farmers' Market, which takes a lot of work and time. Plus, this year we added local food cooking demos to the area. I conducted 7 cooking demos and they went very well. I'm amazed how each time a do one it gets easier and easier.

We had both professional and amateur chefs and all demos were very well attended. Missouri Farmer Today had a nice article about the area, as well as a tv report from KOMU TV.

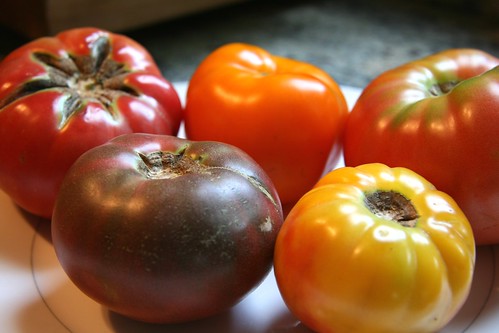
One of the four different recipes I demonstrated was a very quick and simple recipe for what I call "dressed-up tomatoes." This is how we like to eat tomatoes at our house. I coudl actually make a dinner out of eating tomatoes and veggies!

Dress-Up Tomatoes
By Lane

3-4 different heirloom tomatoes, sliced
feta cheese, herb flavored
balsamic vinegar
basil leaves, chopped
kosher salt

On a tray, plate your tomato slices. Sprinkle with a little kosher salt, drizzle with balsamic vinegar and sprinkle with feta cheese and fresh basil.

* This is a very easy way to add some zing to a simple plate of tomatoes.

August 9, 2009

Pasta with a Twist

It always amazes me how well my husband and I work as a team. Yes, it wasn't always like that. Every couple has to learn about one another and it's not always easy, but it sure is a fun journey! It's taken us a little over 5 years, but we think we have a lot of it figured out.

Building our little man's baby room proved just that. From painting (no, I didn't paint, but I like to say I helped supervised), putting together the furniture, deciding on a theme for the room...it's all about teamwork.

We are definitely going to have to learn about teamwork when our little man comes in November- that's a given. But, I'm not worried. I know that together- Charlie and I make an incredible team and will make great parents.

It all really started right after we got married and started cooking together. Through the years we both cook dinners together about every night and I truly cherish those times.

Tonight was one of those nights in the kitchen. We were both hungry, but didn't feel like making a meal that would take forever- so we opted for a quick pasta dish. Garden tomatoes and basil, capers, olives...and some grilled chicken breast. Talk about a light and healthy meal- and oh so delicious!

Try this recipe for a weeknight meal- you won't regret it!

McConnell Fresh and Light Pasta
3 cups Penne Pasta (wholegrain)
1/3 cup kalamata olives, diced
2 T. capers
1/2 cup garden tomatoes, diced
15 basil leaves, chopped
1 lemon squeezed
3 T. olives oil
1 tsp. garlic powder
2 grilled chicken breasts, sliced

Toss everything in a large bowl and serve with toasty french bread!

July 8, 2009

Just Peachy Breakfast Shake

It seems all I do anymore is eat- 24/7. And, if I’m not eating I’m hungry! But, I guess it comes with the territory of being pregnant- 21 weeks and going strong.

I can’t complain though- I’ve had a wonderful pregnancy and told my husband how much I enjoy being pregnant.

We found out that our house will be expecting a little boy come November. My husband was very pleased, knowing that he will have a little fishing buddy in the near future and!

Here is a quick breakfast treat that is both healthy and flavorful! I found this recipe on What to Expect.com.

Just Peachy Breakfast Shake
1 medium banana, frozen and sliced

1 cup frozen unsweetened peach slices
¾ cup vanilla yogurt
½ cup calcium-fortified cranberry juice
Soy protein powder (optional)

Place all ingredients in blender or food processor and process until pureed. Pour into a tall glass and serve.

June 29, 2009

Lamb Chops with a Side of Banana Peppers

One of the best things about being pregnant is indulging in all sorts of foods. Last week while we were on vacation in South Carolina/Georgia some of the sampling of foods I had were Hilton Head’s World famous Crab Cakes with a Lemon Dill Sauce at Conroy’s, Stuffed Grouper at Red Fish or the delectable Citrus Glazed Salmon at Topsider in Harbor Town. The weather on the east coast was just about as hot as the blazing hot temps in Missouri- but we didn’t mind- for we had miles of white sandy beaches to cool off.

(PHOTO: On the beach at Hilton Head, South Carolina)

When we returned to Missouri on Friday night the temps hadn’t broke and we awoke Saturday morning to a garden full of fresh peppers (banana and jalapeno). My husband decided to find some new recipes for banana peppers by doing some research on the internet- because you can only eat grilled peppers so many times.

While he was searching he also found a really great lamb chop recipe as well. Add in a side of grilled zucchini and it was a terrific meal. Who doesn’t love a great man in the kitchen!

Feta Stuffed Banana Peppers
Adapted from
www.chowhound.chow.com

5 large banana peppers, tops off and seeded
Salt
Pepper
Olive Oil
Feta Cheese or Goat Cheese

In a zip lock bag add salt, pepper and a little olive oil. Place cleaned peppers in bag and seal. Coat the peppers with mixture and remove from bag. Grill peppers on medium-high heat (with cover shut) for about 5 minutes on each side. Take off the grill and stuff with feta cheese (we used garlic feta) and place peppers back on grill and grill for another 2 minutes until cheese is melted.

Lamb Chop Marinade
From Cooks.com


¼ c. vegetable oil
2 T. soy sauce
2 cloves of garlic, peeled and pressed
1 T. ginger
1 T. rosemary
1 T. lemon juice
¼ c. Djon mustard
8 lamb chops

Brush marinade liberally on all sides and let sit overnight in the refrigerator. The next day let the meat come to room temp. Cook on grill 3-4 minutes per side (this all depends on the thickness of the meat).

April 29, 2009

Grilled Asparagus

Spring is one of my favorite times of the year for many reasons…smells of cut grass, tulips, warmer days and nights, gardening …but the real reason I enjoy spring is for the taste of fresh asparagus.

I was at our monthly Central Missouri Master Gardening meeting last night and my friend (and former Director of Agriculture) Lowell Mohler was the guest speaker. The topic- “Growing Asparagus.”

Lowell was nice enough to bring me a large bag of freshly cut asparagus from his 2 ½ acre asparagus plot. If you’ve ever eaten fresh asparagus- there’s nothing like it.

Most people think they are eating fresh asparagus in the stores- but they are so mistaken. Most of the asparagus found in grocery stores is at least 1 week old, some 2 weeks old.

Many folks only know one way to cook asparagus- boil it to death. This is totally the wrong technique. Asparagus shouldn’t be cooked very long at all.

At my house we enjoy grilled asparagus- this is my husband’s favorite way to prepare it!

Grilled Asparagus for Two
10 asparagus stems
Salt and pepper to taste
2 T. butter

Wrap in tin foil tightly. Place on indirect heat for 5 minutes a side.

April 21, 2009

Gardening...A Way of Life

Lately around our house it's been lazy nights, easy dinners and lots and lots of help from my husband. Being pregnant really takes it out of you- I never imagined how tired, excited, scattered brained and nervous one body could be!

Today was a filling day and I found that I pushed myself a little too much when it was 4pm at the office and my back ached like I was an 80 year old (no offense to those that are reading this and are 80). What caused this?

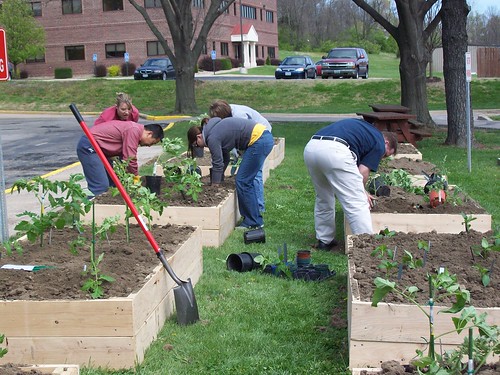
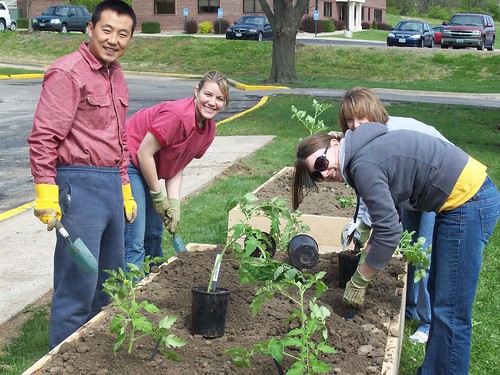
At my work we are putting in a community garden for our employees and somehow I got put on the organization committee- along with some other wonderful folks I work with- and we are responsible for about everything.

What does everything include? Try- building more than 20 raised beds for the vegetables, getting soil and mulch hauled in, picking up over 40 tomato plants, 20 pepper plants, getting sponsors for seeds, gardening equipment, new landscape design plans for the front of our building, herb garden.....the list goes on and on. I'm so thankful to be helped by two other very motivated co-workers that are real go-getters.

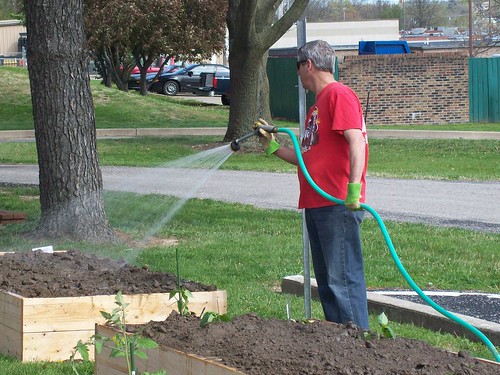
Today, a fellow co-worker finished some of the raised beds and moved them around in different locations on the grounds and then filled the beds with soil. I went to pick up plants from the Central Missouri Master Gardeners (who were kind enough to donate to our cause) and pick up all the equipment needs. I then had to set-up our watering system, water the plants, organize seeds, tools and gloves for the employees and finally we were ready to plant! Then about 2pm many of our employees started coming out to help plant the tomatoes and pepper plants after listening to a gardening 101 short course. (This is an educational course for some, but others are green thumbs).

All and all it was a great day and fun was had by all! Our gardens will serve as an educational piece to the public, but promote a healthy lifestyle to our employees. I mean who wouldn't want to go outside for a couple hours a week (during work time) to play in the dirt and get some good exercise? I know I will be spending a lot of time outdoors this summer getting my hand dirty.

We will also be putting in a small orchard, raspberry and blackberry plants, Norton and Concord Grapes, 5 pumpkin patches, a very large plot of sweet corn, some cut flowers- and who knows what else! The best thing- all produce goes back to our employees!

December 19, 2008

Crock Pot Roast...Ready When You Get Home

Last night was an interesting one. As I was making dinner my husband came in the kitchen with about four tackle boxes of stick baits and just smiled at me. I asked what he was up to and he said, “It’s stick bait time.”

I knew what he meant. My folks are coming up today to spend the weekend and he is taking my dad to Lake Ozark for some winter fishing. My dad is also an avid fisherman, as my husband is.

I knew that the fish at LO must be hitting a stick bait, as then my husband proceeded to fill up one side of my kitchen sink with ice cold water and when I say ice cold, I mean he placed ice cubes in the already freezing water. Guess this helps reenact the water temperature at the lake?

He then starting taking out every stick bait and placing them in the freezing water to see if they would properly sink or float. If the baits do not sink properly and suspend in the water, he then takes some of the weight off the bait.

(FYI: These stick baits are some kind of fancy Japanese bait that are terribly expensive. When I say they are pricy, I mean like $15-$35 a bait!) I told him he better not loose any of them while fishing because we would have to take a loan out to replace all these fancy little stick baits he has. Of course I was just joking though.

Fisherman…got of love them!

Today’s recipe is one of our favorites in my house. It’s simple, quick and cooking at my house right now for when my parents and best gal pal Tyne show u tonight.

Crockpot Beef Roast
By Lane

1 beef roast (I like to use chuck roast)
1 onion, roughly chopped
4 beef bouillon cubes
1 T. parley flakes
1 T. garlic powder
½ tsp. basil, dried
½ tsp. Lowery’s seasoned salt
½ tsp. pepper
1 cup of small baby carrots
1 parsnip, coarsely chopped
1/2 cup dry red wine (omit this if you don't have any on hand)

In a large crock pot, place the onions, carrots and parsnips. Place the beef cubes on top, then lay beef roast. Add all the seasonings and the seasonings. Fill crock up with water – to barley cover the roast with.

Place crock on low setting and cook from 7:30 am until 4:30 or 5:00 pm, depending on the size of the roast.

*After the roast is cooked, keep those wonderful juices! Make some gravy with it, boil some penne pasta in it. You can also use the juice to make some wonderful beef soup.

*If you cook pasta in the juice, the pasta will make it’s own gravy because the starch in the pasta thickens the broth up. I like to then place the pasta in a casserole dish and sprinkle with some tasty feta cheese.

* Or freeze the broth to use another time.

November 18, 2008

Brussels Sprouts: The New Wave

Brussels sprouts get a bum wrap in my opinion. Yes, they are strange-looking and large and round, but they are so tasty. Most folks don’t know who to go about preparing them. I like them all different ways. I found this recipe on All Recipes.com and thought it sounded interesting. A breaded Brussels sprout? Hum, might be good…and it is!

Try serving a plate of these at your Thanksgiving dinner this year- they are sure to be a hit!

Breaded Brussels Sprouts
1 1/2 pounds Brussels sprouts
1 teaspoon salt
4 tablespoons butter, melted
4 tablespoons grated Parmesan cheese
4 tablespoons dried bread crumbs
1/4 teaspoon garlic powder
1/4 teaspoon ground black pepper
1/2 teaspoon seasoning salt

Wash and trim Brussels sprouts. Cut an "X", about 1/8 inch deep in the stem of the sprouts, (this helps cook the sprouts more evenly and quickly).

In a medium-size pot, cover Brussels sprouts with water, add 1 teaspoon salt and bring to boil. Cover and simmer for 6 minutes or until tender; drain. Be careful not to overcook sprouts.

Place sprouts in a small casserole dish. Sprinkle 2 tablespoons of melted butter over the sprouts and mix well to coat.

Combine parmesan cheese, dried bread crumbs, garlic powder, black pepper, seasoning salt and remaining butter and mix well; sprinkle mixture over sprouts.

Heat sprouts under broiler (about 4 inches away from heat) for about 5 minutes or until crumb mixture is lightly browned. Serve hot.

October 8, 2008

Cooking Spaghetti Squash

It’s fall and that means you have the opportunity to enjoy all the wonderful fall squash varieties that are available at your local grocery store or farmers’ markets. I laugh when I see spaghetti squash in the grocery store because I know most people have no idea how to even cook spaghetti squash. Same goes for acorn squash, butternut, ambercup, banana, buttercup, delicate…the list goes on and on.


Try something new tonight and don’t be shy – pick up one of those funny looking squash at your local market and experience the freshness!

Cooking Spaghetti Squash (this is a very easy recipe a farmers’ market vendor told me this summer)
1 spaghetti squash
2 heads of garlic
Salt and pepper to taste
Olive oil and vegetable oil
Vegetables, meat or cheese (Your choice)

Preheat oven to 350 degrees. Halve raw spaghetti squash with a sturdy sharp knife, scoop out and discard.. Place halves onto an oven safe cooking dish face up. Clean heads of garlic and thinly slice garlic.Spread garlic into the bowl like shape of the squash, salt and pepper vigorously, drizzle with a 50/50 mixture of olive oil, and vegetable oil (get the oil everywhere inside the squash).

Place onto the upper middle rack of the oven for about 30-40 minutes. (You will know it is ready when the squash separates with little resistance from the skin). Remove from oven, and place in coldest location possible for at least 20 minutes, before separating from skin. Use a fork to scoop and separate squash strands, add any other ingredients you like at this point. I like to put everything together and place in a cooking dish and bake in the oven for a little while so the cheeses can melt.

Parmesan, Romano, or Pecorino, Feta, are all excellent additions to this dish, as well as, meat, sausage, veggies, olives, the list is endless. My personal favorites are veggies with feta cheese. I like to also sprinkle in some basil-dried seasonings. Enjoy!

September 24, 2008

Local Flavors, Local Colors

The weather is cooling off, the leaves are starting to turn and fall is on it’s way to the Midwest! Ahhhhh…how I love this time of the year. It’s warm enough during the day, but just cool enough to wear a light jacket at night.

The beautiful fall colors, harvest time in the fields, colorful mums start appearing, pumpkins of all sizes, corn mazes, apple pie, winter produce from the garden….there are so many wonderful parts of the fall!

As you might have caught on recently from reading my personal blog – I’ve become a huge “localvore.” Not that I wasn’t before, but with my job at the Dept. of Ag I’ve learned a lot about eating local and I have truly found my passion in life. (Yes, I know it might sound corny – but it’s true!)

In my job I work with farmers across the state that sell their farm products at farmers’ markets or off their farm. I also help producers become certified organic through the USDA and help our Agri-Tourism operations market their businesses. I get to spend the day at farmers’ markets visiting with the producers, going to do farm tours with specialty crops growers and I have the opportunity to learn something new everyday. I truly love my job and enjoy helping our producers across the state.

I really feel like everything that I have done before this job was preparing me for this position and the work that I now do. Yes, there are days in the office that aren’t so wonderful, but that’s why they call it a job – it ain’t all peaches and cream all the time.

I am just thankful for this position finding me and so thankful for the farmers that I have the opportunity to work with on a daily basis. Ok that said, back to cooking right?

If you haven’t been on the Farm to Fork Cooking Blog, you need to. It’s all about eating local food, with great recipes and stories! I’m addictive…I wish I could get paid to just cook and write about the pleasures of local food. The blog is a part of FineCooking.com, which is a great site that you can find lots of wonderful and tasty recipes on.

Today’s cooking treat: Butterflied Chicken! I watched Barefoot Contessa on the Food Network the other day and I knew this was one recipe I knew I would love, plus I have a ton of rosemary in my herb garden that needed to be put to good use.

Butterflied Chicken
By Ina Garten

1/4 cup chopped fresh rosemary leaves, plus 2 sprigs

3 garlic cloves, chopped
1 teaspoon lemon zest
1 1/2 tablespoons lemon juice
Good olive oil
Kosher salt
Freshly ground black pepper
2 roasting chickens (2 1/2 to 3 pounds each), deboned and butterflied
1/2 lemon, thinly sliced

Mix the chopped rosemary, garlic, lemon zest, lemon juice, 1 tablespoon olive oil, 2 teaspoons salt and 1/2 teaspoon pepper together in a small bowl to make a paste.

Place the chickens on a sheet pan, skin side up, and loosen the skin from the meat with your fingers. Place 1/2 of the paste under the skin of each chicken. Rub any remaining paste on the outside and underside of the chickens.

Turn the chicken skin side down and scatter the lemon slices and sprigs of rosemary over each chicken. Season with salt and pepper. Roll each chicken up, cover with plastic wrap and refrigerate for at least 1 hour. Heat a grill with coals. Spread the coals out in 1 dense layer and brush the grill with oil. Unroll the chickens, place them on the grill and cook for 12 minutes on each side.

September 21, 2008

Apple Stuffed Pork Loin

Recently, I’ve had apples on the brain. Maybe it’s because I’m trying to eat healthier, maybe it’s because I recently visited Peter’s Market near Marshall, Mo for work or maybe it’s because it’s apples season in Missouri – but either way I’ve had apples on the brain.

On a recent visit to Peter’s Market for work I toured the very impressive orchard and came away from the market with the best Gala apples I’ve ever eaten! I also purchased apple butter, some pickled okra (because I didn’t pickle any of my own this year…ran out of time), home-grown nectarines, gallon of apple cider and a few other Missouri made products that I hadn’t tried before.

Paul Peter, owner of Peter’s Market, took me around the orchard to look over their extensive operation. I learned that Peter’s was the largest distributor of Jonathan apples in the nation, who would have known….right here in good ole Missouri.

There are over 7,000 named varieties of apples in the world – 7,000!

Since it’s apples season across the nation what a better time to try your hand at making a homemade apple pie or this new recipe I recently tried from Paula Deen. I didn’t know about stuffing a pork loin with apples, but this is a very simple recipe for dressing up a traditional pork loin, plus it makes a lovely presentation. And you know…it’s all about the presentation!

Apple Stuffed Pork Loin Roast
Photo and recipe from Paula Deen, Food Network

3 tablespoons olive oil
1 large onion, chopped
2 Granny Smith apples, peeled, cored and chopped
8 fresh sage leaves
2 cups thick-cut white bread cubes, crusts removed

1 egg, beaten
2 tablespoons butter
Salt and pepper
1/2 to 1 cup chicken broth, plus more if needed
1 (3 pound) pork loin roast, butterflied

Preheat oven to 375 degrees F.

In a large skillet, heat the olive oil over medium-high heat. Add the onion, apples and sage. Sauté until softened. Remove from the heat and gently stir in the bread, egg, butter and salt and pepper. Add the chicken broth gradually until everything is moistened. Let the stuffing mixture cool completely before putting it in the pork loin. Spoon the stuffing down the pork, horizontally, in a line. Roll the pork over the stuffing, jelly roll style, ending with the seam down and fat side up. Lightly score the fat, in a diamond pattern, with a sharp knife. Tightly tie the pork roast up with butcher's twine, season it with more salt and pepper, and transfer to a roasting pan. Roast the pork in a preheated oven for about 90 minutes or until an instant-read thermometer registers 160 degrees F. Remove from the oven and let rest for 15 minutes before slicing. Garnish with apples and fresh herbs.

September 6, 2008

Heirloom Tomatoes: Taste the Freshness

Although the farmers’ market season is winding down you can still get out to your local farm stand and markets and take part in one of the very best parts local food – heirloom tomatoes!

My family has grown heirlooms in our family garden since I was a child, as do I in my own garden. Heirlooms (or heritage tomatoes) are non-hybrid tomatoes. The definition of the use of the word heirloom to describe plants is highly debated, according to Wikipedia. I consider a true heirloom a cultivar that has been nurtured, selected, and handed down from one family member to another for many generations.

There are SO many varieties to choose from when it comes to heirloom tomatoes…endless possibilities. My favorites are Cherokee Purple and Green Zebra.

If you have never had the opportunity to taste the freshness of heirloom tomatoes, I highly suggest you visit your local market before the end of the season and give it a try.

This year at the Missouri State Fair visitors were able to taste 9 varieties of heirloom tomatoes at the Missouri State Fair Farmers’ Market I put together in the Ag Building. Read about the market events and the heirlooms on my Farmers’ Market Blog or check out other photos from the fair market.

Here are some good readings if you are interested in heirloom tomatoes as well. Or maybe you want to buy some heirloom seeds for your garden next season….take a look at Baker Creek Seeds (where I purchase a lot of my garden seed) or Morgan County Seed (both Missouri companies).

Suggested Heirloom Readings:
Smith & Hawken: 100 Heirloom Tomatoes for the American Garden (book)
The Heirloom Tomato Cookbook (book)
Why Grow Heirloom Tomatoes
How to plant heirloom tomatoes

Now for a heirloom tomato recipe that I hope you all enjoy!

Creamy Polenta-Stuffed Heirloom Tomatoes
1 Tbs. butter
1 Tbs. diced shallot
1/2 tsp. minced garlic
3 cups lower-salt chicken broth
1/2 cup heavy cream1 cup polenta (such as Bob's Red Mill brand)
1/2 Tbs. chopped fresh thyme
1/2 tsp. chopped fresh rosemary
1/4 cup plus
2 Tbs. freshly grated Parmigiano Reggiano
Kosher salt and freshly ground black pepper
8 large Roma-style heirloom tomatoes
2 Tbs. chopped parsley

In a medium saucepan over medium heat, melt the butter. Add the shallot and garlic and cook, stirring constantly, about 2 minutes. Add the chicken broth and bring to a boil. Add the cream and then whisk in the polenta. Reduce the heat to a simmer, stirring constantly with a wooden spoon. Add the thyme and rosemary and continue to cook, stirring frequently, until the polenta is tender, creamy, and thick, 15 to 20 minutes. Remove from the heat and whisk in 1/4 cup of the cheese. Season to taste with salt and pepper.


Position a rack in the middle of the oven and heat the oven to 400° F. Line a large rimmed baking sheet with parchment paper. Halve the tomatoes lengthwise and hollow them out. Cut a very thin slice off the bottom of each tomato half so the filled tomato can lie flat without rolling. Arrange the tomatoes on the baking sheet and season them lightly with salt. Fill each tomato half with some of the polenta, mounding just slightly (depending on the size of your tomatoes, you may or may not use all the polenta). Sprinkle the remaining 2 Tbs. of cheese and the parsley over each. Bake until the tomatoes are soft, about 20 minutes. Let cool slightly before serving.

June 27, 2008

Squashing Around

This year has been a tough one for many farmers’ across Missouri. Floods, heavy rain, damaging winds and then more flooding has caused many farmers’ to loose their vegetable crops, meaning their farmers’ market business well also suffer this season.


But there are many folks that have salvaged their gardens or vegetable operations. I attended the recent Fahrmeier Field Day Monday for work and received a bountiful basket of fresh produce from the Fahrmeier family that included, tomatoes, squash, zucchini and raspberries.
My garden is almost ready to provide me with some wonderful squash, but I’ll still have to wait about another two weeks for tomatoes.
Reminder: Get out to your local Missouri Farmers' Market this season and enjoy the wide variety of produce and talking with the producers.

Here’s a new recipe for squash that I know you will all enjoy!

Italian Summer Squash
2 tablespoons freshly squeezed lemon juice
1/2 teaspoon dried oregano leaves
2 cloves garlic, chopped
1/2 teaspoon Dijon mustard
5 tablespoons olive oil
salt and ground black pepper to taste
2-1/2 tablespoons chopped dill (use the feathery portions only)
1/3 cup crumbled feta cheese
3 pattypan squash - trimmed and cut into
1/2 inch thick slices
3 zucchini, trimmed and cut into 3/4" thick slices
3 yellow (crookneck) squash, trimmed and cut into 3/4" thick slices
Combine lemon juice, oregano and garlic in a non-reactive bowl. Whisk in mustard and olive oil. Season with salt and pepper to taste. Stir in the dill and feta cheese; set aside. Cook squash until tender, but not mushy. Carefully transfer squash to a serving plate. Stir dill and feta dressing to recombine, spoon over squash.

June 25, 2008

Back With Many New Recipes from Spain

Yes, I know it’s been a bit since I’ve posted and I do apologize but with being gone for three weeks in Spain put me a little behind in work when I arrived back. Thanks for the emails from some loyal readers, I appreciate the kind notes.

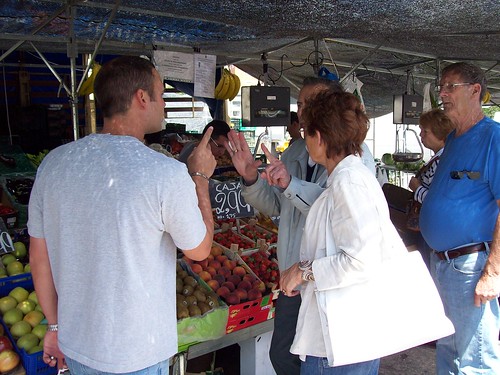
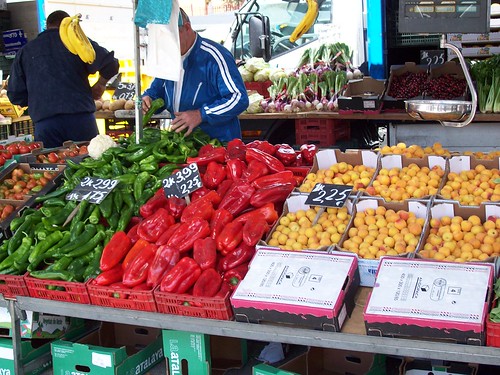
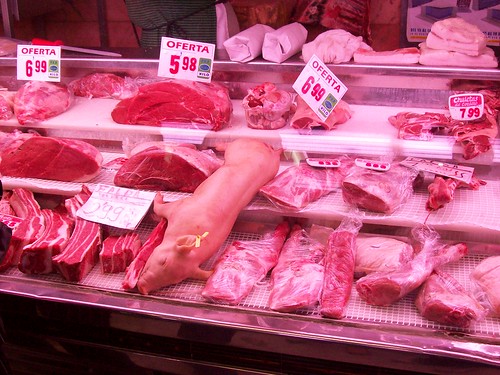
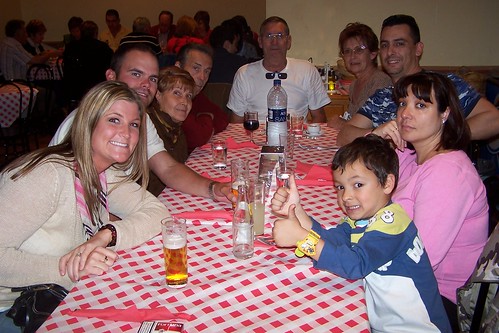
How was Spain? It was a wonderful experience that I will always remember. We walked up mountians, view world famous paintings and buildings, shopped at local farmers' markets for meat, fish and produce. From tours of palaces where I saw walls and ceilings of gold and beautiful paintings, fountains galore, to cathedrals that absolutely amazed me by the treasures that laid inside and not to mention the best part of all- THE TAPAS! View my photos from Spain.


Tapas, you ask? Tapas are snacks, canapés or finger food. Tapas come in many different forms and can vary from town to town! But, what are they?

Tapas can be practically anything from a chunk of tuna, cocktail onion and an olive skewered on a long toothpick to meat with sauce served piping hot in a miniature clay dish or even a plate of olives. They are served day in and day out in every bar and café in Spain. So much a part of the culture and social scene that the Spanish people invented the verb tapear which means to go and eat tapas!

In most regions of Spain one tapa is complimentary with each round of drinks ordered. Tapas keep the Spanish fueled for their long journeys from bar to bar before their mid-day meal and in the evening before dinner. (I think I will start serving tapas when we have friends over more often, you can almost fill up on them.)

We really enjoyed sharing in the culture of the Spanish and with my husband’s family who all live outside and surrounding towns of Madrid. We traveled, we ate (a lot), we met family we had never met and learned so much! It was a wonderful experience that we will always cherish.
Spain also showed me a new appreciation for new tastes to draw upon to create new recipes which I will be sharing. Today, I’ll pull out one of my favorite recipes from Spain that we had with dinner almost everyday – A Spanish Salad. No, salad dressing on Spanish Salads- just olive oil and vinegar.

Lettuce (two kinds if your prefer)
1 tomato, sliced
Spanish Olives
3 green onions (scallions), chopped with tops
A little cracked black pepper

Place on large plate. Drizzle with a good olive oil and some vinegar, don’t use too much though. (I also like to use red wine vinegar.)

Simple recipe that is also good for you. In Spain you sit this salad in the middle of the table and everyone eats from the plate, no salad bowls. It’s kinda fun!

April 23, 2008

Shrimp Tonight

Do you ever wonder where the time goes? I never seem to have enough hours in the day to do everything I want to.

Yesterday, I was off work. I thought the day was going to be rainy and nasty out, but instead the sun came out and it was the perfect day for me to get some more yard work done.

I have a very large vegetable garden, plus a fair-sized herb garden. I start a lot of my herbs early in a starter tray for transplants. Then I buy my tomato and pepper plants from the Cole County Masters Gardeners Plant Sale. Why don’t I grow my own tomato and pepper plants….simple: I am a Master Gardner and I spend about 35 hours between Feb-April in our greenhouse in Jeff City starting seeds, transplanting and caring for plants in our greenhouse, so I really do grow tomato and pepper plants.

Today, I separated out my purple basil, lemon basil and then changed out the dirt in all my containers. Plus, I had my husband pick-up mulch on his way home to mulch all the landscape around the house, which we did when he got home.

I also had to lay plastic all over my herb garden and mulch it as well. (Yes, I’m getting lazy…the plastic will now make it so I don’t have to worry about weeding it.)

Somewhere in the middle of all of this I whipped up an old stand-by recipe for dinner tonight:

Shrimp Scampi & Lemon Spaghetti

by Lane
Salt
1 pound spaghetti
4 T. butter
4 cloves garlic, finely chopped or just use garlic powder
1/2 teaspoon crushed red pepper flakes
2 lemons, juiced and zested or 4 T. lemon juice
3/4 cup heavy cream
1 cup grated Parmigianino Reggiano
Parsley and basil flakes, ½ tsp of each

Bring your pasta to a boil and be sure to salt it. Cook according to directions.

In another pot melt butter, garlic and red pepper flakes. After the pasta has boil for about 8 minutes add a cup of the water from the pasta water to the butter mixture. Add cream and lemon juice and season with all seasonings (to suit your own taste). Remove from heat and add cheese and toss mixture with the drained pasta. Let the pasta and sauce sit, tossing occasionally.

While sauce is setting….cook your shrimp.

Shrimp Scampi
1 pound raw shrimp, shells and tails removed
1 T. parsley
1 tsp. salt
1 tsp. garlic powder
3 T. butter
1 red bell pepper, thinly sliced
1 yellow bell pepper, thinly sliced

Heat large skillet and belt the butter. Add shrimp, peppers and season with seasonings. Cook and toss shrimp around to coat with butter. Cook until shrimp are pink. DO NOT OVERCOOK SHRIMP.

Remove and drain excess butter from shrimp.Give pasta one more last toss and plate some and top it with some shrimp.Serve with crusty French bread and salad. Makes great leftovers! and salad. Makes great leftovers!

April 22, 2008

Portobello Chicken and Chives

Visiting the farmers’ markets is one of my favorite ways to get the very best local produce around, plus that opportunity to visit with the producer about their operation and family farm is a great learning experience.

I shopped at the Columbia Farmers’ Market last weekend and picked-up a few items to make a great meal the other night. This Portobello Chicken and Chives recipe is perfect for a Saturday night in with my husband. Fresh garlic, mushrooms and chives from my herb garden made this bursting with flavor.

This recipe comes from the Kansas City Farmers’ Market cookbook, “In-Season, Cooking Fresh from the Kansas City Farmers’ Market.” This is a great cookbook and makes a great addition to your cookbook collection.


Portobello Chicken and Chives
From the In-Season, Cooking Fresh From the Kansas City Farmers’ Market


4 boneless chicken breasts
1 cup dry white wine
1/3 cup extra virgin olive oil
4 cloves of garlic
1 tsp. kosher salt
½ tsp. cracked pepper
6 oz. baby Portobello mushrooms
1 small bunch of chives
½ cup chicken stock
½ cup cream

Pound chicken breast to about ½ inch thick and marinate in the wine for at least 4 hours ( do it overnight).

In a large skillet heat olive oil. Mince garlic and add to the oil along with the salt and pepper. Remove the chicken from marinade. Saute chicken in the oil for about 5 minutes on each side.

Slice mushrooms thinly and add to the skillet. Cut chives thinly and add chives and stock to the skillet. Cover and simmer for 10-15 minutes or until the chicken is done.

Add cream and cook uncovered for another 5 minutes to thicken the sauce.

Serves 4. Suggested wine: Pinot Noir