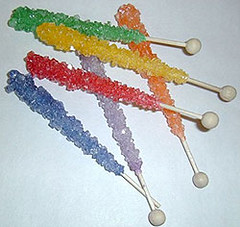
I’ve got something really special for you all today. It’s a little project you can do over the weekend with your kids.
When I was little my parents introduced me to so many neat projects like making stalactites and stalagmites, cooking, knot tying, paper mache, preserving leaves….you get the idea.
We usually did these types of fun activities during the winter months. I am sure many of you with children are having a hard time finding activities for the kids to do inside the house, besides watching tv.

My mother and I used to have so much fun making rock candy in her kitchen. As a kid I thought it was the coolest thing that my mother knew the exact ingredients to make the candy.
Now you and your children can have some fun this weekend making your own rock candy!
Rock Candy Recipe
1 Glass jar or drinking glass
1 Piece of cotton string
1 Pencil or stick
1 Paper clip
1 Food coloring (optional)
1 c Water
2 c Sugar
Additional sugar
Tie a short piece of cotton string to the middle of the pencil or stick. Attach a paper clip to the end of the string for a weight.
Moisten the string very lightly, and roll in a bit of sugar (this will "attract" the sugar crystals from the syrup to the string). Place the pencil or stick over the top of the glass or jar with the string hanging down inside.
Heat the water to boiling, and dissolve the 2 cups of sugar into it. For the biggest crystals, heat the sugar-water solution a second time, and dissolve as much additional sugar as you can into it. Add a few drops of food coloring to the solution if you want colored candy.
Pour the solution into the prepared glass or jar and leave undisturbed for a couple of days. Depending on how much sugar you were able to dissolve into the water, you should start to see crystals growing in a few hours to a few days.


1 comment:
I will definitely be passing this along to some of our friends! Their kids will love it!
Post a Comment